Reassembling the Battery Charger and Conditioner
242 Re
airin
the Instrument
Step 8 Remove the right-hand cooling fan.
Note: When reconnecting the two-pin plug, ensure that the red wire faces the heat
sink.
Removing the Air Filters
The air filters are located on the left and right side of the device.
Step 1 Open the housing (see “Opening the Housing” on page 239).
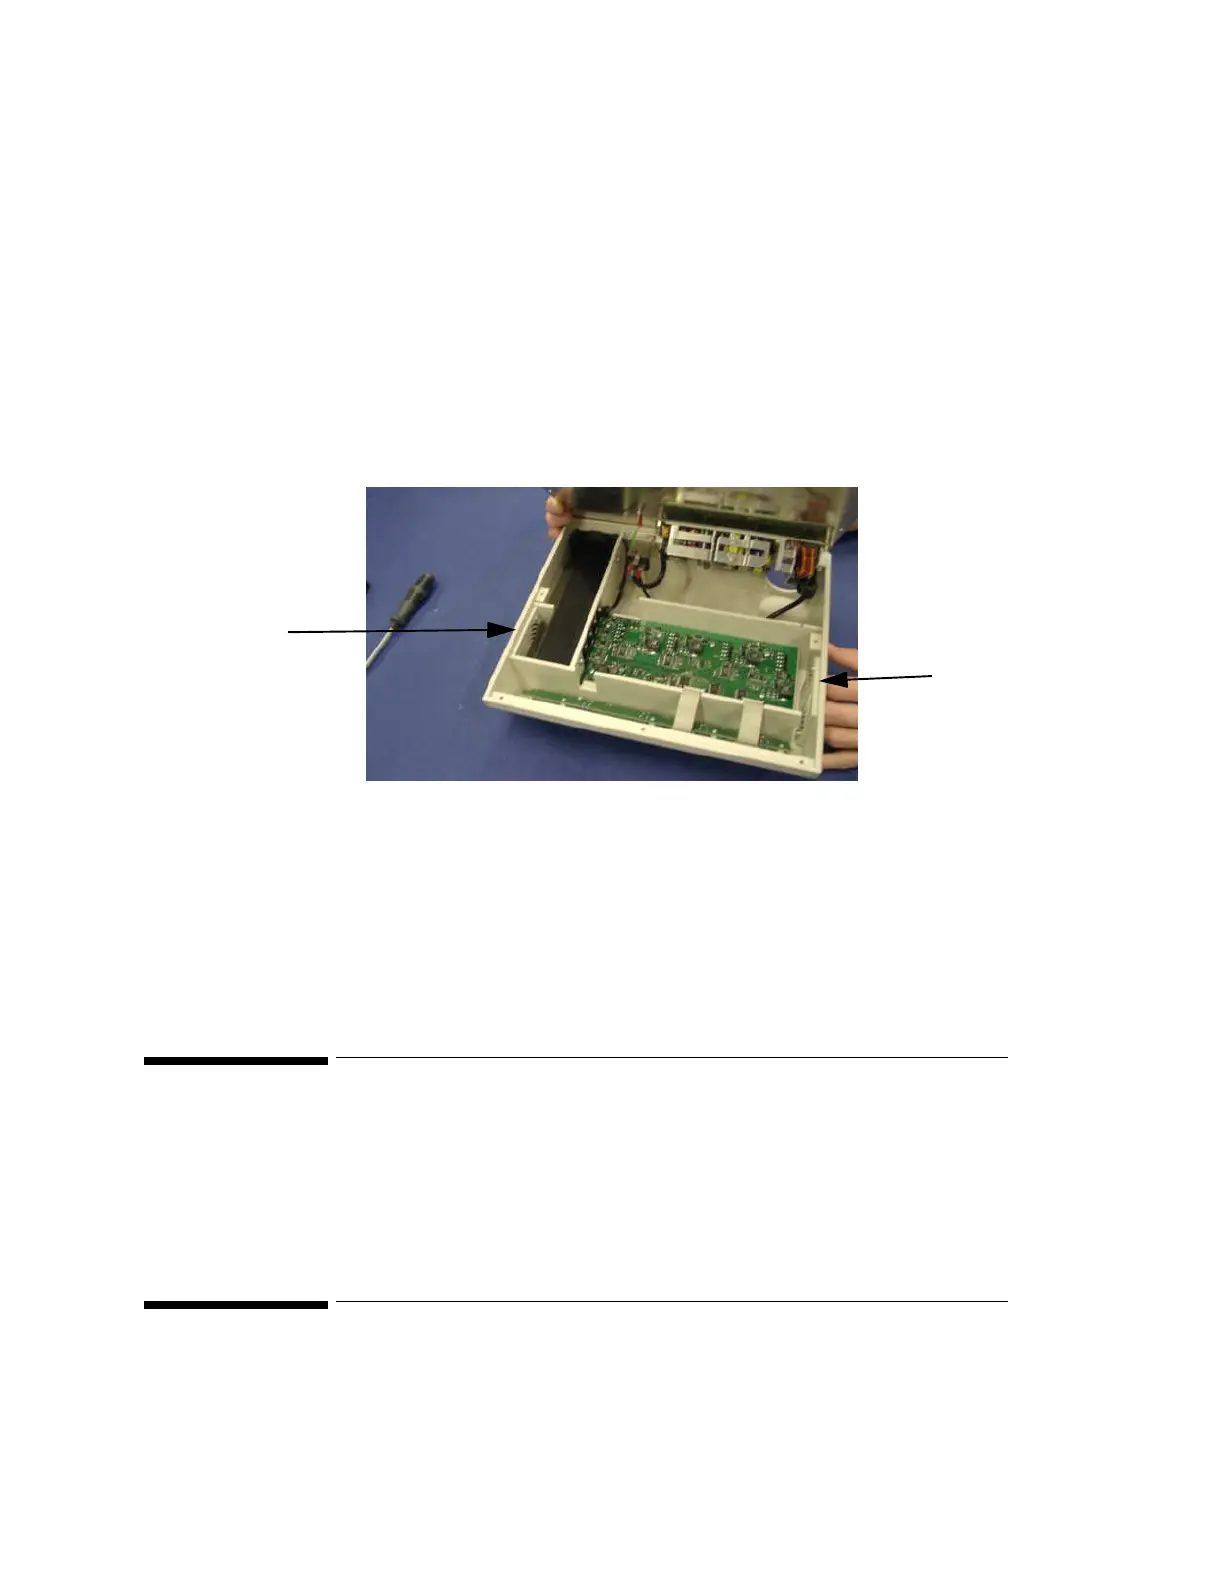
Step 2 Remove the plug from the five-pin connector on the circuit board. This allows
better access to the inside of the charger.
Step 3 Remove the two screws holding the air filter.
Step 4 Remove the air filter cover.
Step 5 Remove the filter mat and clean the dust out, or exchange the filter mat if required.
Step 6 Insert the mat and re-fit the cover and screws.
Reassembling the Battery Charger and Conditioner
Reassembly is the reverse of the disassembly procedure.
Following Reassembly
Once you have reassembled the Instrument, you must perform a safety and performance
check on the Instrument. Refer to "Maintaining the Instrument" and "Testing the Instrument".
Air Filter
Air Filter