NOTE
The function is available for programs that have been activated in menu
2300 Licences.
To permanently adjust preset exposure values:
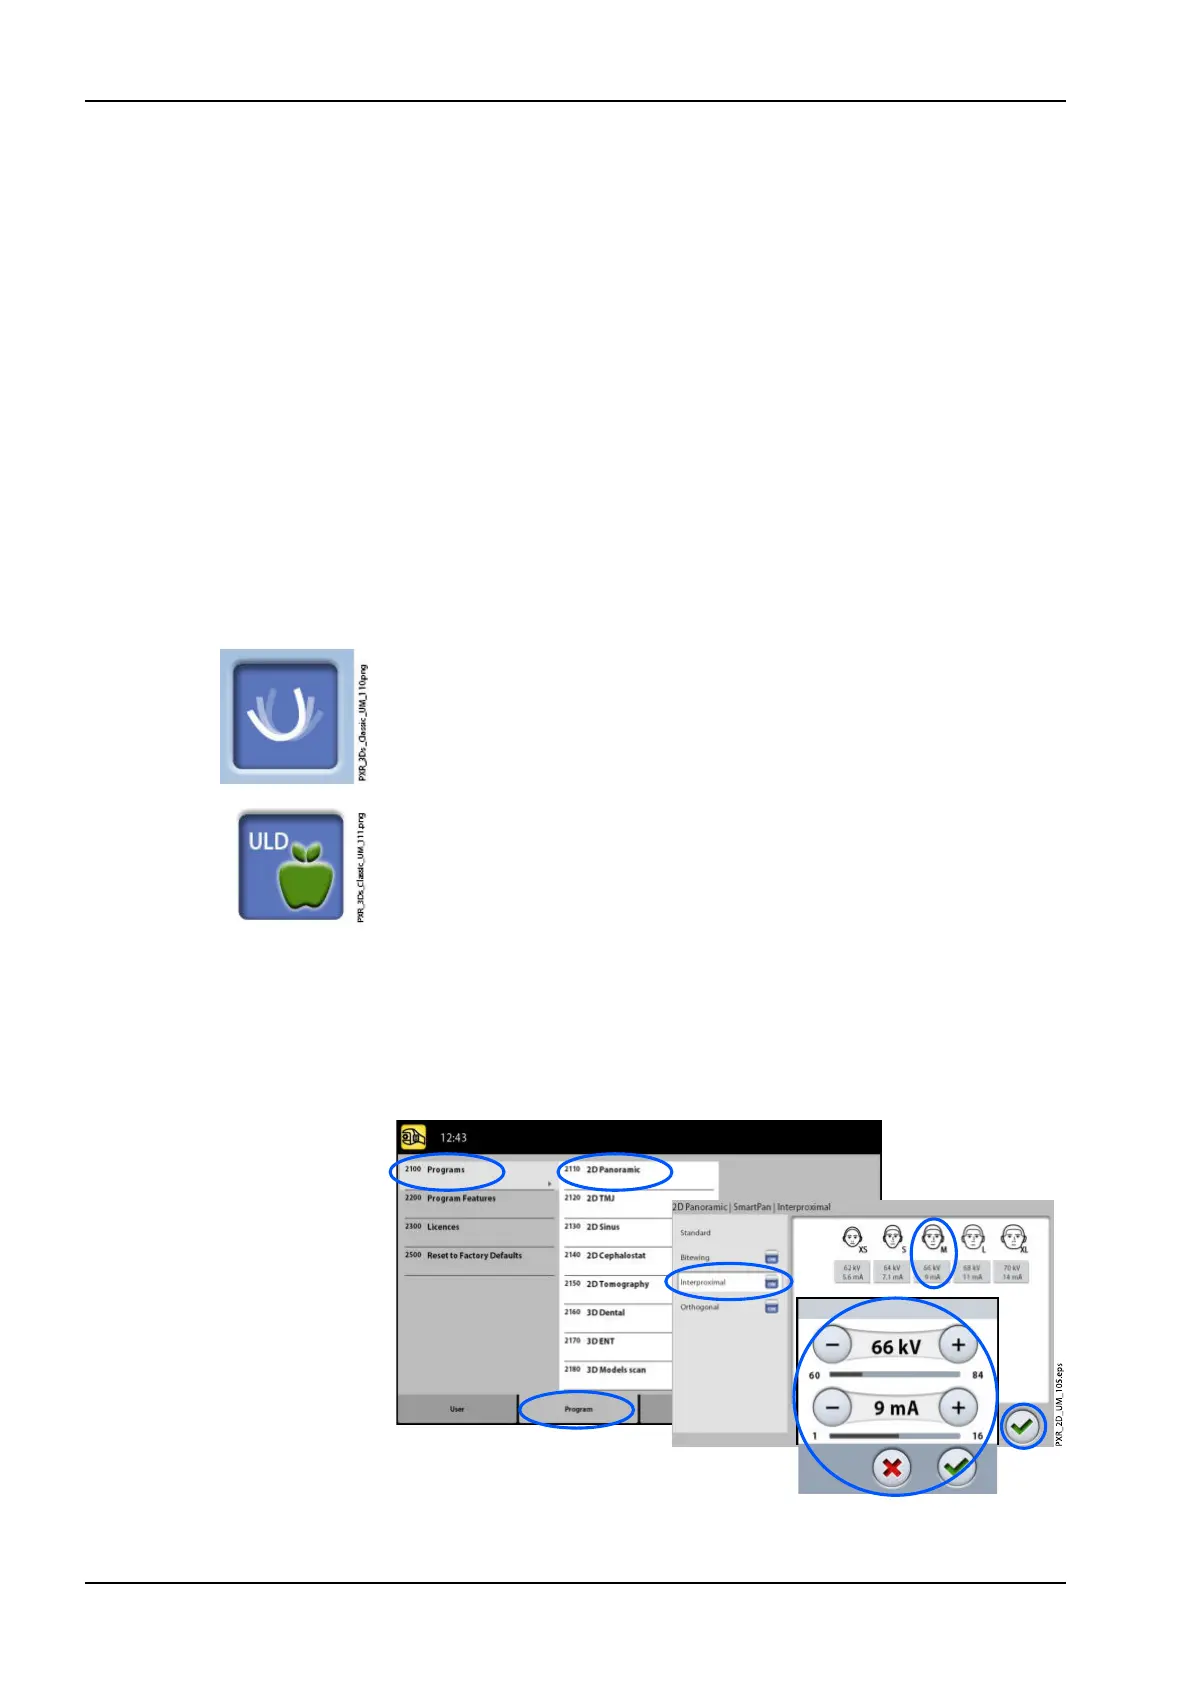
1. Select Program > 2100 Programs.
2. Select a program group (e.g. 2110 2D Panoramic).
3. Select a program type (e.g. Interproximal).
4. Select the exposure values you wish to adjust (e.g. 66 kV / 9 mA for
patient size M).
• For 2D tomographic programs:
In combined programs (cross-sectional + longitudinal) only the cross-
sectional exposure values can be adjusted.
• For 3D X-ray units:
If you use both sensors (Dimax and 3D) for taking 2D exposures,
make sure that the panoramic system in menu 1340 is set to the
option (Dimax or SmartPan) you wish to adjust.
• For 3D X-ray units:
In 2D panoramic programs with a 3D sensor (2D Panoramic /
SmartPan /) select also the MultiView button if you wish to adjust the
presets for the MultiView imaging mode.
•
For 3D X-ray units:
In 3D programs the exposure values are given separately for each
image resolution. The image resolutions that are not available are
shown with faded buttons. Select also the ULD (Ultra Low Dose)
button if you wish to adjust the presets for the ULD function.
5. Use the minus or plus buttons to set the exposure values you wish to
use.
6. Select the green check mark button.
7. Repeat for another program type, patient size or image resolution (3D) if
needed.
8. Select the green check mark button.
9 Settings
94 Planmeca ProMax User's manual