SECTION 12: BRAKE AND AIR SYSTEM
22
PA1621 Maintenance Manual All Series | January 2017
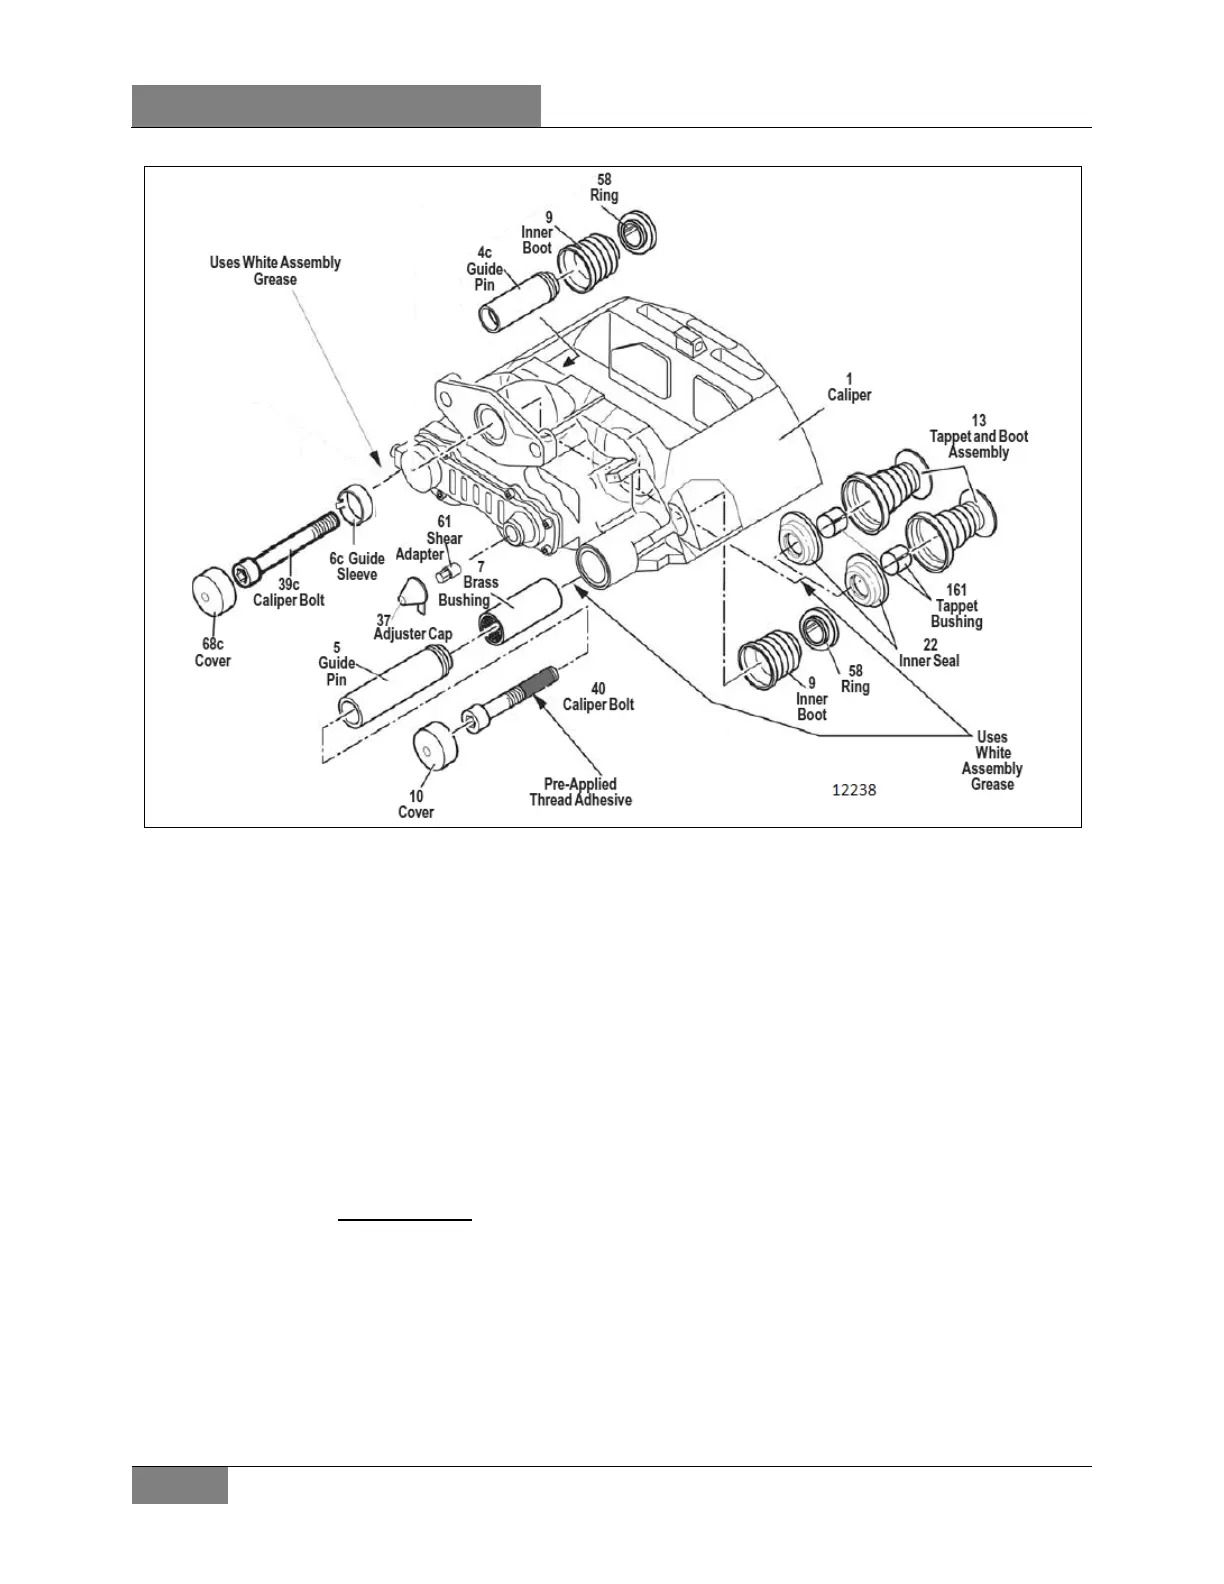
FIGURE 22: BRAKE COMPONENTS
27.2 PAD REPLACEMENT - ADJUSTER
Brake pad replacement procedure has slightly
changed with the introduction of the new N2G
slack adjuster on the vehicles.
After fitting new pads,
1. Turn the adjuster (thru shear adapter)
clockwise until the pads come into
contact with the disc.
2. Then turn back the adjuster counter-
clockwise three “clicks” and check
the caliper running clearance.
During the turning of the adjuster, you will
notice a changed clicking noise. It is not
caused by a defect of the mechanism.
Also the “feel” during the rotation of the
adjuster and the position of the spanner
after the 3 clicks has changed.
Depending on the age of the vehicle, it may
have installed on it two different design levels of
disc brake and so there may be 2 different
clicking noises and final positions of the adjuster
on the vehicle.
The full wording of the processes is included in
the latest Knorr-Bremse service manual.
Refer to Knorr-Bremse Pneumatic Disc Brake
Y006471 Service Manual.
27.3 CHECKING DISC BRAKE PADS
Brake pads have to be checked on a regular
basis depending on the vehicle operation. The
remaining thickness of the pads should never be
less than 0.079 in (2 mm). When replacing
brake pads, all four pads on an axle have to be
changed at the same time. There is no inner or
outer pad, since all pads are the same. Once
removed, worn pads should be replaced in their
original position.
 Loading...