SECTION 13: WHEELS, HUBS AND TIRES
8
PA1621 Maintenance Manual All Series | January 2017
CAUTION
Wheel studs and nuts must be kept free from
grease and oil. No lubricant whatsoever
should be used. Cleanliness of the wheel and
its rotor mating surfaces is important for
proper wheel mounting.
It is recommended to add some rust protection
lubricant on the outside diameter of the hub (to
facilitate future removal).
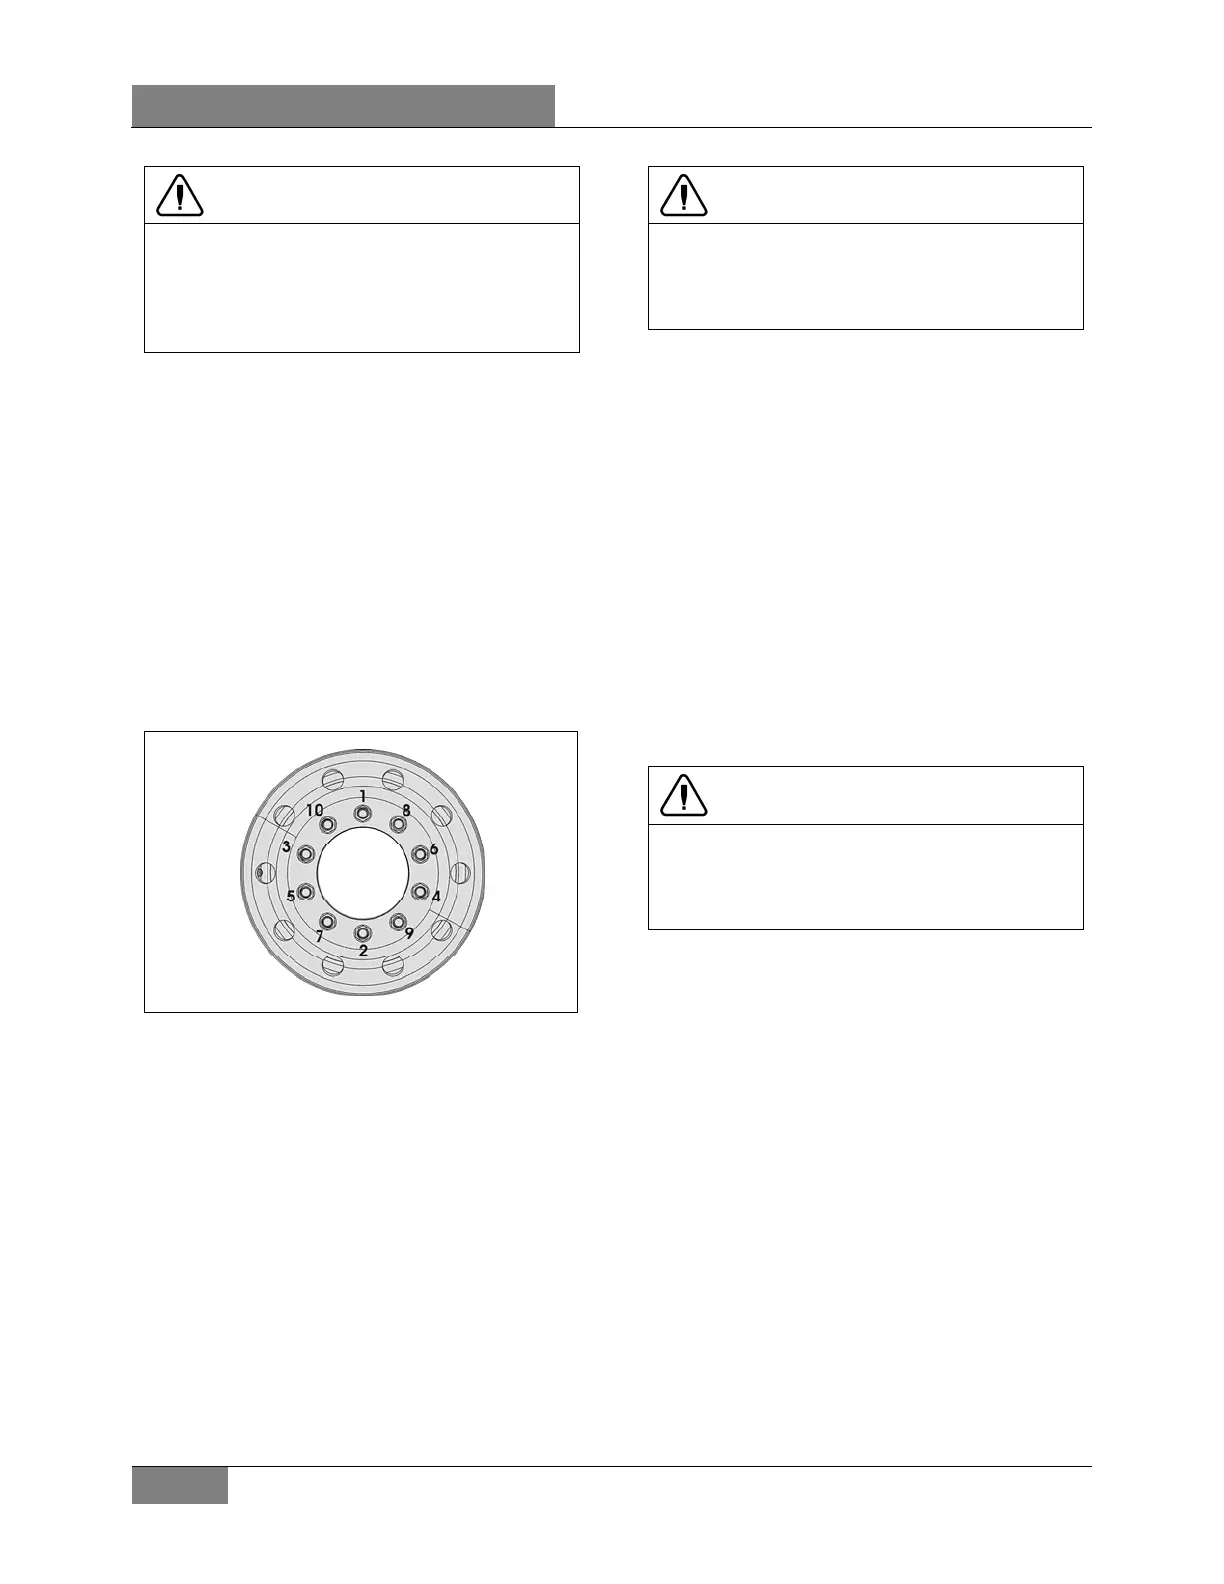
It is also important that wheel stud nuts be
tightened alternately on opposite sides of the
wheel. Refer to Figure 3 for the suggested
tightening sequence.
3.1 INSPECTION
Tighten stud nuts progressively as shown in
Figure 3. The final tightening should be done
with a torque wrench.
TORQUE (aluminum & steel wheels):
450-500 lb-ft (610-678 Nm)
FIGURE 3: TIGHTENING SEQUENCE 13018
3.2 SINGLE WHEEL REMOVAL
1. Stop engine and apply parking brake.
2. Loosen wheel nuts about one turn (do not
remove the nuts). This is not necessary if
equipped with hydraulic powered gun.
3. Raise the vehicle by its jacking points on the
body. See Section 18, "Body", under heading
"Vehicle Jacking Points";
4. Unscrew wheel hex stud nuts and remove
the wheel;
CAUTION
Always mark position of the wheel on the axle
prior to removal in order to replace wheel at
the same location, thus avoiding a new wheel
balancing.
3.3 SINGLE WHEEL INSTALLATION
1. Mount the wheel over studs, being careful
not to damage stud threads;
2. Screw in the hex stud nuts (refer to Figure 3
for sequence) so that wheel will position itself
concentrically with hub. This is important,
otherwise wheel may be eccentric with hub
and will not run straight. In this initial step,
slightly tighten the nuts to correctly position
the wheel;
3. Tighten stud nuts progressively as shown in
Figure 3. The final tightening should be done
with a torque wrench.
TORQUE (aluminum & steel wheels):
450-500 lb-ft (610-678 Nm)
CAUTION
Insufficient mounting-torque can result in
damage to parts. Excessive mounting torque
can cause studs to break and the wheel to
crack in stud hole area.
4. DUAL WHEELS
4.1 OUTER WHEEL REMOVAL
Same as described in "Single Wheel Removal"
procedure described previously.
4.2 INNER WHEEL REMOVAL
1. Remove outer wheel;
2. Remove inner wheel.
4.3 INNER WHEEL INSTALLATION
Mount the wheel over studs, being careful not to
damage stud threads;
4.4 OUTER WHEEL INSTALLATION
With inner and outer wheels installed, tighten
the stud nuts progressively as shown in Figure
3. The final tightening should be done with a
torque wrench.
 Loading...