SECTION 18a: H3 SERIES BODY
34 PA1621 Maintenance Manual All Series | January 2017
WARNING
Wear rubber gloves and do not smoke when
cleaning.
5. Peel of protective paper from the seal.
Position the seal in order to leave ¼" (6 mm)
from the upper molded edge of the door and
3/16" (4,5 mm) from the sides and lower
molded edges of the door.
6. Progress slowly all around the door.
7. Cut the seal and glue both ends with
LOCTITE 414 glue.
8. To assure bonding, press a small roller on
top of the new seal.
11.7 DOOR LUBRICATION
Part Lubricant Frequency
Latches
Upper door
catch
Low
temperature
grease
Every six months
Door locking
mechanism
White grease Every six months
Key hole
Hinges
Low viscosity
oil
Every six months
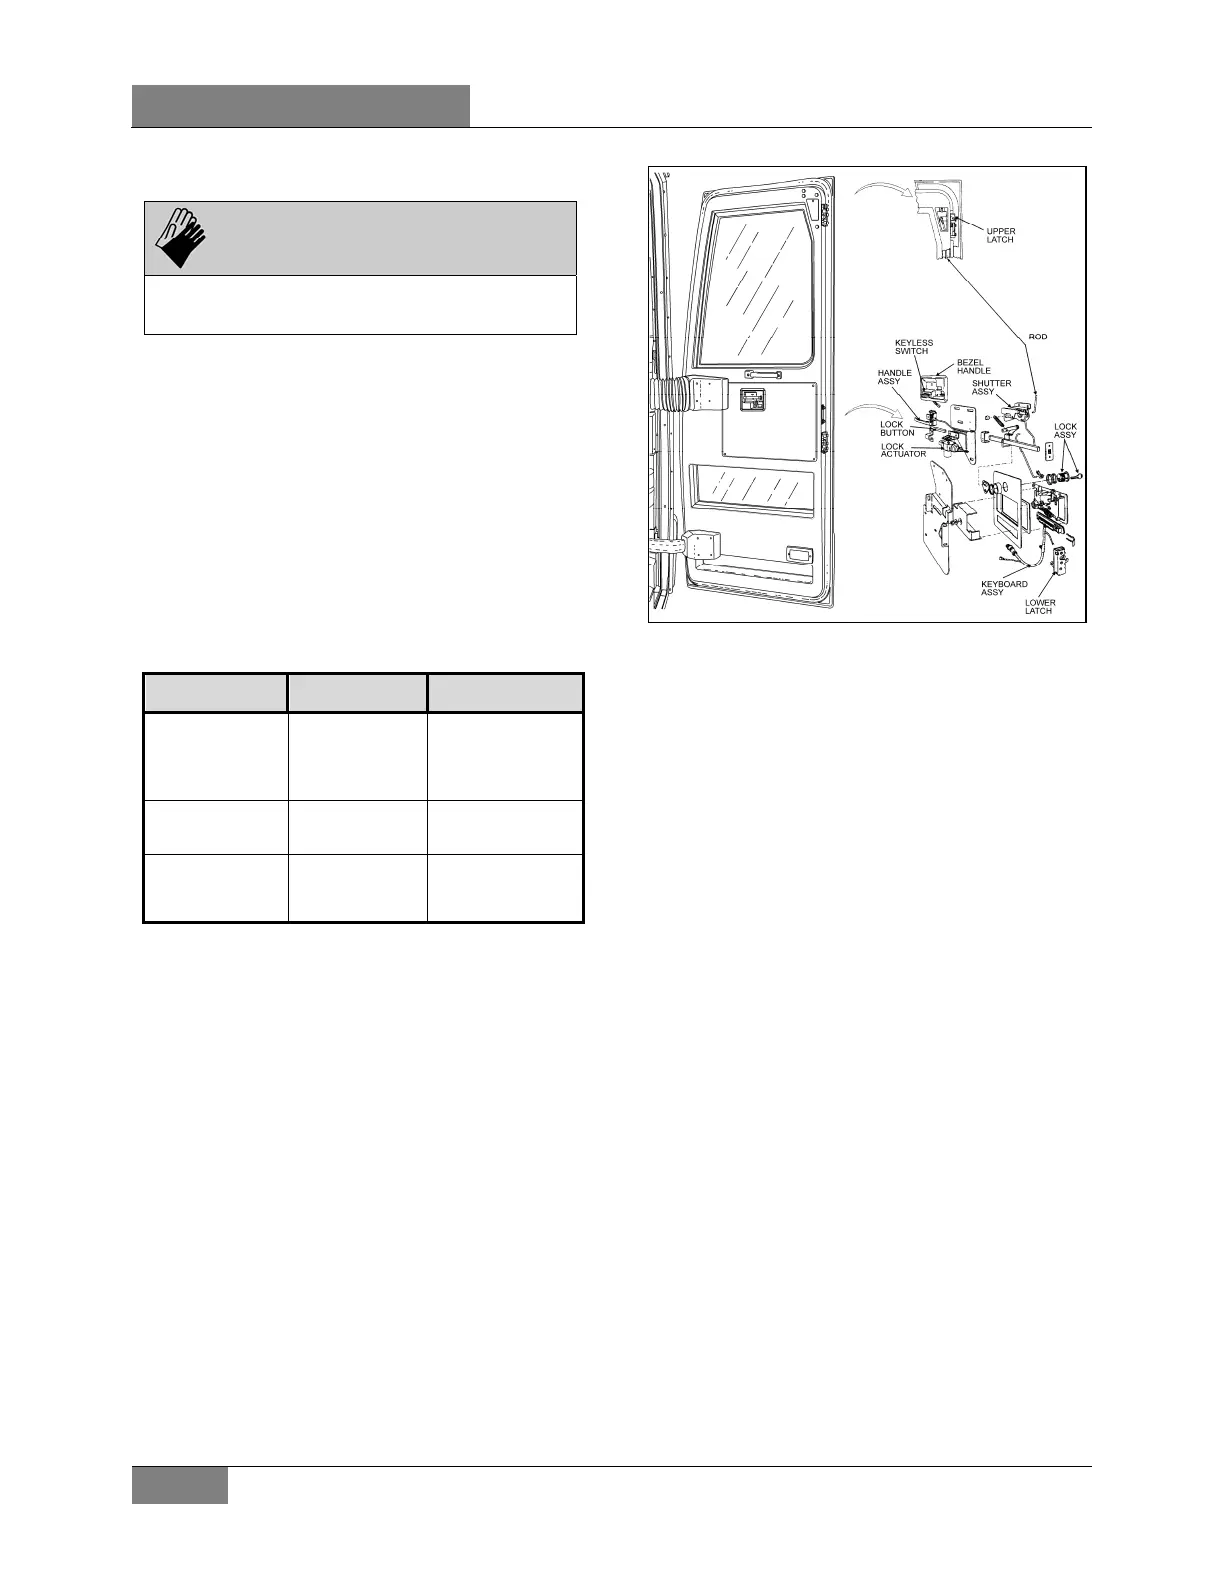
11.8 DOOR LATCH MECHANISM
Generally, when the latch mechanism
malfunctions, a number of causes may be
responsible for this situation. No single
procedure will correct this situation. It is best to
remove the protective cover and to look for
binding, used or bent parts. Operate the latch
mechanism and try to find where any binding
occurs. Replacing a part or slightly bending a
rod should be enough. Remember, having a
global understanding of the mechanical activity
will generally lead you to the cause of the
problem, and ultimately to an easy repair.
FIGURE 30: ENTRANCE DOOR (VIP, TYPICAL) 18440
12. DRIVER’S POWER WINDOW
To replace window or motor, the whole
assembly must be removed. The following
instructions refer to Figure 31.
12.1 POWER WINDOW REMOVAL
1. Raise the driver's power window.
2. Set the battery master switch to the OFF
position.
3. The window must be held in upper position.
To do so, use duct tape to hold it in place.
4. Gain access to the power window
mechanism. Dismount the driver's area
lateral control panel and left interior trim. It
may be required to remove the driver's seat
and dashboard panel.
5. Unfasten bolts (item 1) fixing the window to
the lifting mechanism (actuator).
6. Remove the three bolts (item 2) holding the
motor support and actuator assembly in
place.
7. Detach the plastic water protection shield
and remove the assembly by slipping it
under the vehicle structural members.
8. Dismount the window support and lower the
window completely to release it from its
guides.
 Loading...