SECTION 14: STEERING
PA1621 Maintenance Manual All Series | January 2017
25
2. Use an appropriate inspection tool (e.g.
spatula with cut out) to push up (sealing
boot) or down (dirt seal) the seal (without
damaging it) until ball pin surface is visible.
Degrease the ball pin surface and inspect
carefully.
3. If there is corrosion of the ball pin or the
sealing boot has deteriorated through
ageing or is damaged, replace the ball joint.
4. If there is corrosion of the steering arm or tie
rod arm area which is in contact with the
sealing boot or dirt seal, clean and eliminate
all surface irregularities.
5. If there is no corrosion or damage to the
sealing boot or dirt seal, smear the steering
arm and tie rod arm with Lithium grease and
push seal back into its properly seated
position.
When dismantling tie rod or drag link, ensure
that no damage is caused to the sealing boots,
dirt seals or ball joint housings.
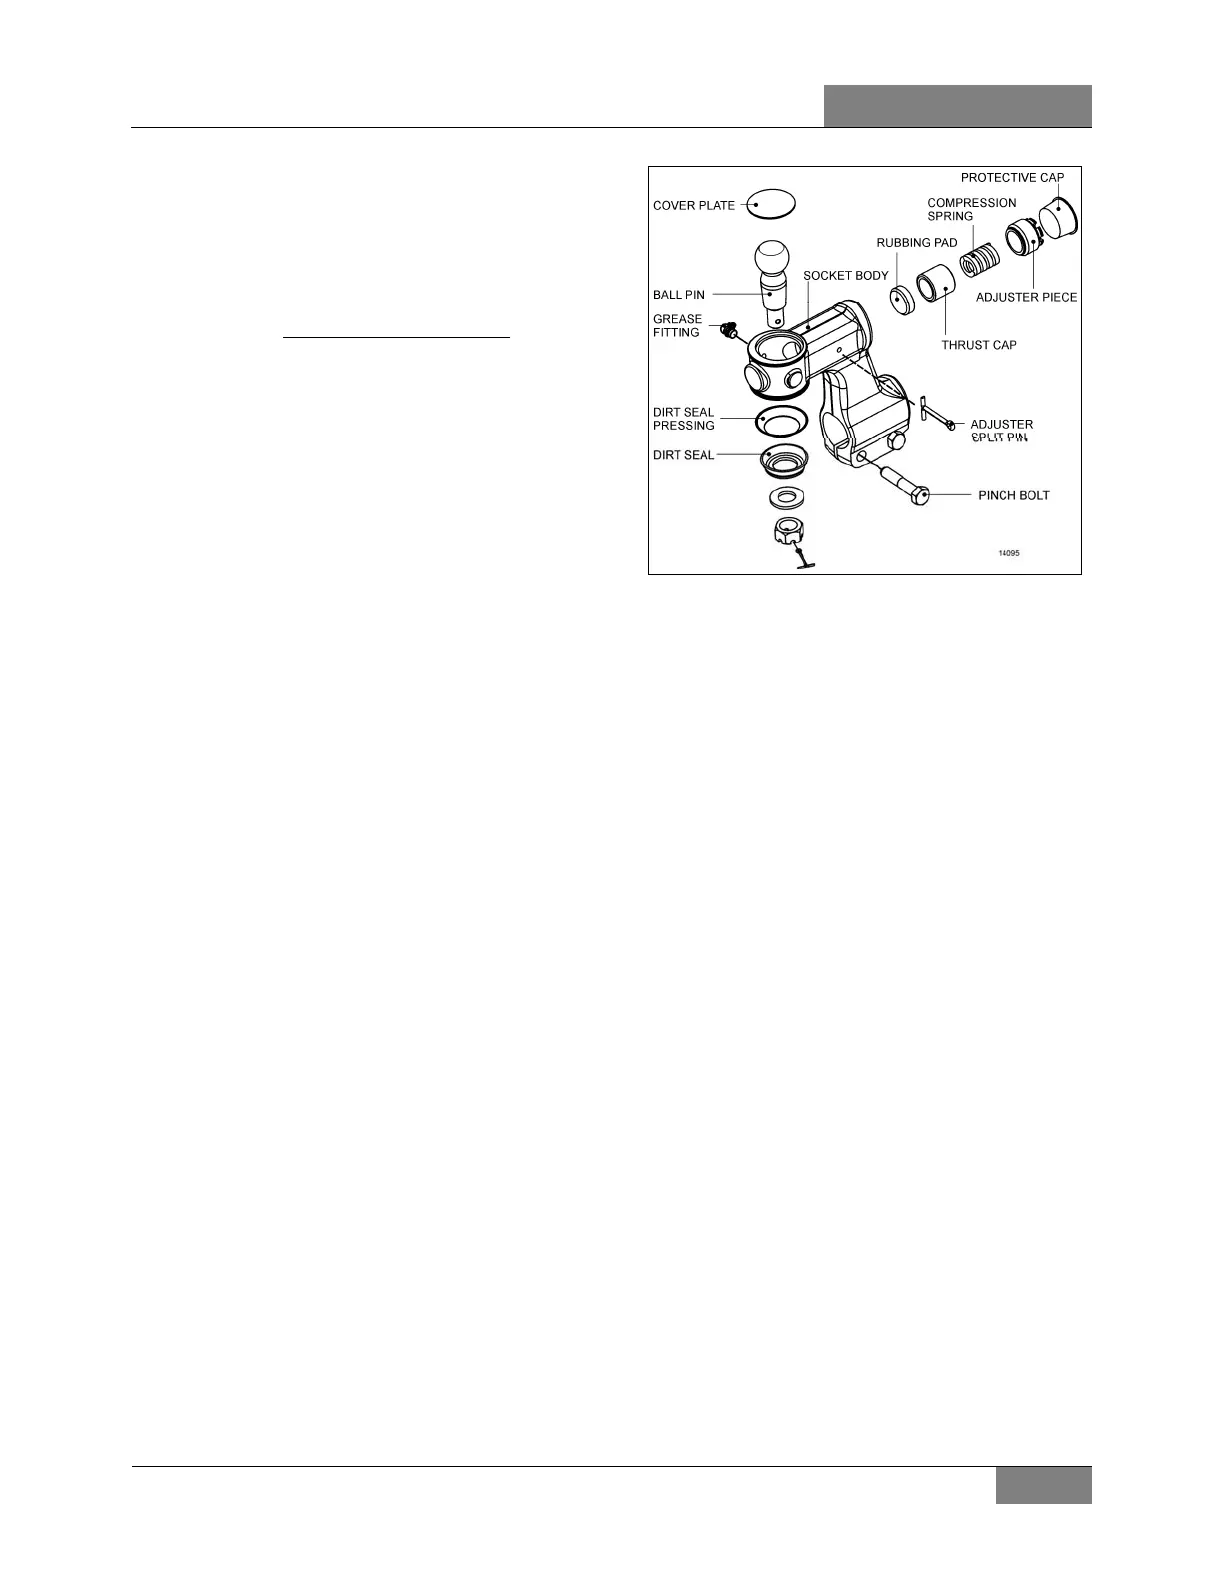
13.9 DROP TYPE BALL JOINT
13.9.1 Drop Type Ball Joint End Play
If end play (direction of the ball pin axis)
exceeds 0.047” (1.2 mm), readjustment is
necessary.
Remove protective cap, using a suitable tool i.e.:
a 1” x 1/8” x 9” long flat bar, tighten adjuster
piece fully home (SOLID) locating thrust cup
onto ball pin.
Still with tool located on adjuster piece, back off
carefully (LEAST AMOUNT) until adjuster piece
cotter pin is allowed to pass through body, then
remove tool.
Reinstall protective cap.
FIGURE 30: DROP TYPE BALL JOINT FOUND ON TIE
ROD (2X)
13.9.2 Dismantling Drop Type Ball Joint
1. Remove dirt seal and dirt seal pressing from
ball pin.
2. Slacken pinch bolt nut then unscrew and
remove ball joint assembly from tie rod
having first marked ball joint body and tie rod
to enable tracking on re-assembly.
3. Remove adjuster split pin from ball joint
body.
4. Remove cap then using a suitable tool i.e.: a
piece or 1”x1/8”x 9” flat bar, unscrew and
remove adjuster piece. Waggle ball pin to
free thrust cap.
5. Remove compression spring and thrust cap
from ball joint body.
6. Relieve peening on socket body top then
using a hide faced mallet, tap ball pin out of
body. This operation will also remove cover
plate from body.
7. The rubbing pad can now be removed from
body.
Thoroughly clean all parts and check for
wear, renewing where necessary.
13.9.3 Assembling Drop Type Ball Joint
1. Apply a bead of Loctite 638 sealant to
mating corner of rubbing pad in socket body
then knock rubbing pad into its recess in ball
joint body.
 Loading...