PowerMeasuringModule PMM
35,0(
84
Revision 13 EN - 02/2023
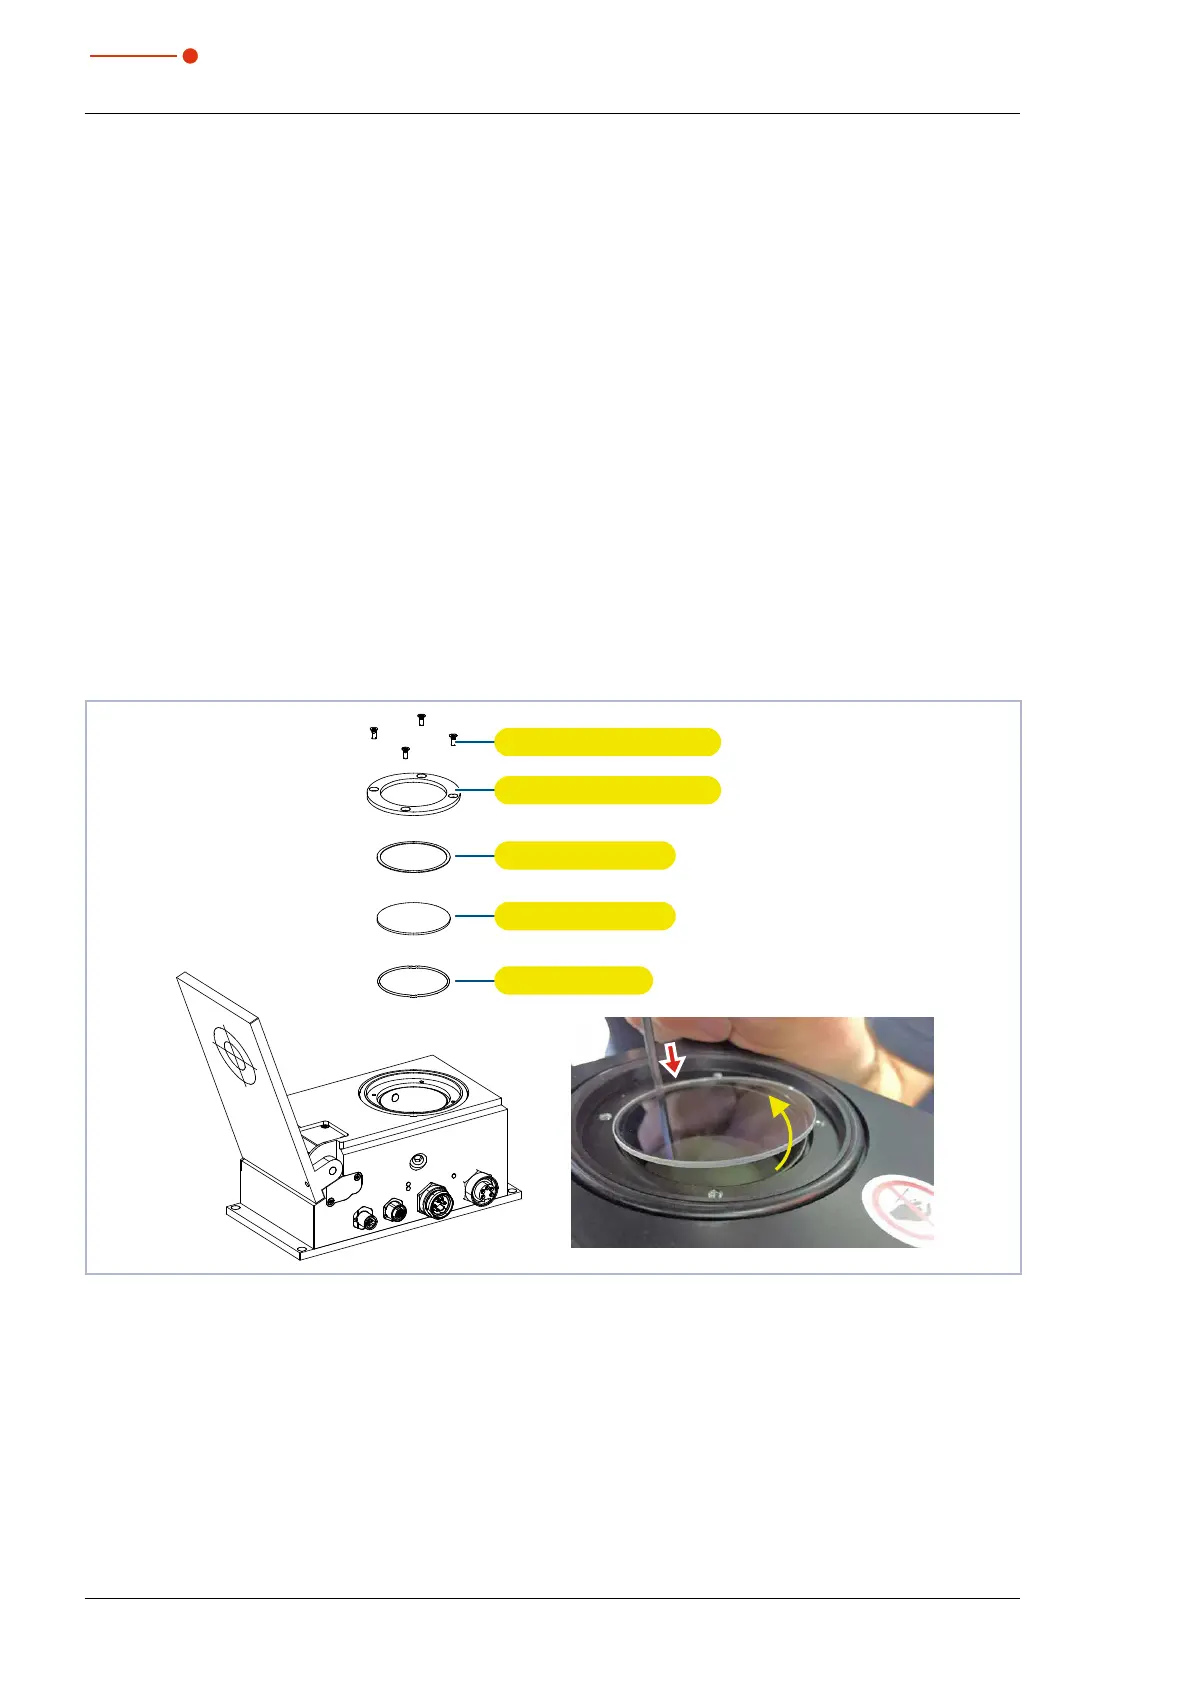
15.3.2 Exchanging the protective window of the PMM
1. Observe the warning messages in chapter 15.3.1 on page83.
2. Switch off the laser source.
3. Ensure that moving parts, e.g. robot arms, etc. are at a standstill and that they cannot be set in motion
unintentionally.
4. Let the device cool down for an adequate period of time.
5. Open the shutter.
6. Put on suitable gloves.
7. Unscrew the four screws (Torx TX 10) on the protective window mount.
Hexagon AF 2.0 for older versions.
8. Carefully remove the protective window mount upwards.
9. Press down the edge of the protective window with a blunt object, grasp it by the circumference and lift
it out.
If the O-ring sticks to the protective window, remove it and reinsert it into the inlet aperture.
10. Check the cleaned or a new protective window for contamination.
11. Insert the new protective window into the device.
12. Place the teflon disc on the protective window.
13. Tighten the protective window mount evenly with four screws.
14. Check that the protective window mount is securely seated.
The protective window mount must rest flat against the device.
15. Close the shutter.
Protective window mount
Teflon disk
Protective window
O-ring
Four screws M3 x 6 mm
Fig. 15.1: Exchanging the protective window of the PMM