PowerMeasuringModule PMM
35,0(6
63
Revision 13 EN - 02/2023
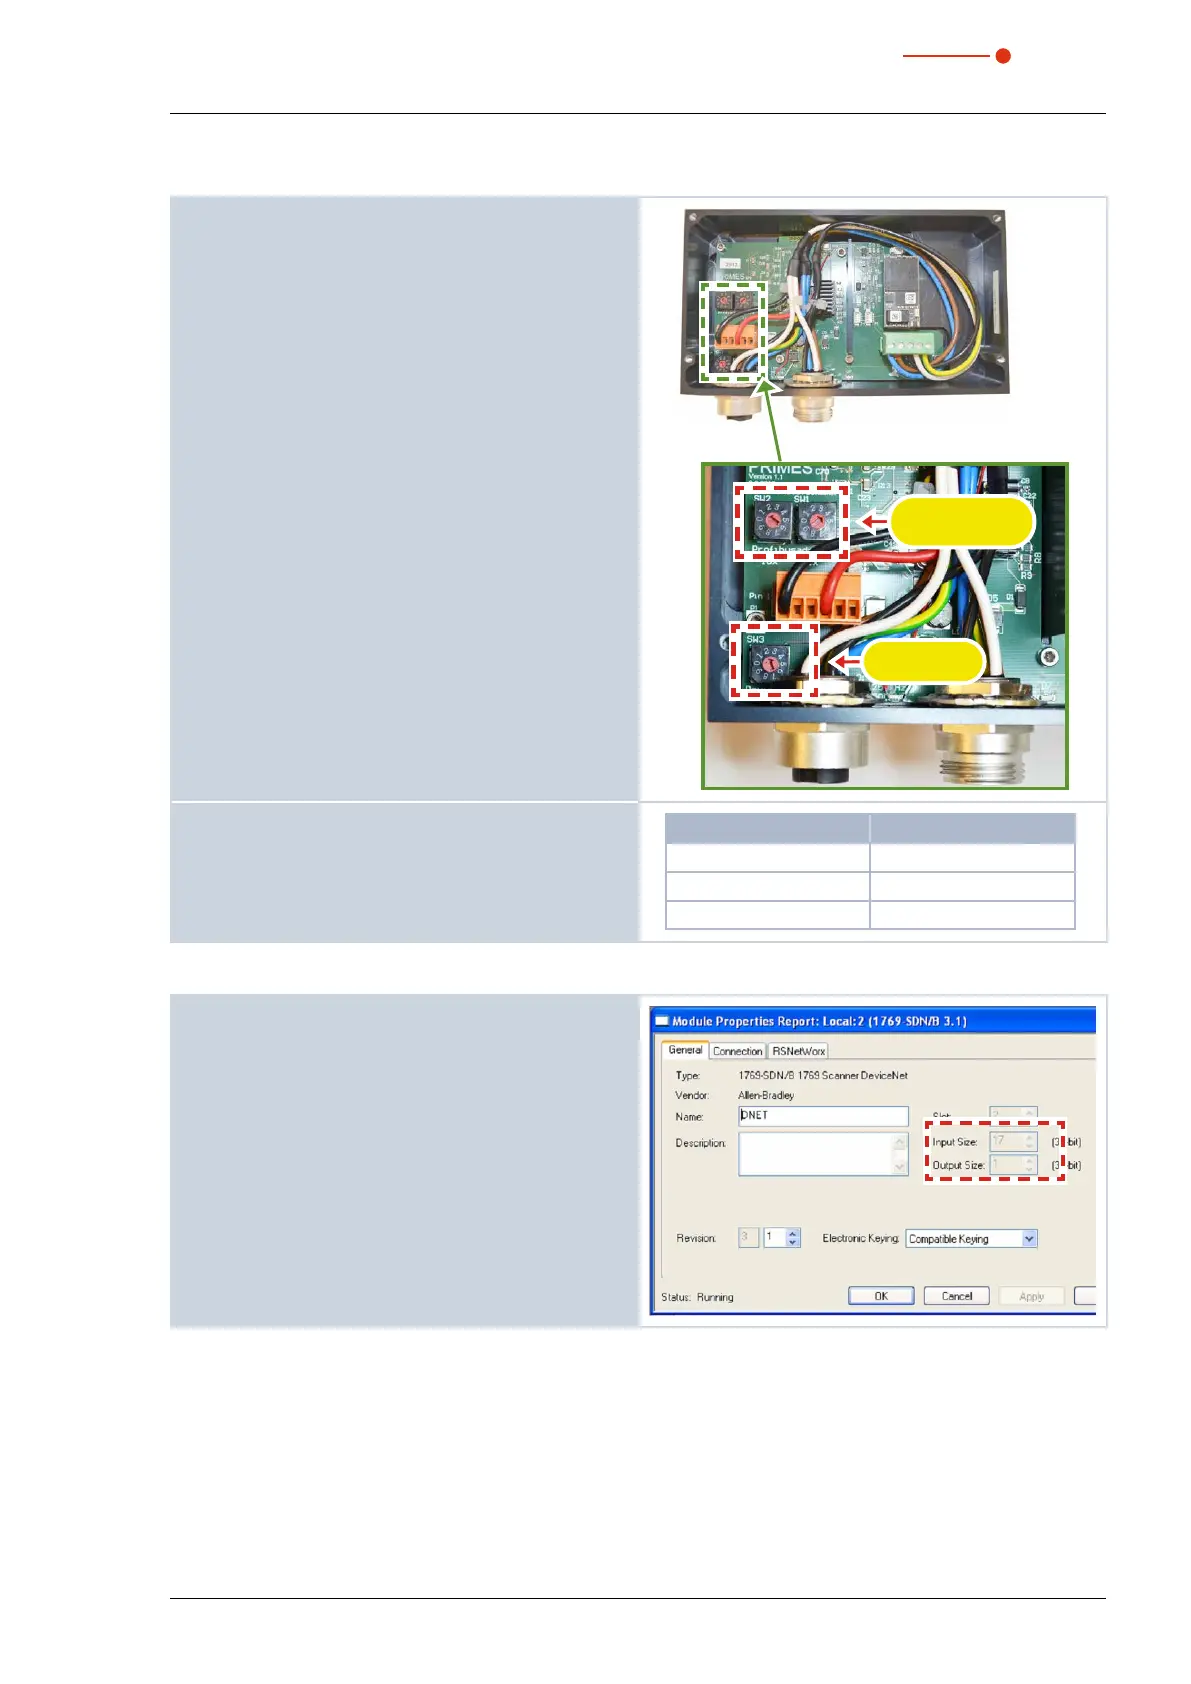
13.3.1 Setting the DeviceNet™ address and the baud rate
1. Remove the base plate of the device (four hexagon
socket screws a. f. 2.5 mm).
2. Set the desired bus address by means of the rotary
switches SW2 and SW1. The arrow head of the
rotary switch has to point to the respective figure.
The address consists of two digits. Use switch SW2 to
set the first digit (tens), and switch SW1 to set the sec-
ond digit (units).
Example
The bus address is supposed to be 14.
Setting switch SW2=1
Setting switch SW1=4
Baud rate
SW3
Bus adress
SW2 and SW1
3. Set the desired baud rate by means of the rotary
switch SW3 (factory settings 2≙500kHz).
4. Mount the base plate of the device again.
Switch position SW3 Baud rate in kHz
0 125
1 250
2 500
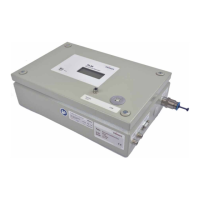
13.3.2 Integrating DeviceNet™ scanner into DeviceNet™
1. Click “I/O Configuration” in the directory tree of the
hardware window and choose New Module… by
clicking the right button.
2. Choose your scanner from the type list (here
“1769-SDN/B Scanner DeviceNet™) and confirm by
clicking OK.
3. Enter as an input parameter:
• PMM A:
17 double words; corresponding to 68 bytes
• PMM AP3s:
21 double words; corresponding to 84 bytes