Chapter 5: WebPAM
83
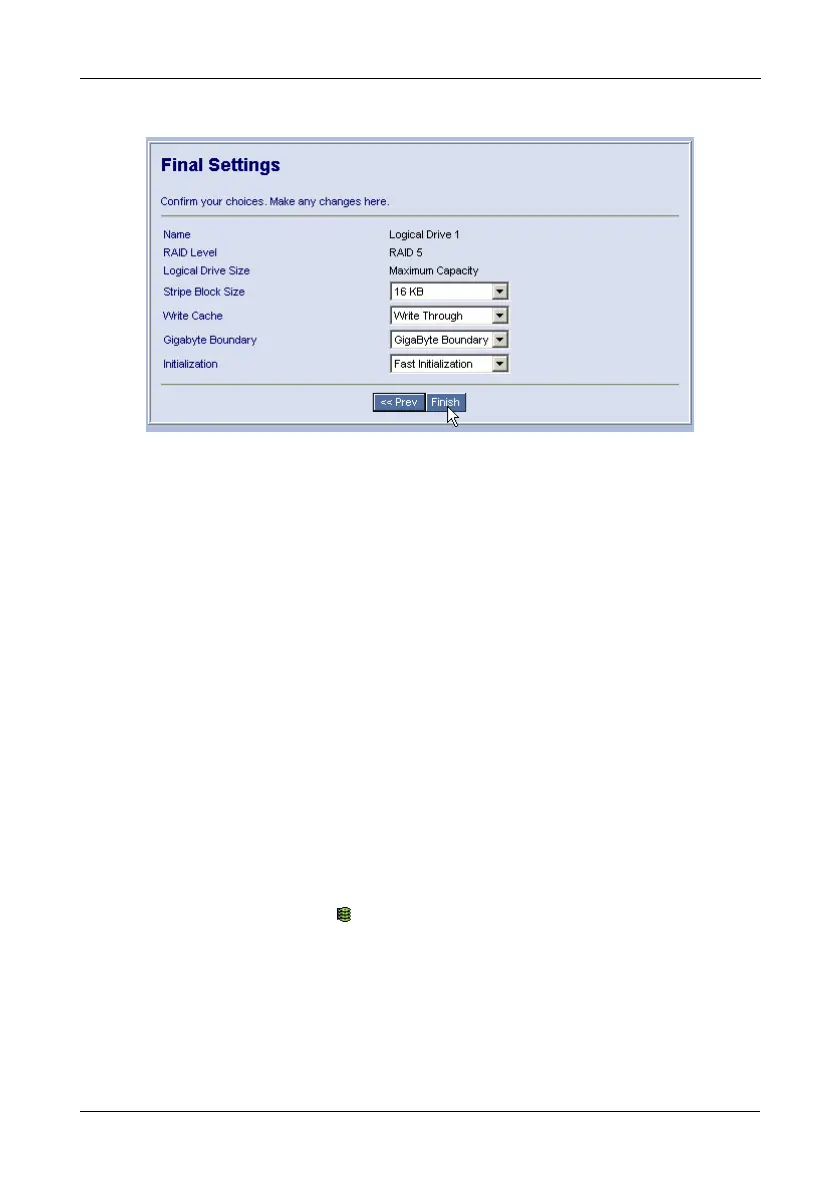
The Final Settings screen appears.
These features have only the default setting:
• Stripe Block Size – Set to 16 KB with no options.
• Write Cache – Set to Write Through with no options.
10. Choose Gigabyte Boundary or None from the Gigabyte Boundary dropdown
menu.
Gigabyte Boundary enables you to replace a failed physical drive with a
slightly smaller physical drive. This option is available only when you have
checked the Use Maximum Capacity box in step 6.
11. Choose an Initialization method from the Initialization dropdown menu:
• Fast Initialization – Erases the Master Boot Record (MBR) of the
physical drives being added to the logical drive.
• Full Initialization – Erases all sectors of the physical drives being
added to the logical drive. Available for RAID 1, 5, and 10.
• None – No initialization. This choice is not recommended.
12. Click the Finish button.
If there are physical drives available, the Select RAID Level screen appears
again, where you can create an additional logical drive.
Click the Logical Drive Icon to see all of the information about your new
logical drive.
 Loading...