SECTION 3
OPERATING PRINTER
50
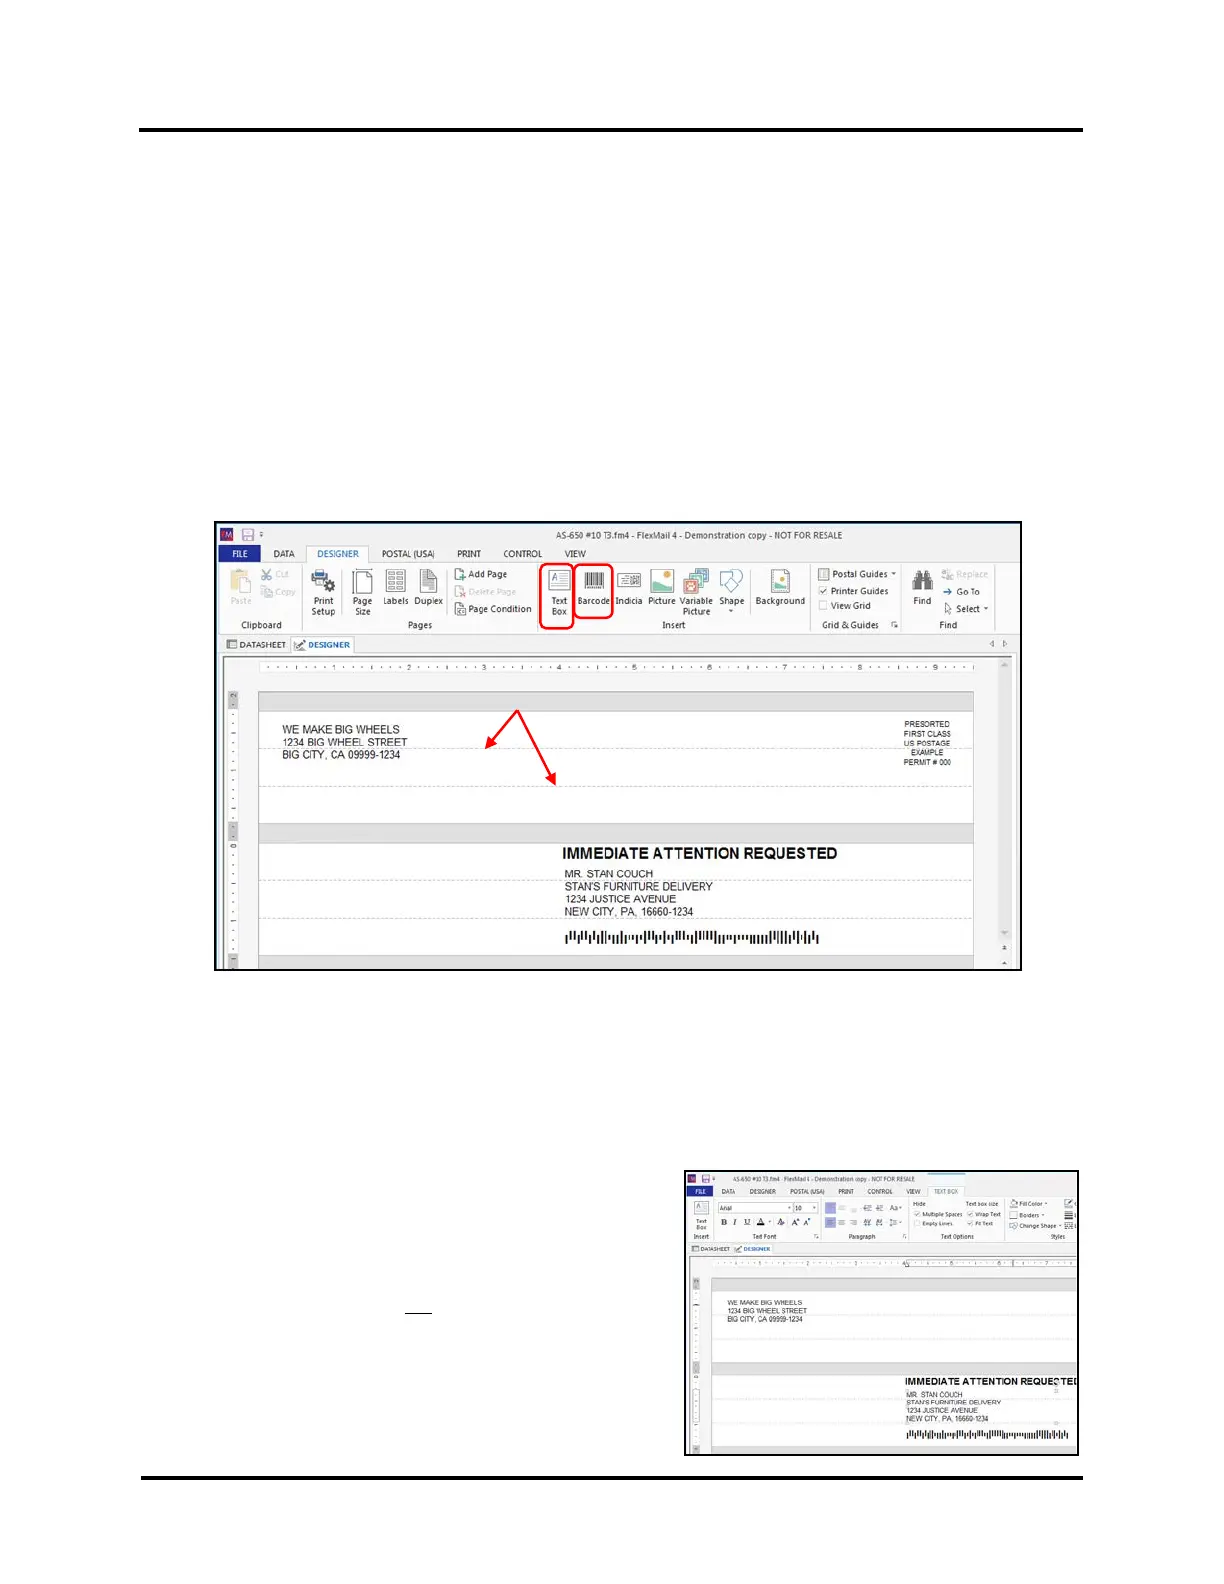
Dashed Lines = Head (cartridge) separation
This gray area represents the separation between Print Units
4. Click on the “DATA” Tab to link a data file to the Project.
Click on “?” symbol, located at top corner of FlexMail window, for help linking “Datasources”.
5. Click on the “DESIGNER” Tab to add elements to the Layout.
Once the Layout is setup to represent the AS-650 printer and your desired Page Size, you are ready to start
adding elements, such as Text (including data fields), Barcodes and Pictures, to the Layout.
The following Layout example was designed for an AS-650.
It shows a page Width of 9.5” and two Print Units, each with three cartridges (Heads).
On one Print Unit there is a “Text Box” (Return Address) element, positioned at the top-left on the top two
Heads, an “Indicia” element positioned at the top-right on the top two Heads.
On the other Print Unit there is a “Text Box” (Immediate Attention Requested) element positioned on the
upper Head, a “Text Box” (Address Block) element positioned on the upper and center Heads and a “Barcode
Box” (Intelligent Mail Barcode) element positioned on the lower Head.
a. The “Dashed Lines”, in the Layout, represent the approximate separation points between Heads
(cartridges).
TIP: For best print results, try to position elements so text and graphics are not split between Heads or
Print Units. If you split text/graphics between Heads or Print Units some misalignment, between the
upper and lower sections of the text/graphic, is likely to occur.
b. Click and drag elements, such as the “Text Box” or “Barcode Box”, to the desired print location in the
Layout.
c. Click on an element, such as a “Text Box”, to access
and change Font Options for this element.
Font Options and other features for the selected
element can be accessed at the top of the screen.
NOTICE: FlexMail does not provide Head number
references in the FlexMail Layout.
This eliminates the need to show a different Head
numbering order, in Layout, when selecting between
“Normal” and “Inverted” print orientations.