SECTION 2
INSTALLING PRINTER
25
The Printhead Cartridge is a delicate precision device. Handle with extreme care to avoid damage and issues that
could degrade print quality. Please read through this entire procedure before attempting this process.
NOTE: This procedure assumes all Ink Tanks are installed and recognized as containing 30% or more ink.
PRINTER MAY NOT FULLY PRIME IF INK TANK(S) ARE LESS THAN 30% FULL.
1. Turn ON and Power-up the Printer. Plug in Printer. Turn ON Main Power Switch. Press Soft-Power
Button to power-up the Print Engine.
You can continue to the next step once the Touchscreen Display appears.
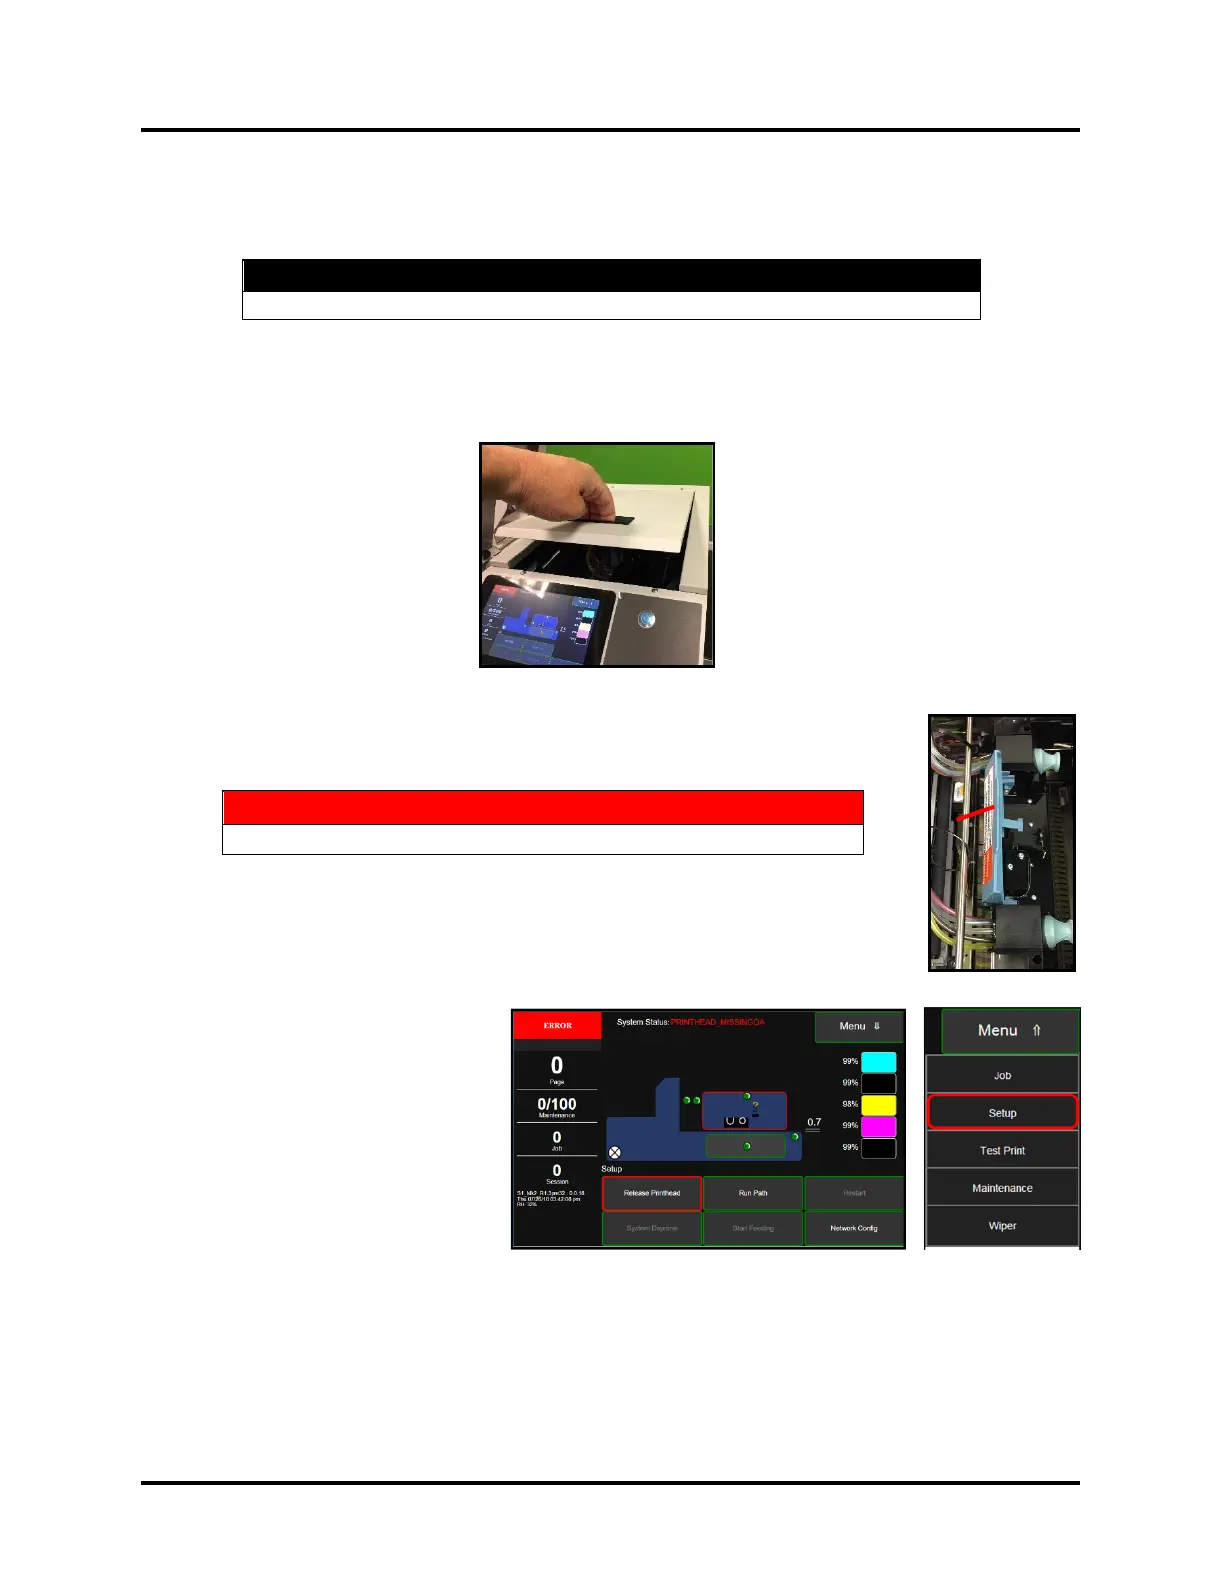
2. Open Printhead Door.
3. Verify that the Printhead Latch [1] is released.
NOTE: If Printhead isn’t detected (no Printhead currently installed), during the
power-up process the Printhead Latch should automatically release.
If the Printhead Latch was accidently closed after the printer powered-up, please use
the following procedure to safely release the Printhead Latch.
Printhead Latch Release Process:
• Close the Printhead Door
and Ink Tank Door.
• On the Touchscreen, tap
Menu then tap Setup from
drop-down list.
• Then tap Release Printhead,
from the button choices
provided at the bottom of the
Touchscreen.
You should hear a “click” as
the Printhead Latch is release.
Tip: If “Release Printhead” is grayed out and “System Deprime” is available, this means that the
printer sees a Printhead installed and primed. In this case use “System Deprime” to deprime the system
and release the Printhead Latch.
Do NOT force the Printhead Latch [1] open. Severe damage will result!