SECTION 3
OPERATING PRINTER
72
Date and Time – Set the date and time or change the format of how the date and time will appear in the Toolbox
and Touchscreen.
To set or format Date and Time:
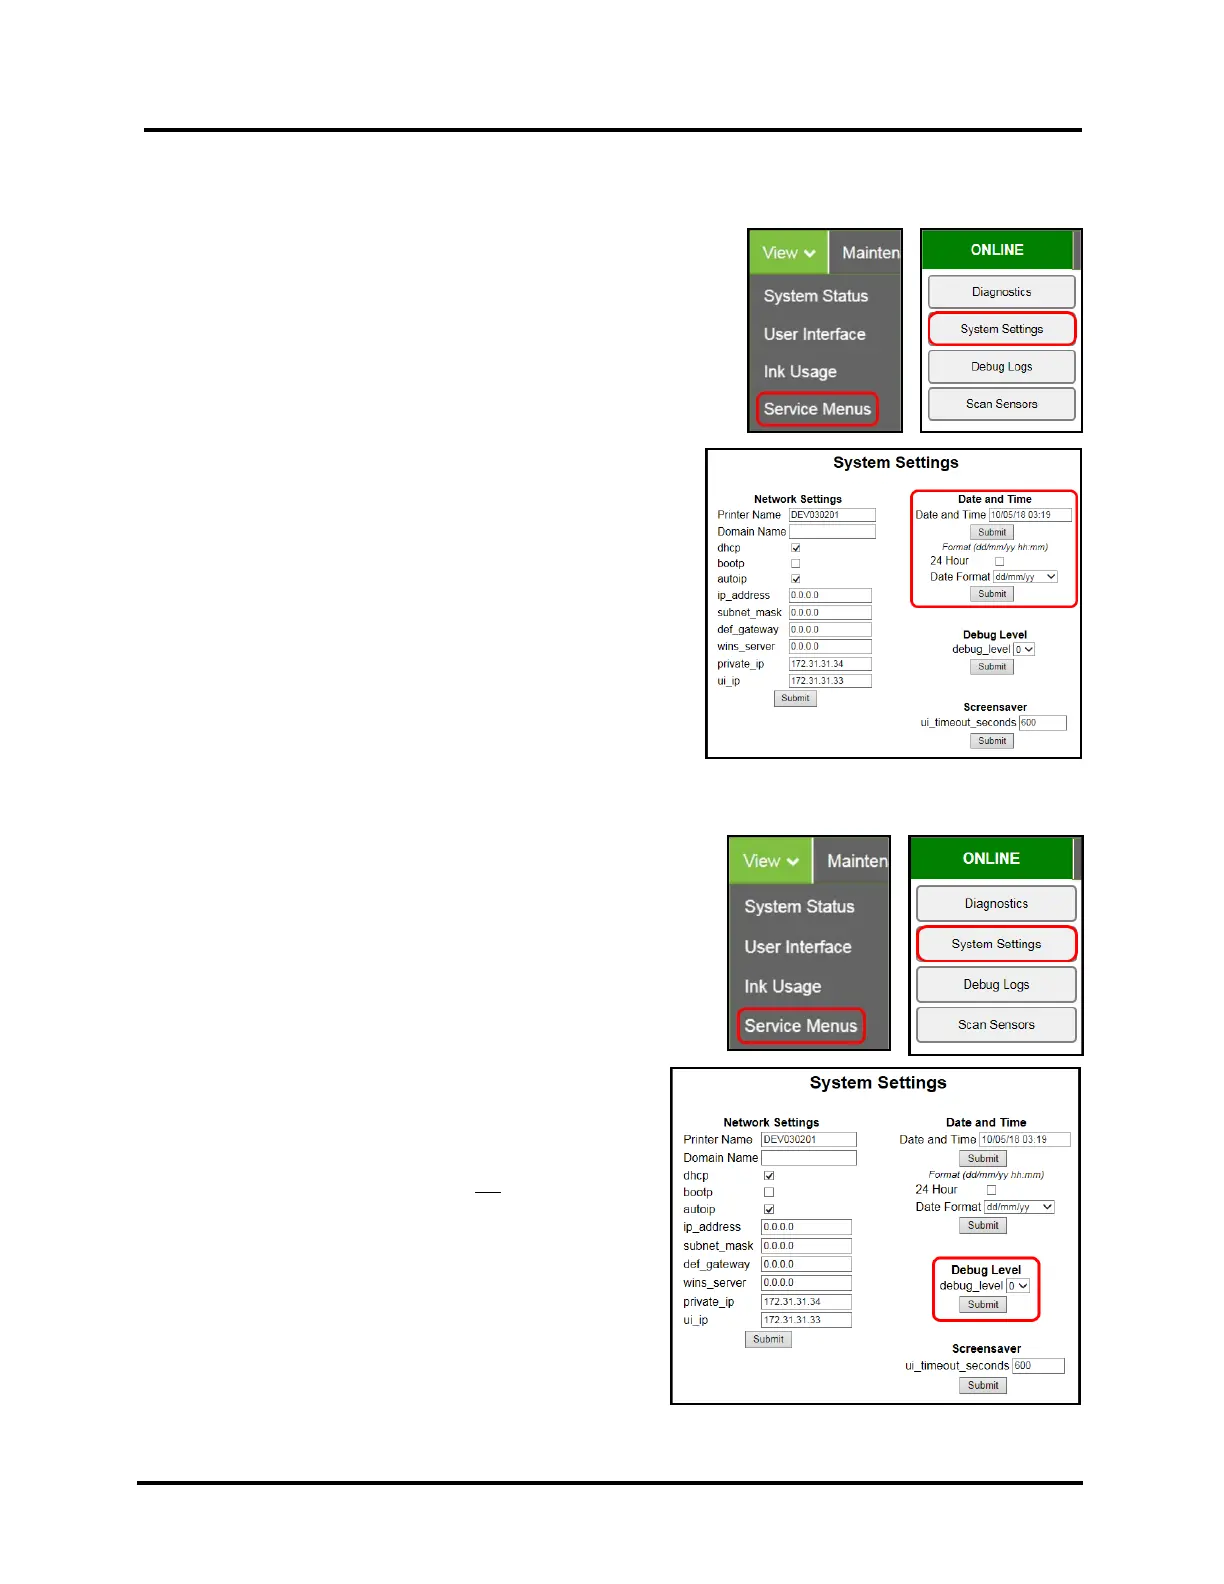
1. From the Toolbox, select “View” drop-down menu, click
“Service Menus” then click “System Settings”.
2. “System Settings” page opens. Use the following Date and
Time options to enter, edit and format the Date and Time for
the Printer.
Date and Time – set/adjust date and time here.
NOTE: This field is always displayed as “dd/mm/yy hh:mm”.
Hours and minutes always displayed as “24 Hour” clock.
Format for this field will not change when you change the
choices below.
24 Hour – Select (check) this box for 24 Hour clock.
Un-check this box for 12 Hour clock.
Date Format – Select between the following date formats.
dd/mm/yy, dd-mmm-yy, mm/dd/yy, mmm-dd-yy,
yy/mm/dd, yy-mmm-dd
3. Click “Submit”.
Debug Level – Set the detail level of the Debug Logs.
NOTE: If experiencing a persistent issue, you may be asked to
provide a Debug Log from your printer. A technician may ask you to
set the Debug Level to 1 or 2, and reproduce issue, before providing
them with the Debug Log file.
To change the Debug Level:
1. From the Toolbox, select “View” drop-down menu, click
“Service Menus”, and then click “System Settings”.
2. “System Settings” page opens. Go to Debug Level
options and select 0, 1, or 2 to set the desired detail
level for the Printer. (0 = least detailed, 2 = most
detailed).
NOTE: Because of the amount of data collected and
stored, the Debug Level should not be left at a setting
above 0 (zero), unless asked to do so by a service
technician. Please set the Debug Level back to zero
after providing the requested Debug Log file.
3. Click “Submit”.