Chapter 5
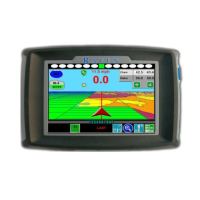
40 Envizio Pro™ and Envizio Pro II® Installation and Operation Manual
Initial Setup Wizard
The initial setup wizard will automatically begin when the Envizio Pro is powered up for the first time. This
wizard will step through the initial settings and calibration values required for operation of the field computer
and control system. This process is only required during the initial power up sequence.
Any values or settings programmed during the initial setup wizard may be modified or refined later through the
Tools Menu.
Note: Many of the values entered in the initial setup wizard are required for guidance and/or product
control features of the control system. Therefore, the more accurate these values, the more
accurate the control system will be.
Review the following steps and sections for assistance with completing the initial setup wizard. To confirm the
settings displayed on a screen and proceed with the initial setup wizard, touch the ‘Next’ or ‘Accept’ icons. If
available, the ‘Previous’ icon will step back to the previous Setup screen.
Note: The following steps are provided as a process overview. The following procedure will reference
specific sections in Chapter 7, Tools Menu, for details on specific settings and configuration
assistance.
1. The Region screen is displayed automatically when the field computer is powered on for the first time.
Select the preferred language and units for display on the field computer. Refer to the Region section on
page 137 for details on the available settings or region selections.
2. If desired, configured the time zone by selecting the Time Zone icon in the upper, right corner of the
Region screen. Refer to the Time Zone Settings section on page 137 for details.
3. Touch the Next icon proceed with the initial field computer setup.
4. The Control Interface screen will be displayed. Select the Product Control option desired for interfacing with
the control system on the configured implement. For detailed information on the control option settings,
refer to the Product Control Options section on page 94.
Note: It is not possible to complete configuration of the OmniSeed control option until the activation key
is entered on the field computer. Select the ‘None’ option to complete the initial configuration
wizard. Refer to the Special Features Registration section on page 138 for a procedure to enter
the activation key and then return to the Setup Wizard menu and restart the set up wizard to
configure the OmniSeed Control Interface.
5. Review the available system options at the bottom of the Control Interface screen. See the Boom Master
and System Options section on page 97 for details.
6. Touch the Serial Port icon in the upper, right corner of the screen to configure an optional serial device
or light bar if desired. See the Serial Port Configuration section on page 98 for information on the available
serial port settings.
7. Select the CAN Diagnostics icon in the upper, right corner of the screen to check the status of the
network and nodes currently detected and communicating with the field computer. Review the CAN
Diagnostics section on page 30 for information on using the field computer to check status and readdress
the CANbus.

 Loading...