1.Replacement and Adjustment
111
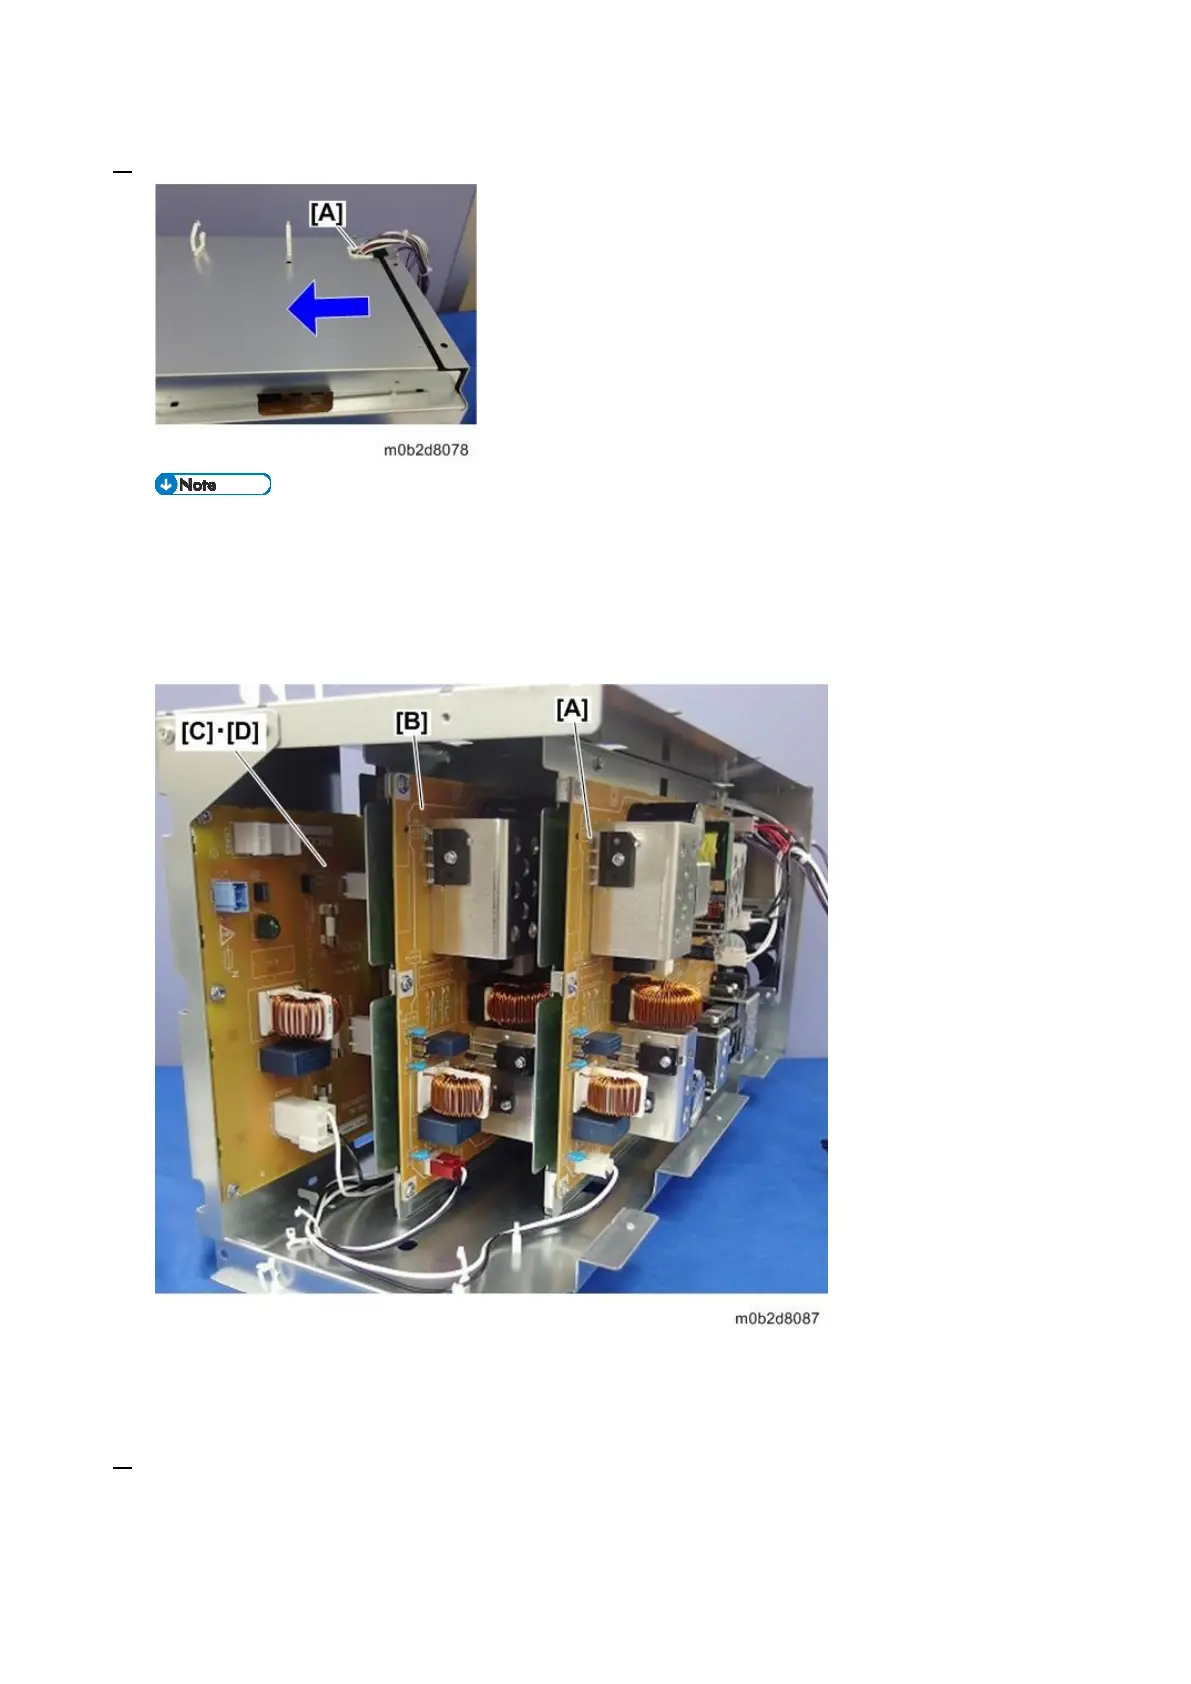
6. Open the clamp [A] to release the harness, and then remove the PSU left cover.
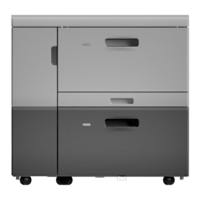
PSU1, 2, 3 / AC Drive Board Location
[A]: PSU 1
[B]: PSU 2
[C]: PSU 3 (Rear)
[D]: AC Drive Board (Front)
To replace PSU 2 or 3, you need to remove the PSU(s) to the right of the one to replace.
PSU 2 replacement: Requires removal of PSU 1.
PSU 3 or AC drive board replacement: Requires removal of PSU 1 and PSU 2.
7. Pull out the connector and remove the screws on PSU 1 [A], and then open the clamp at the rear