120 Rockwell Automation Publication ICSTT-RM448M-EN-P - February 2021
Chapter 6 System Startup
• The firmware will be downloaded and stored on the module - this take 5
to 10 minutes
• ControlFLASH will report the success or failure of the update.
Refer to document 1756-UM105
ControlFLASH Firmware Upgrade Kit User
Manual in the Literature Library for detailed instructions for using
ControlFLASH.
Setting the Controller IP
Address for
Communications
The AADvance system uses Internet Protocol (IP) to carry communications
between the controller and the AADvance Workbench software or AADvance-
Trusted SIS Workstation software. This chapter shows you how to set up the IP
address in the controller. It is convenient to set up the controller resource
number at the same time.
Controller IP Address
The AADvance controller stores its IP address data in non-volatile memory in
the T9100 processor base unit. The data is independent of the T9110 processor
modules in the controller, and so the controller keeps the address information
when you remove a processor module.
You must set up the IP address data when you create a new system, or if you fit
a new processor base unit.
After having set up the IP address data in the controller, you can configure the
AADvance Workbench software or AADvance-Trusted SIS Workstation
software to find the controller on the network.
Troubleshooting AADvance
Discover Communications
This procedure describes how to activate communications using the AADvance
Discover tool. After completing the steps, refresh the AADvance Discover tool's
list of modules to test for communications.
1. Ensure that the Ethernet cable is plugged into a socket above a fitted
AADvance controller – communications will not ‘pass through’ unused
slots.
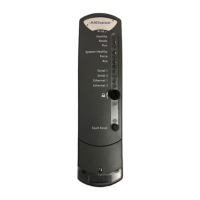
2. Ensure that the controller is activated by turning the locking bar. Wait
for the Ready LED to go green before refreshing the AADvance Discover
tool. (The communications tasks are not active until it is 'Ready').
3. Do not use an office network. Use an isolated hub or switch between the
computer and AADvance controller. Check that the hub/switch has LEDs
lit for the ports to both computer and controller, showing that the ports
are working.
4. Open the Network Connections window. Open the Properties of the
computer’s network adapter (as used for configuring AADvance). Un-tick
all protocol "items" which are not immediately necessary, especially
"Check Point SecuRemote" and "iPass Protocol" (if present). You will
need to leave "Internet Protocol" (or) "IPv4" and "IPv6", "Client for
Microsoft Networks", "File and Printer Sharing" and "Network Monitor
Driver" (if present) for normal Windows operation.
5. Disable the Windows Firewall, or any third-party firewalls and shields.
6. If using a laptop, disable Wireless. If there are multiple network
connections, disable the connections not being used. The AADvance
 Loading...
