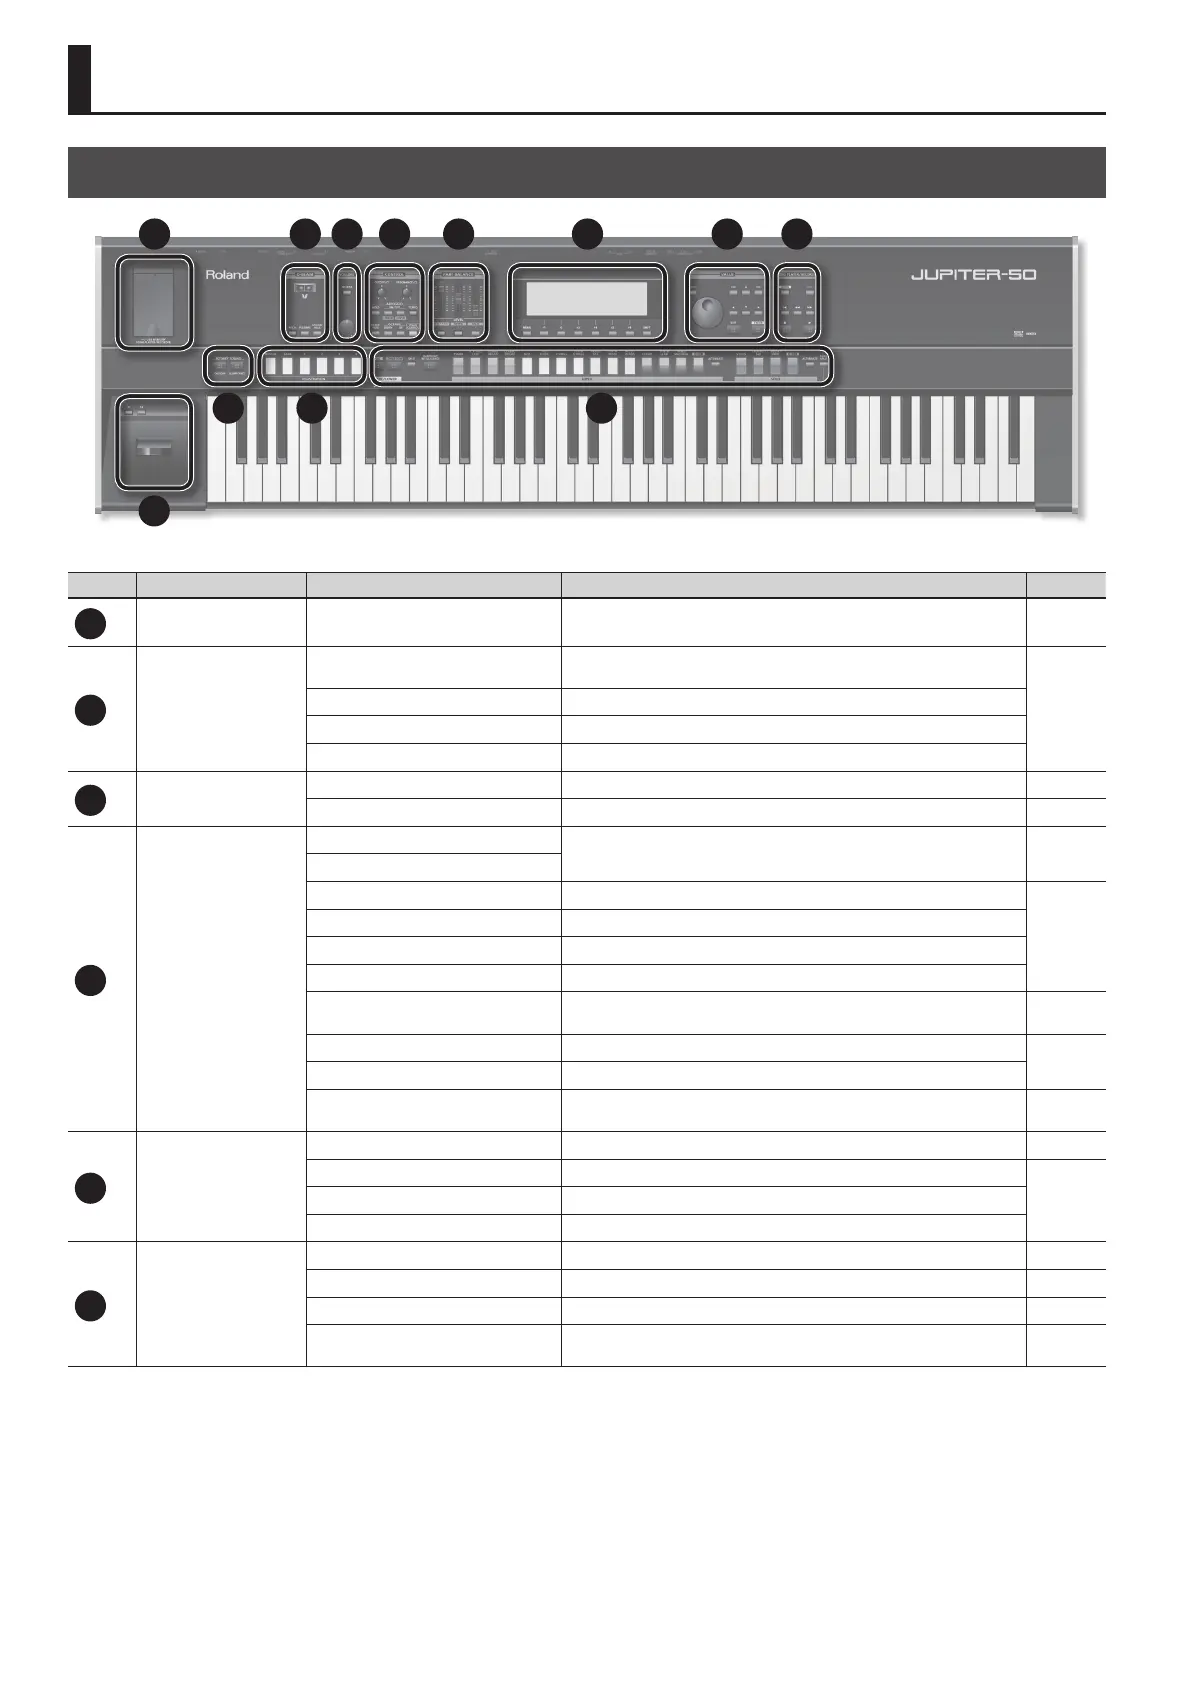
26
Top Panel
1 3
12
84 75 62
109 11
Number Area Name Explanation Page
1
USB MEMORY USB MEMORY port Connect USB ash drive (sold separately) here. p. 25
2
D-BEAM
D-BEAM controller
By moving your hand above the D-BEAM you can apply various eects to the
sound.
p. 51
[PITCH] button If this is on, the D-BEAM controller will control the pitch.
[VOLUME] button If this is on, the D-BEAM controller will control the volume.
[ASSIGNABLE] button If this is on, the D-BEAM controller will control the function you’ve assigned.
3
VOLUME
REVERB button Turns on/o the output of the Live Set’s reverb. p. 53
[VOLUME] knob Adjusts the volume of the output from the MAIN OUT jacks and PHONES jack. p. 31
4
CONTROL
[CUTOFF/C1] knob
These adjust the parameters specied by the Registration. p. 52
[RESONANCE/C2] knob
[HOLD] button Turns the arpeggiator Hold function on/o.
p. 47
ARPEGGIO [LOWER] button If this is on, the arpeggiator will apply to the Lower Part.
ARPEGGIO [UPPER] button If this is on, the arpeggiator will apply to the Upper Part.
[TEMPO] button Accesses the tempo screen.
[TRANSPOSE] button
By holding down the [TRANSPOSE] button and using the [–] [+] buttons, you
can transpose the keyboard in semitone steps.
p. 46
OCTAVE [DOWN] button Lowers the key range in steps of one octave.
p. 46
OCTAVE [UP] button Raises the key range in steps of one octave.
[VISUAL CONTROL] button
Turns MIDI Visual Control on/o. When you press this button to turn it on, the
setting screen will appear.
p. 85
5
PART BALANCE
[LEVEL] slider Adjust the volume of each Part, or the volume of each layer in the Live Set. p. 42
PART ON/OFF [PERC/LOWER] button Turns the Percussion/Lower Part on/o.
p. 42PART ON/OFF [UPPER] button Turns the Upper Part on/o.
PART ON/OFF [SOLO] button Turns the Solo Part on/o.
6
Display
Display Shows various information for the operation. p. 35–p. 37
[MENU] button Accesses the Menu screen. p. 35
[F1]–[F6] buttons Execute the functions shown in the bottom of the display. p. 32
[SHIFT] button
This is used in conjunction with other buttons to access setting screens
related to those buttons.
p. 33
Panel Descriptions

 Loading...


