Installing the AP
Step 1: Preconfiguring the AP
Ruckus Wireless Indoor AP 100.2.0 User Guide, 800-70892-001 Rev A 84
Windows saves the IP address settings that you have configured.
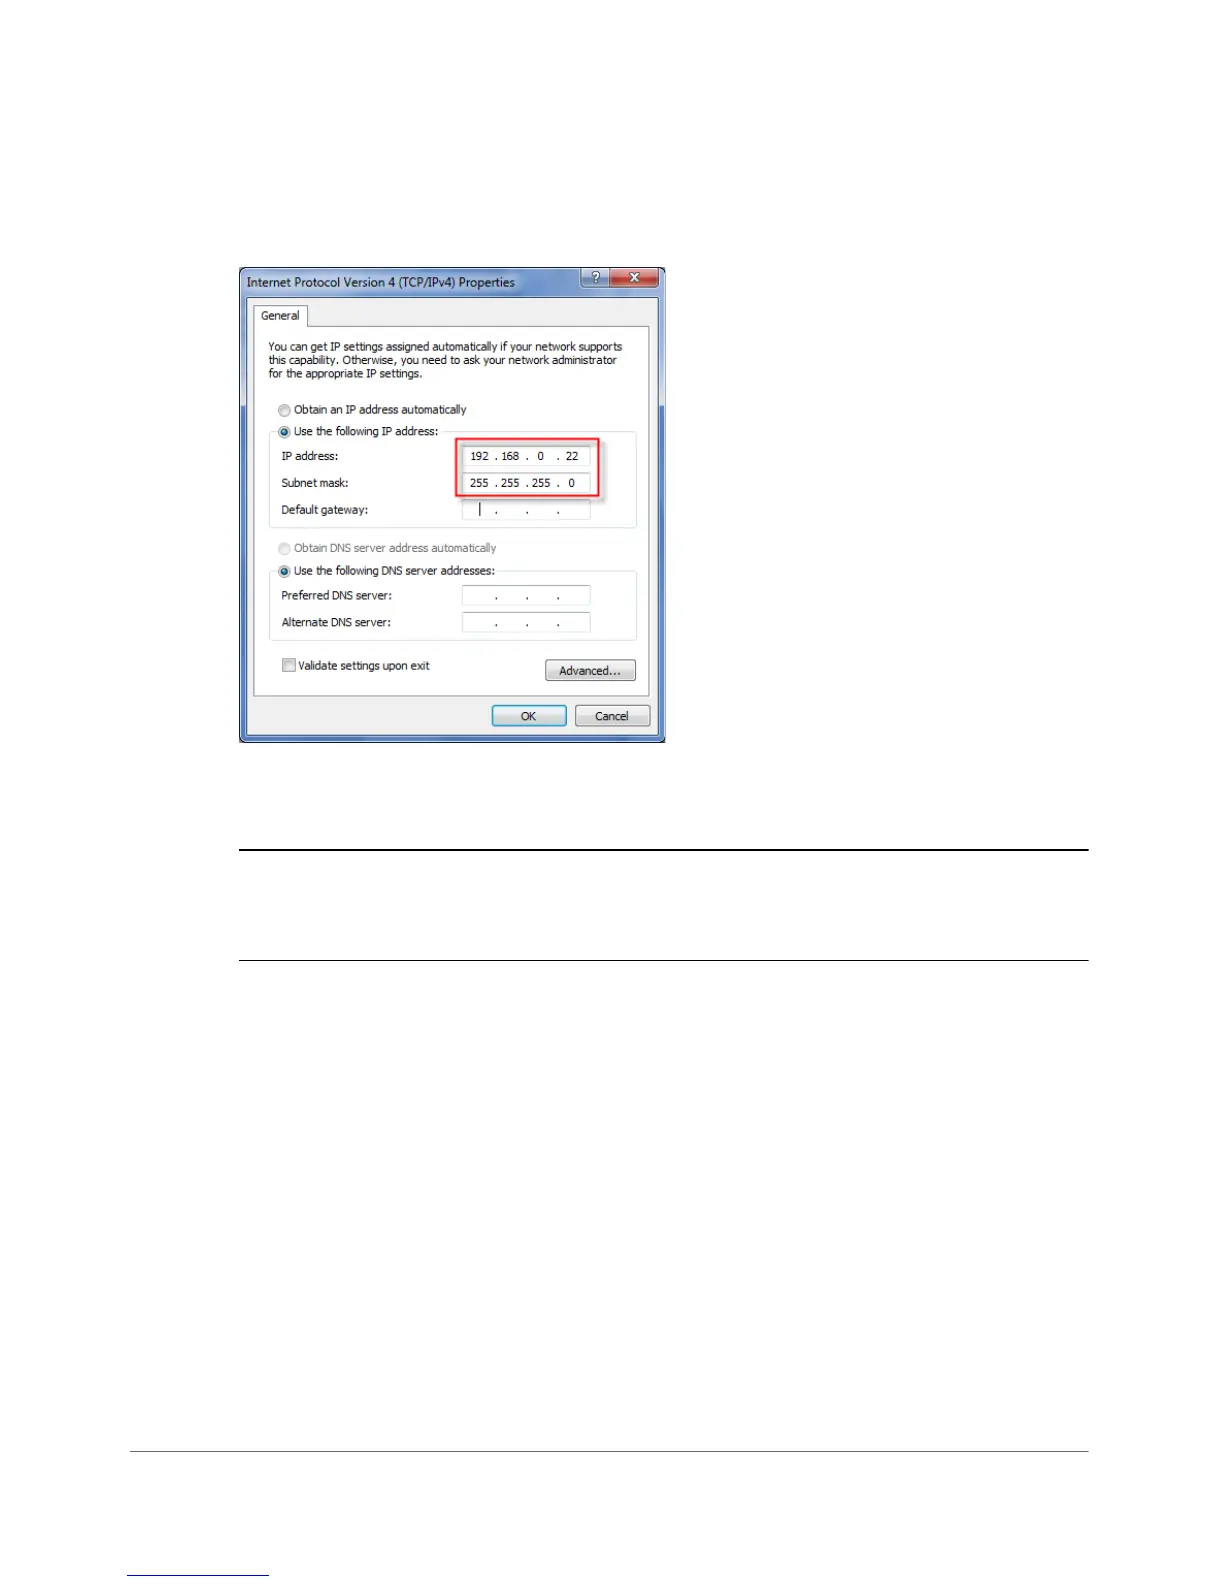
Figure 37. Sample configuration in the Internet Protocol (TCP/IP) Properties dialog box
3. Connecting the AP to the Administrative Computer
CAUTION! Do NOT connect the AP to your live network at this point. If you connect
it to a live network with an active DHCP server, the AP acquires a new IP address
from DHCP and you are unable to access it via the default IP address (192.168.0.1).
1 Connect one end of an Ethernet cable to an Ethernet port on the AP, and then
connect the other end to the administrative computer’s Ethernet port.
2 Provide power to the AP using either an AC adapter or a PoE injector or switch.
4. Logging Into the AP’s Web Interface
1 On the administrative computer, open a Web browser window.
2 In the address or location bar, type the following address:
https://192.168.0.1
3 Press <Enter> on the keyboard to connect to the AP’s Web interface. A security
alert message appears.
4 Click Yes or OK or Proceed anyway (depending on the browser) to continue.
The AP’s login page appears.