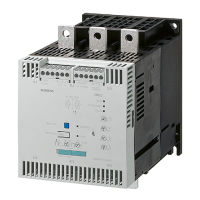
PROFIBUS DP Communication Module
SIRIUS 3RW44 manual
GWA 4NEB 535 2195-02 DS 06
8-19
8.6.2 Configuration using the Device Master Data (GSD) in STEP 7
Table 8-3: Commissioning
Step Description
1
Activate the PROFIBUS DP communication module as described in Chapter
8.4.
2
Set the desired station address as described in Chapter 8.4.
3
Switch on the supply voltage for the DP master CPU 315-2 DP at the infeed
module.
4
Observe the status LEDs of the DP master CPU 315-2 DP on the infeed
module:
5 V DC:
SF DP:
BUSF:
Lights up
Off
Blinking
5
Start the SIMATIC Manager and create a new project with a DP master
(e.g. CPU315-2 DP with DI 16 x24 V DC and DO 16 x24 V DC). Generate OB1
and OB82 for the project.
6
In HW config., call up the menu command Extras > Install new GSD file, and
integrate the GSD file of the soft starter into the configuration tool of the DP
master used. For the CPU315-2 used in the example, you can install
• the German GSD file SIEM80DE.GSG,
• the English GSD file SIEM80DE.GSE,
• the French GSD file SIEM80DE.GSF,
• the Spanish GSD file SIEM80DE.GSS,
• the Italian GSD file SIEM80DE.GSI
in the STEP 7 SIMATIC Manager.
7
Generate the PROFIBUS DP subnet.
8
Add the soft starter from the hardware catalog to the PROFIBUS under
PROFIBUS DP > Additional field devices > Switching devices > Motor starters
> Direct on line soft starters > Sirius 3RW44.
9
Set the station address for the soft starter to 3 (or higher).
10
Drag the module from the selection list of the dropdown menu to slot 1 of the
Sirius 3RW44:
Open the "DP slave characteristics" dialog with a double click.
11
Click on "Parameterization". Set the parameters **), e.g.
Rated operating current
Click "OK". The configuration is completed.
12
Save the configuration.
*) Depending on the structure
Slot
Module/
DP ID
Order number I addr.
O
addr.
Comment
1 192 3RW4422-*BC** 2...3
*)
2...3
*)
 Loading...