SIGLENT
32 SDS1000CML+/SDS1000DL+ User Manual
2.8 Trigger System
The trigger determines when the oscilloscope starts to acquire data and display a
waveform. When a trigger is set up properly, the oscilloscope converts unstable
displays or blank screens into meaningful waveforms.
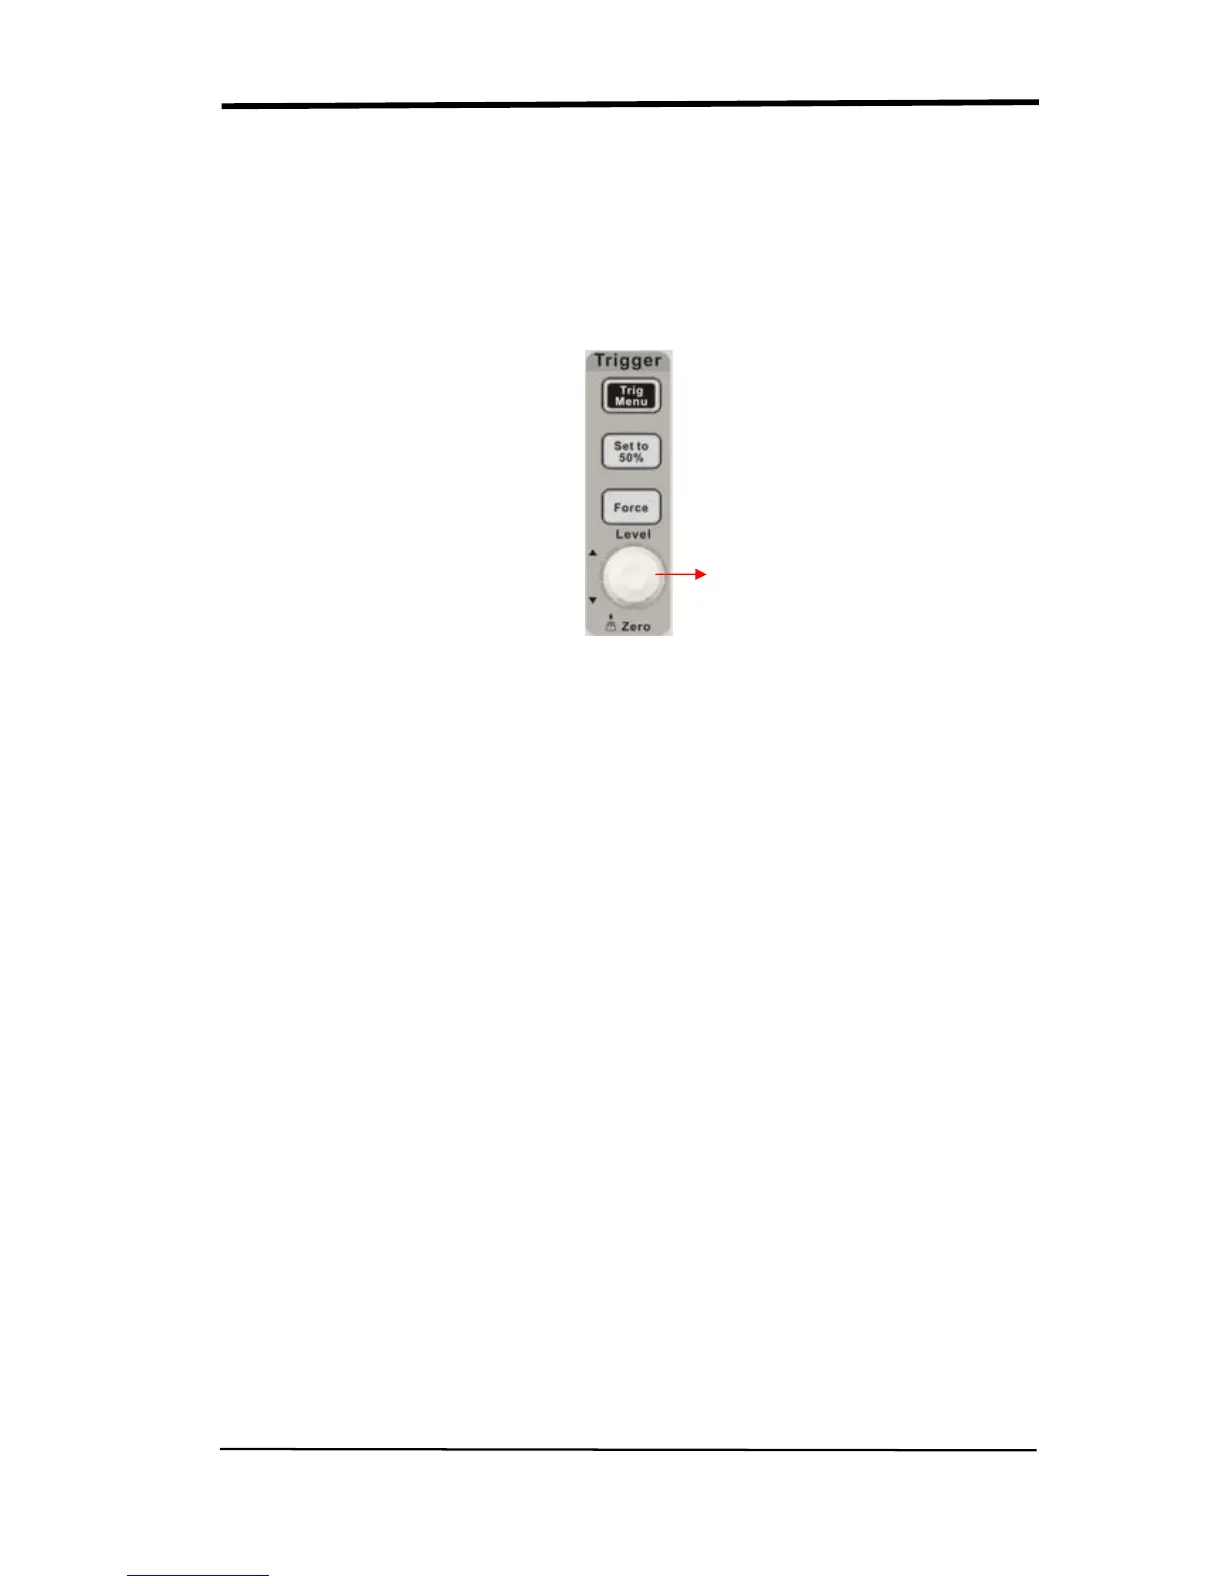
There are three buttons and one knob in the Trigger area. See picture.2-29:
Picture 2.8-1
■“TRIG MENU” Button: Press the “TRIG MENU” button to display “Trigger
Menu”.
■“LEVEL” Knob: The LEVEL knob is to set the corresponding signal voltage of
trigger point in order to sample. Press the “LEVEL” knob can set trigger level to
zero.
■“SET TO 50%” Button: Use the “SET TO 50%” button to stabilize a waveform
quickly. The oscilloscope can set the Trigger Level to be about halfway between
the minimum and maximum voltage levels automatically. This is useful when you
connect a signal to the EXT TRIG BNC and set the trigger source to Ext or Ext/5.
■“FORCE” Button: Use the FORCE button to complete the current waveform
acquisition whether the oscilloscope detects a trigger or not. This is useful for
SINGLE acquisitions and Normal trigger mode.
■ Pre-trigger/Delayed trigger: The data before and after trigger the trigger
position is typically set at the horizontal center of the screen, in the full-screen
display the 6div data of pre-trigger and delayed trigger can be surveyed. More
data of pre-trigger and 1s delayed trigger can be surveyed by adjusting the
horizontal position.
LEVEL knob