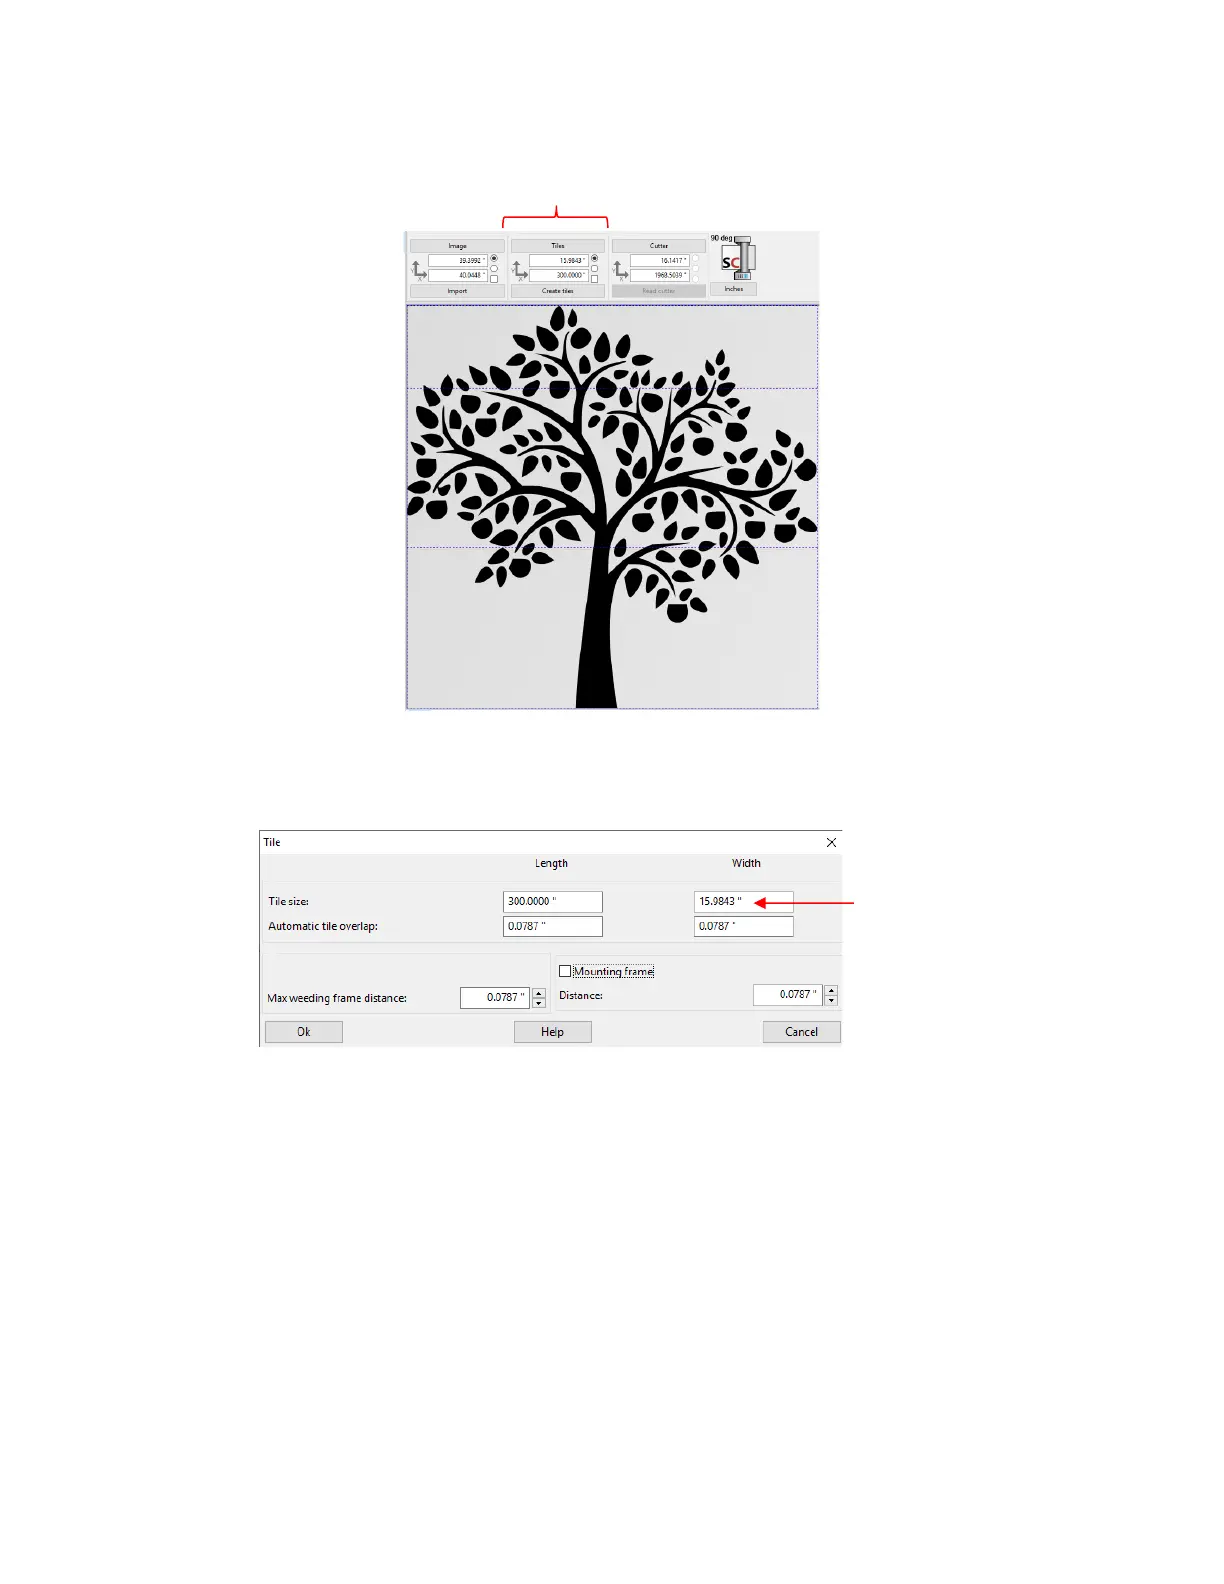
• The Tiles Panel above the Work Area contains the tools needed to automatically tile a project into
individual tiles based on dimensions entered. In this example, a large tree design will be tiled for application
using 12” wide wall vinyl:
• In some cases, the limiting factor which leads to the need for tiling is the maximum cutting width of the
cutter. In other cases, as presented here, the limiting factor is the width of the material available.
• Click on the Tiles button and the following window opens:
Tile size: Enter the maximum Length and Width of each tile. Assuming the vinyl is on a roll, the
Length can be left at a maximum size. The Width, however, will be changed to 11” because the wall
vinyl happens to be 12” in width.
Automatic tile overlap: mounting vinyl can be easier if a small amount of overlap is allowed. This
ensures there will be no unsightly gaps in the final project after application.
Mounting frame: mark this option to add a rectangle around the tiles. This can aid in alignment and/or
weeding, as needed.
• After entering the Tile Size Width as 11 inches, click on Ok to close the window. Then click on Create tiles
and the preview will update with the 11” tiles generated: