User Manual |
89
Laser Engraving and Cutting - 03 How to Laser Engrave and Cut
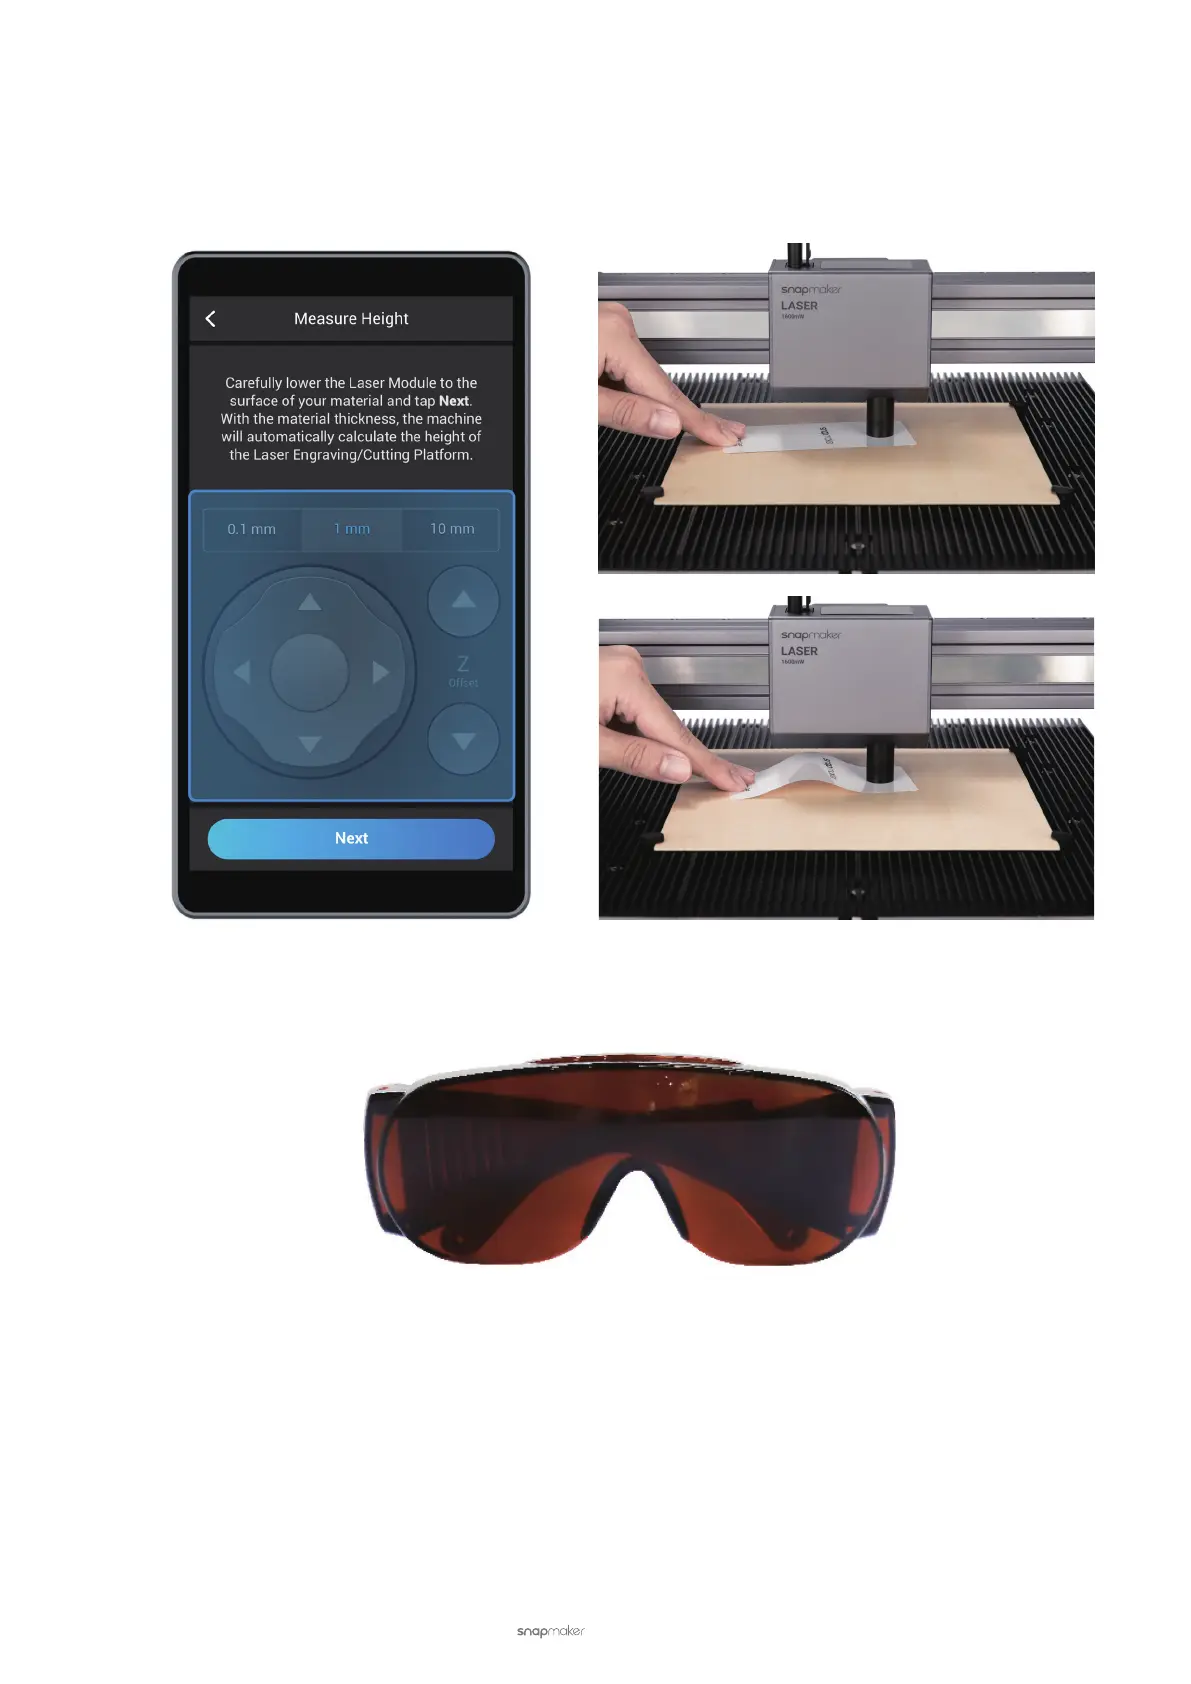
(5) Put the Calibration Card provided or a piece of A4 paper in between the Laser Module and the material. Tap
X-, X+, Y-, Y+ to move the Laser Module above the Calibration Card. Keep adjusting the Z Offset until you feel
slight resistance when you pull out the Calibration Card, and it should be wrinkled when you push it forward.
Then, pull out the Calibration Card and tap Next.
(6) Put on the Laser Safety Goggles and tap Next.
(7) Set Reference Points. Tap X-, X+, Y-, Y+, Z-, or Z+ to move the Laser Module. After the laser beam is focused
into the smallest spot possible, tap Next.