47 48
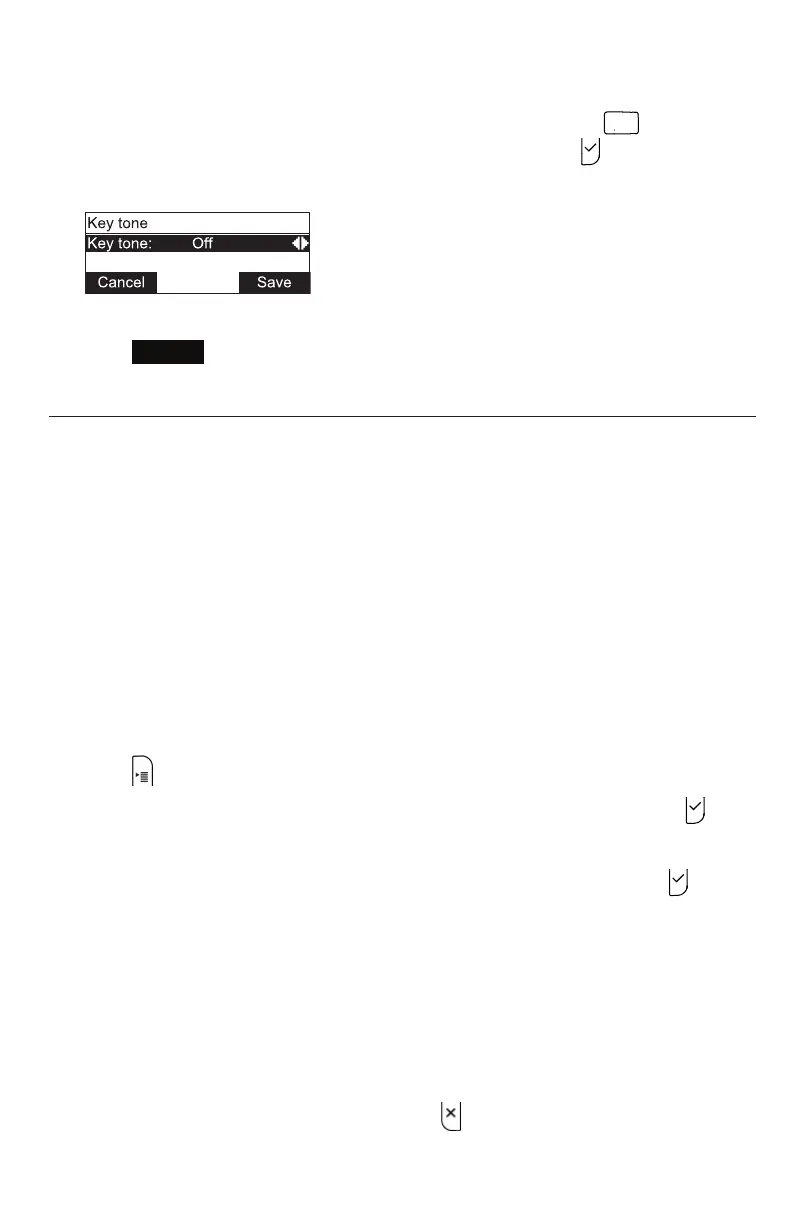
Seng the key tone:
1. From the Audio menu, open the Ringer tone screen by pressing
2
A B C
.
Alternavely, press q to highlight 2 Key tone and then press .
The Key tone menu appears.
2. Press t or u to turn key tones on or o. When o, key presses are silent.
3. Press
Save
.
Registering wireless microphones
The wireless microphones delivered with the C520 are preregistered. If you do need
to register a wireless microphone (e.g., if you have purchased a C520 Replacement
Microphone), it must be registered to the phone.
• The phone must be idle when registering wireless microphones.
• The phone supports two microphone registraons; previous registraons must
be deregistered before you can register the two microphones you want to use.
• Do not remove the wireless microphones from the charging cradles during the
enre registraon process. A microphone that was registered before but is not
in the charging cradle during a new registraon process will be deregistered.
• The LED status indicator on each wireless microphone ashes red and green
alternangly during registraon.
1. Place the microphones you want to register into the phone's charging cradles.
2. Press .
3. From the Main menu, press q to highlight 3 User sengs and then press .
4. From the User sengs menu, press q to highlight 4 Wireless microphones.
5. From the Wireless microphone menu, with 1 Register highlighted, press .
The screen displays "Registering....".
• If registraon is successful, the screen displays "Registraon succeeded." The
base unit plays a conrmaon tone. The status indicator of the registered
microphone stops ashing red and green alternately.
• If registraon fails, the display will say "Registraon failed". Remove the
microphones from the charging cradles and put them back in. Repeat step 5
to try the registraon process again.
• To stop a registraon in progress, press . The display says "Registraon
cancelled". Repeat step 5 to try the registraon process again.
Conguring the Phone