12
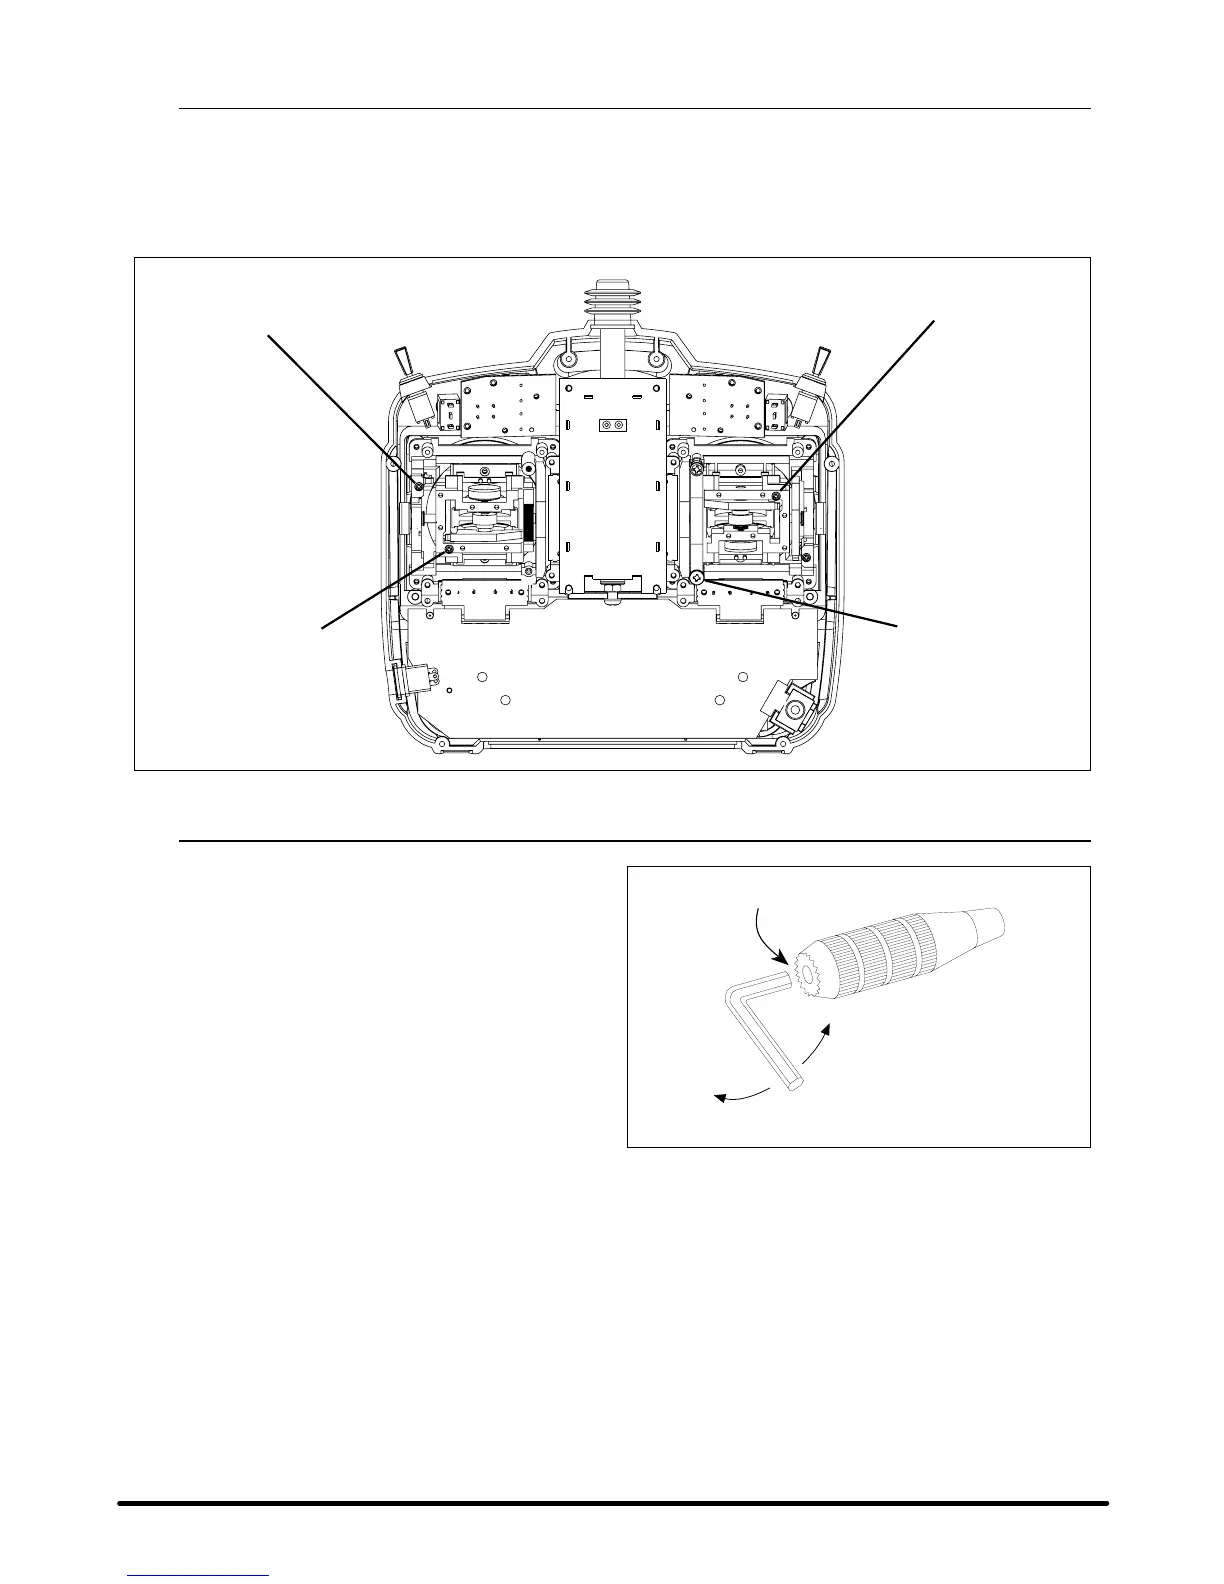
Adjusting the Control Stick Tension
Note: Remove the six (6) transmitter back cover screws. Remove the transmitter back, being
careful not to cause damage to any components.
Adjust each stick tension screw for the desired tension (counterclockwise to loosen stick tension, clockwise to
tighten stick tension).
ELEVATOR TENSION
SCREW
AILERON TENSION
SCREW
RUDDER TENSION
SCREW
THROTTLE TENSION
SCREW
SPEKTRUM DX7 • INTRODUCTION
Control Stick Length Adjustment
The DX7 allows you to adjust the control stick’s
length. Use the 2mm Allen wrench (supplied with
your DX7 transmitter) to unlock the setscrew.
Turn the wrench counterclockwise to loosen the
screw. Then, turn the stick clockwise to shorten or
counterclockwise to lengthen. After the control stick
length has been adjusted to suit your flying style,
tighten the 2mm setscrew.

 Loading...