29
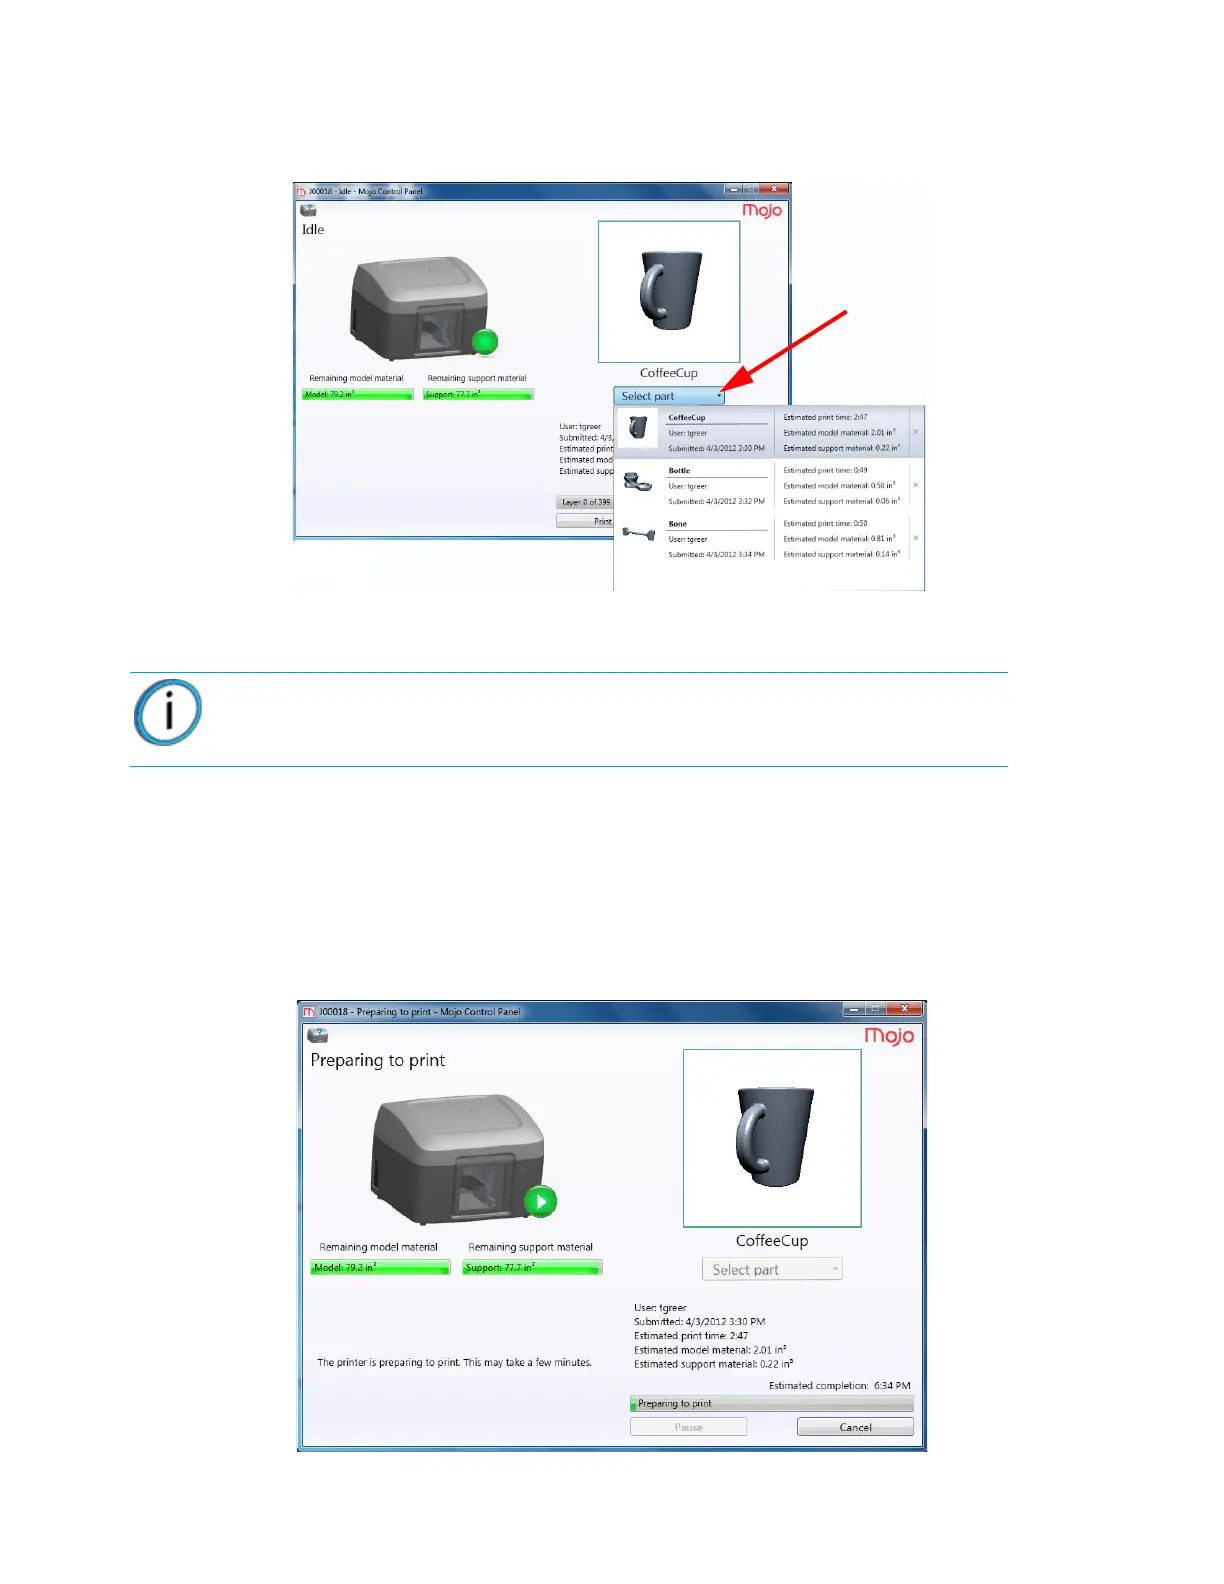
2. Click Select part from the drop down menu and select the part to be printed. The first processed
part will be displayed in the preview window with the part name.
Figure 4-34: Part selection
3. Click Print to begin printing.
As the part is being printed, the following general information will be displayed:
• Printer status
• Material usage
• Estimated completion time
The following window will be displayed while the part is preparing to be printed.
Figure 4-35: Preparing to print
Note: If there is not enough model or support material available in the QuickPack
Print Engine to complete the part, the part will not print.