35
REMOVE A PART FROM THE MODELING BASE
1. After removing the modeling base from the printer, firmly flex the modeling base back and forth
with your hands to loosen the part.
2. Pull the part off of the modeling base or use a putty knife to completely remove the part.
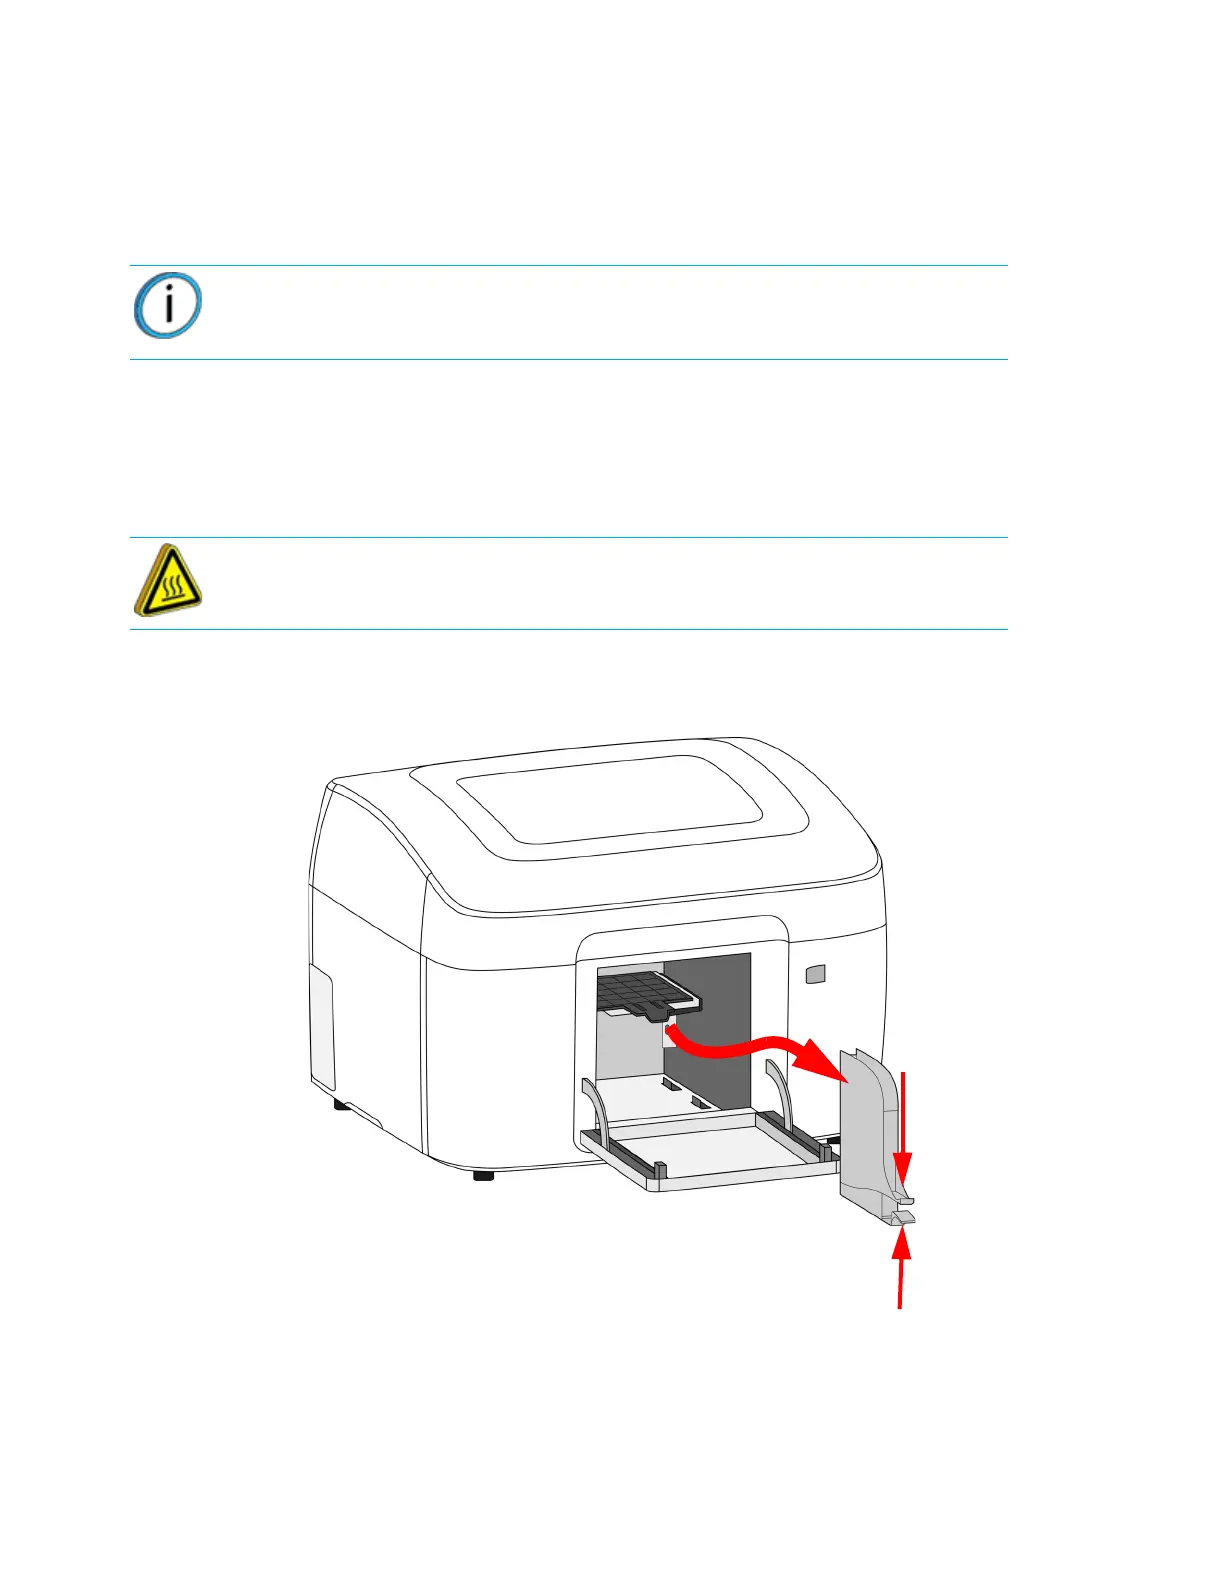
EMPTYING THE PURGE BUCKETS
Empty the purge buckets on each side of the printer after each use to avoid part quality issues or damage to the
printer.
1. Squeeze the upper and lower tabs and then lift and pull the purge bucket out of the chamber.
Figure 4-47: Emptying the purge buckets
2. Empty the purge buckets.
3. Place the purge bucket in position then push the bucket into the chamber. Make sure the purge
bucket “clicks” in place.
Note: Parts are easier to remove from the modeling base when they are still
warm.
Hot Surface: The surfaces inside of the chamber can be hot. Use extra care
when working around heated components.