Chapter 4 Servicing Motherboard Components 4-9
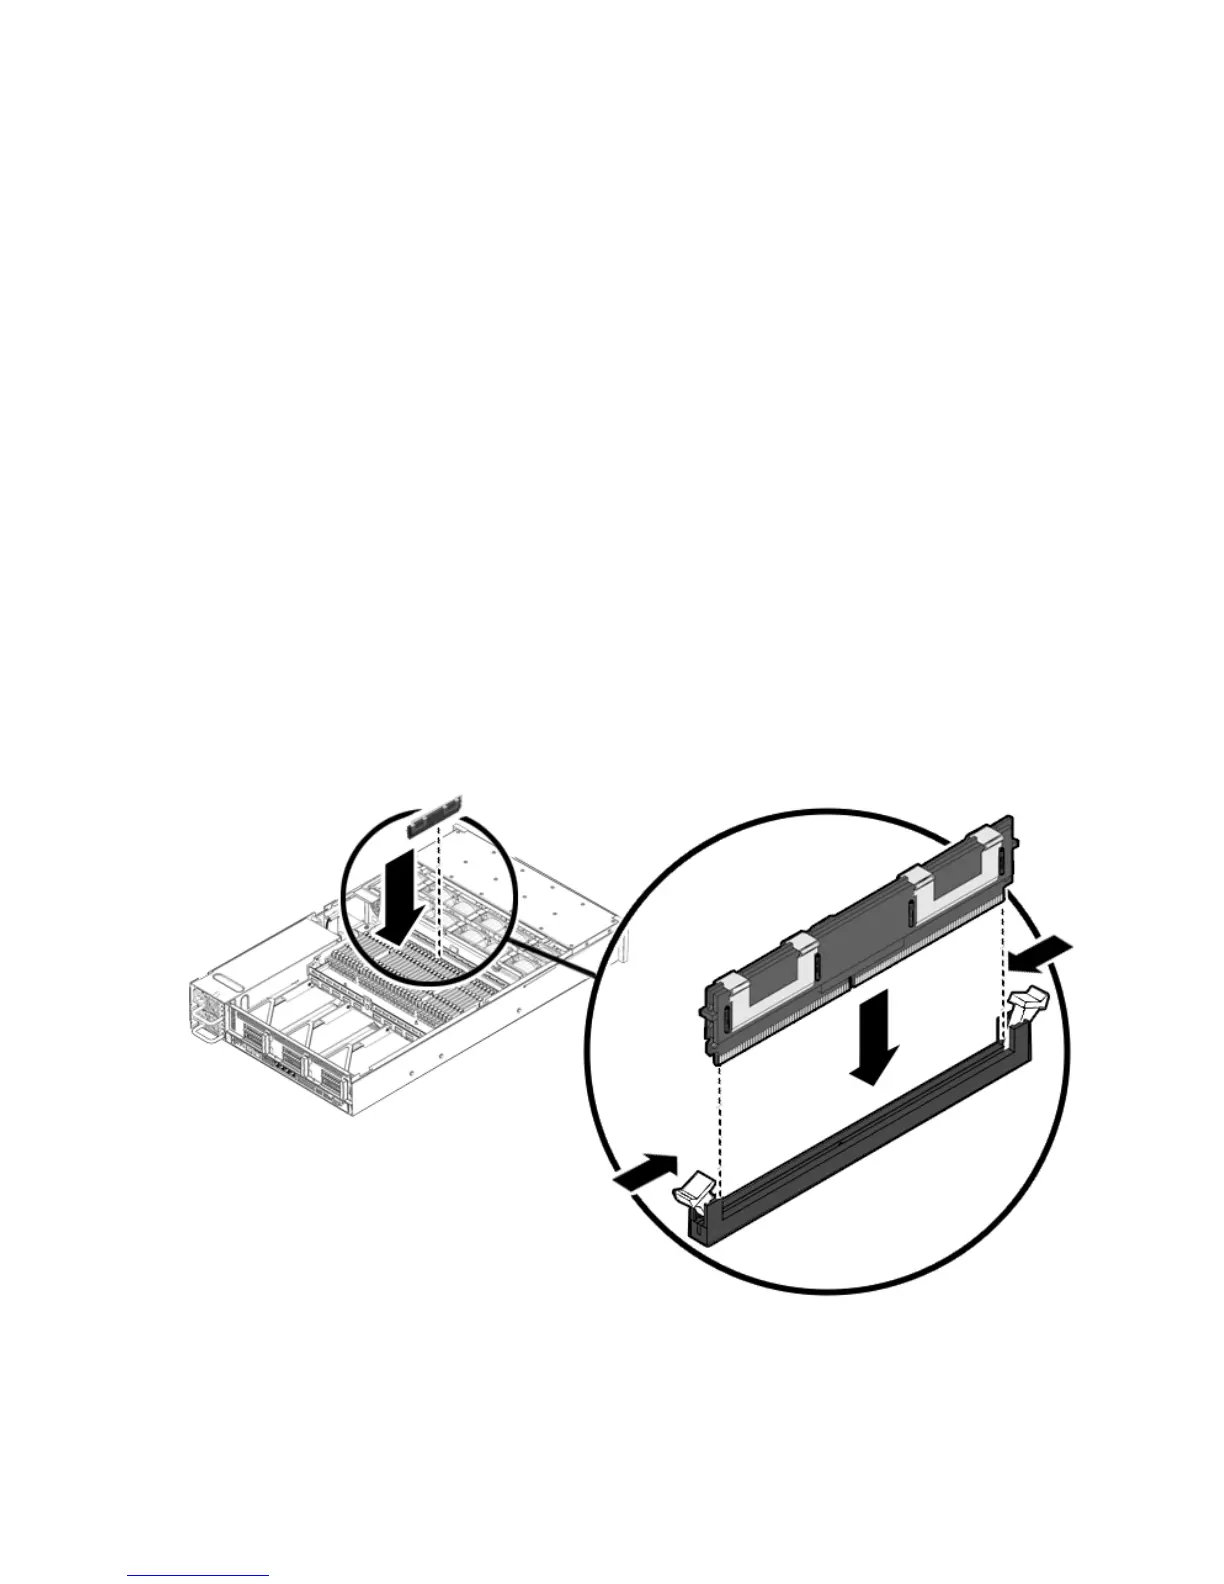
4. Push the FB-DIMM into the connector until the ejector tabs lock the FB-DIMM
in place.
If the FB-DIMM does not easily seat into the connector, verify that the orientation
of the FB-DIMM is as shown in
FIGURE 4-5. If the orientation is reversed, damage
to the FB-DIMM might occur.
5. Repeat Step 2 through Step 4 until all replacement FB-DIMMs are installed.
6. Install the top cover.
See Section 6.1, “Installing the Top Cover” on page 6-2.
7. Slide the server into the rack.
See Section 6.3, “Returning the Server to the Normal Rack Position” on page 6-4.
8. Reconnect the power cord (or cords) to the power supply (or supplies).
Verify that the AC Present LED is lit.
See Section 6.4, “Powering On the Server” on page 6-5.
9. Power on the server.
See Section 6.4, “Powering On the Server” on page 6-5.
FIGURE 4-5 Installing FB-DIMMs