Chapter 4 Servicing Motherboard Components 4-21
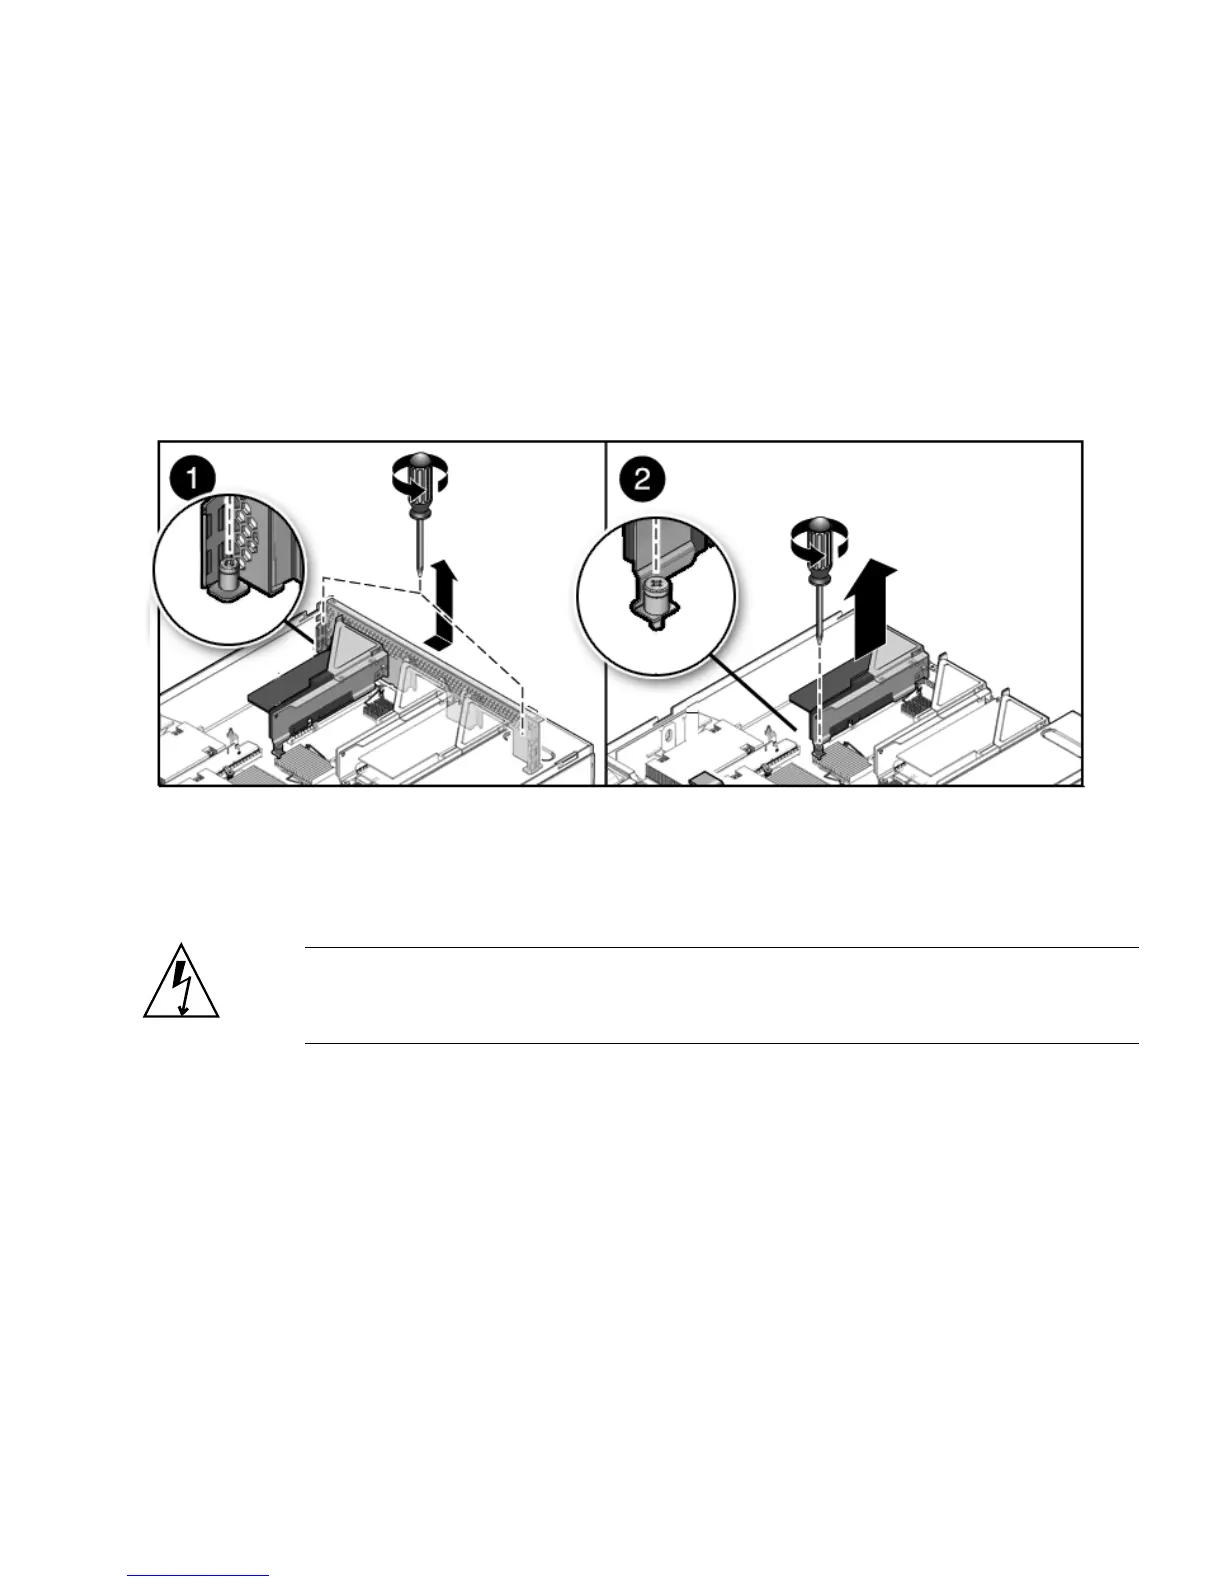
7. Loosen the captive retaining screw holding the front end of the riser to the
motherboard. [2]
8. Loosen the captive Phillips screw on the end of the riser.
9. Lift the riser up to remove it from the server. (
FIGURE 4-11)
Remove the riser and any PCIe cards attached to it as a unit.
FIGURE 4-11 Removing a PCIe Riser
4.5.2 Installing a PCIe Riser
Caution – Ensure that all power is removed from the server before removing or
installing risers. You must disconnect the power cables before performing this
procedure.
1. Lower the PCIe riser and any cards attached to it into the system. [3]
2. Slide the back of the riser into the motherboard back panel stiffener.
3. Tighten the screw that secures the riser to the motherboard. (
FIGURE 4-12)
4. Install the back panel PCI cross beam. [4]
a. Slide the crossbeam down over the PCIe risers.
b. Secure the PCI cross beam is secured with two captive Phillips screws.
5. Slide the server into the rack.
See Section 6.3, “Returning the Server to the Normal Rack Position” on page 6-4.