Questions? Call or Text +1-801-658-0015 • 35
The Sunstone CDDP-A welder can be connected to and controlled by a computer using an Ethernet connec-
tion. A Sunstone weld head connected to the welder can also be controlled by this connection. Follow the
instructions below to setup and congure the Ethernet connection. Additional Ethernet information, specic to
the Modbus messaging software, can be found in Appendix C.
1. Power on the CDDP-A welder.
2. Touch the Communications Button in the Navigation
Bar to open the Communication Screen.
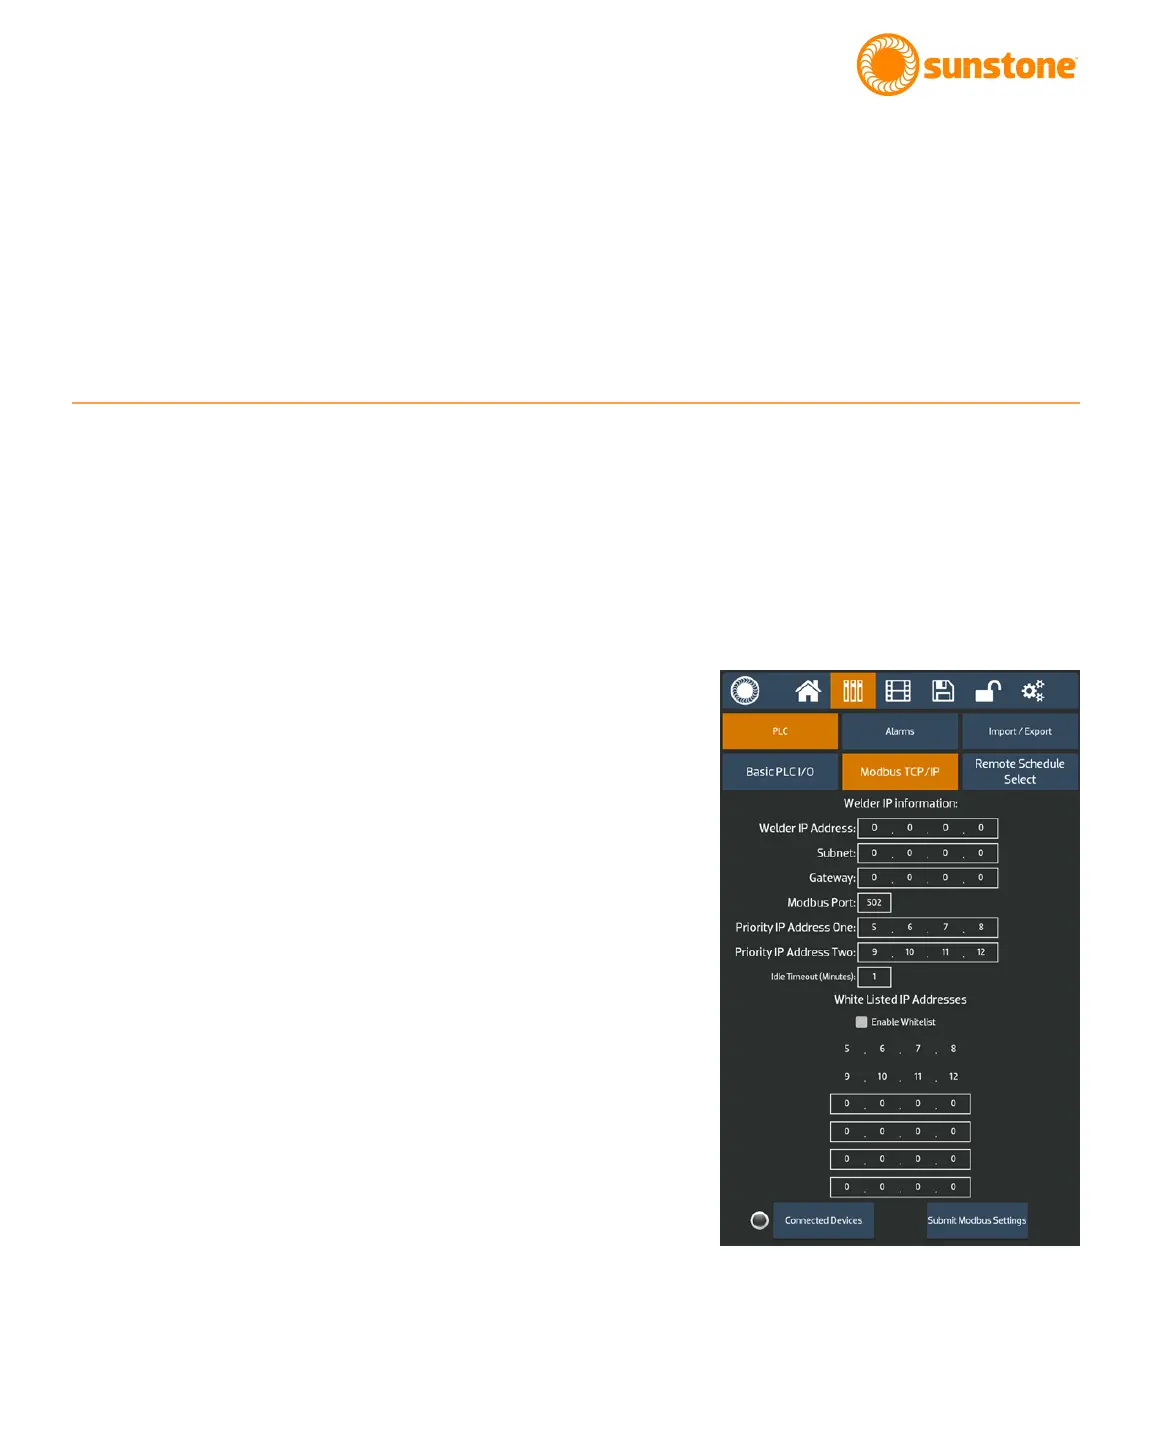
3. Select the PLC tab and then select the Modbus TCP/IP
sub tab. See Figure 35.1.
4. Enter the welder’s static IP address, which you can
retrieve from your Network Administrator. Typical
Routers default to IP address of 192.168.0.2 through
192.168.0.254. Be careful not to assign an IP address
that is already in use on your network.
5. Input the Subnet address of the welder. Typical routers
default this to 255.255.255.0.
6. Input the Gateway of the network that the welder is
connected to. Retrieve this from your Network Adminis-
trator. The Gateway will typically be the rst IP number
in the subnet mask. For example 192.168.0.1
7. The default port for Modbus is 502. You can enter any
number; however, port 502 will still be available to use
even with an additional port dened. Available port
values are 502 and 1025 through 65535.
Figure 35.1. To congure an ethernet connection,
access the Modbus TCP/IP screen by pressing the
Communications Button, and then the PLC button.