POWER TRIM AND TILT 8-5
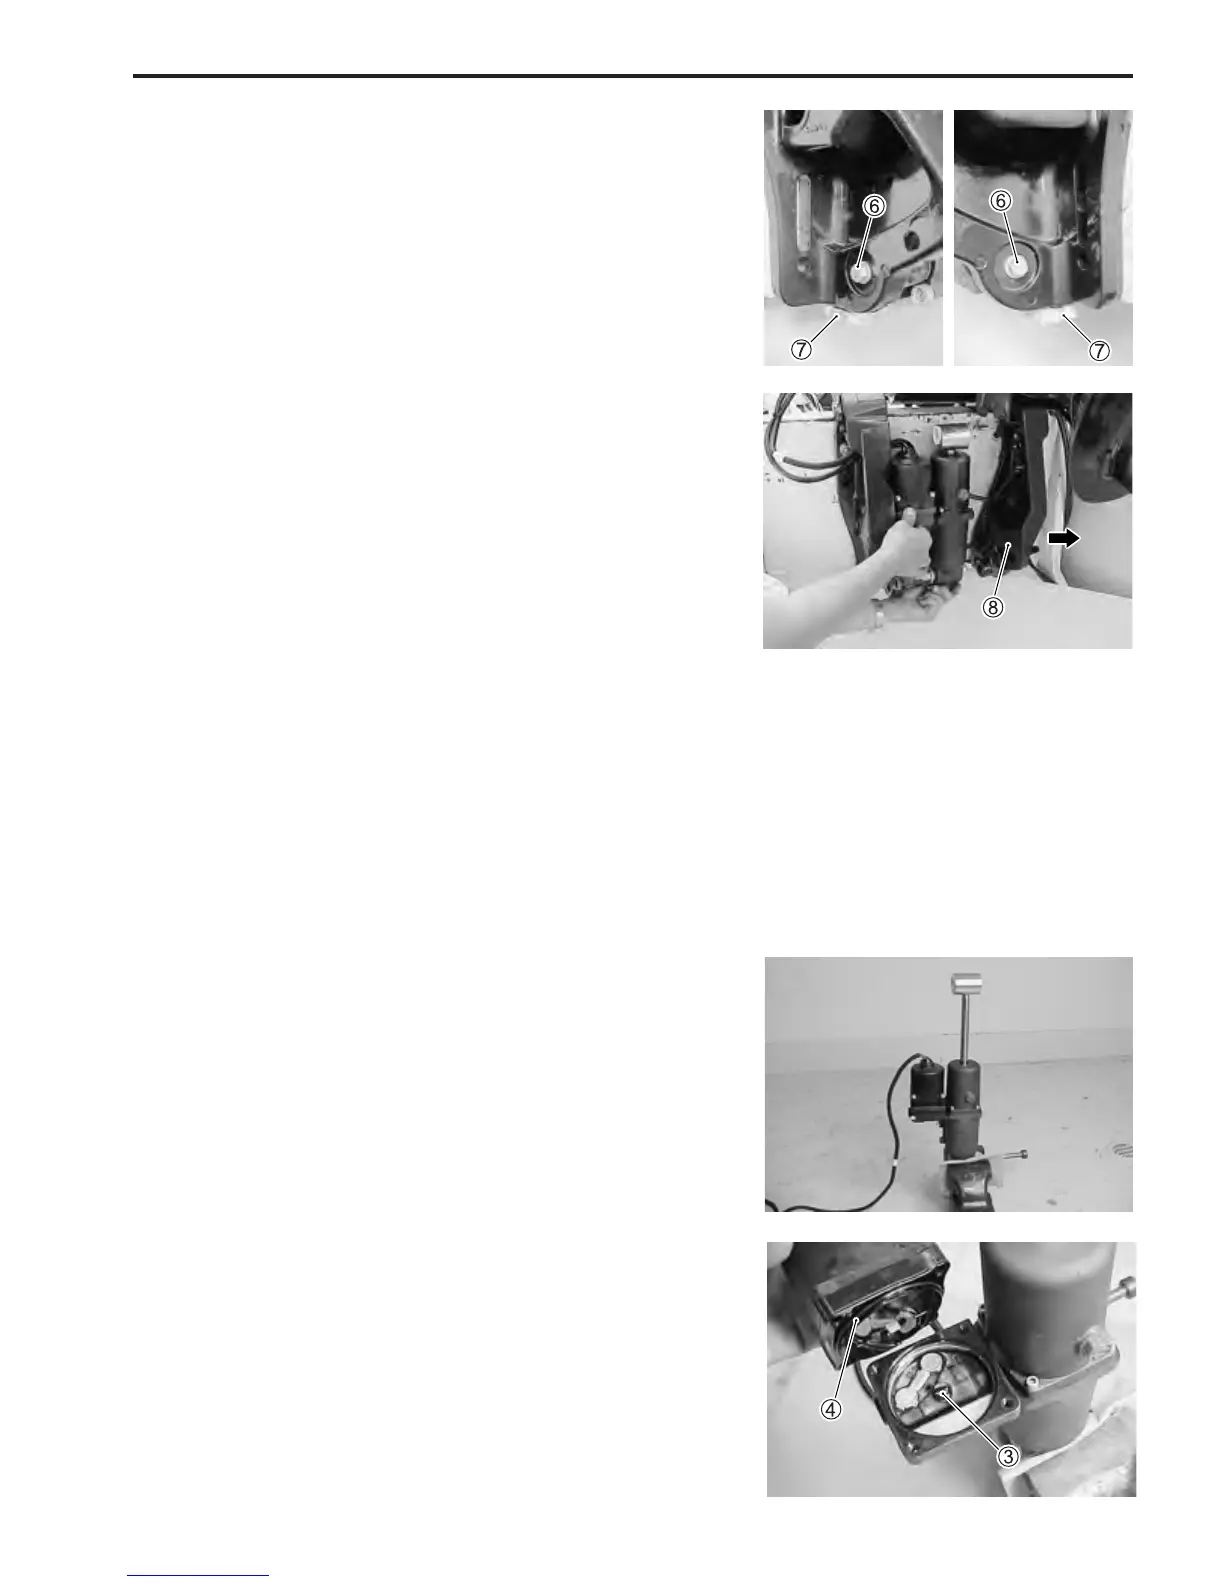
6. Remove PTT cylinder lower shaft bolts 6.
7. Remove two bolts and anode 7.
8. Slide STBD clamp bracket 8 off clamp bracket shaft, then
remove PTT unit.
DISASSEMBLY
NOTE:
Before disassembly, wash PTT body with a stiff bristle brush
and hot, soapy water to remove sand or dirt and dry PTT body
with compressed air.
1. Place lower mounting eye of PTT cylinder in a vise. Tighten
vise only enough to secure PTT unit, do not over tighten.
NOTE:
To prevent damage to PTT cylinder use wood blocks, vise jaw
protectors, etc., between vise jaws and PTT components be-
fore tightening vise.
2. Connect PTT motor cable leads (Green, Blue) to battery
and operate PTT motor until tilt piston rod is at maximum
stroke. (full-tilt up position)
3. Remove PTT motor. (See page 8-10)
Note position of drive joint 3 and O-ring 4, before removing
them.
4. Remove fill plug and drain PTT oil into suitable container.