getting started
46
SYNRAD FH Series Flyer Operator’s Manual Version 3.4
Connecting
USB Communication cable
Use the Universal Serial Bus (USB) cable to establish the initial communications link between Flyer and
your Windows
®
development computer.
Important Note: Install WinMark Pro v6 before you connect Flyer to your computer’s USB port and
power it up. If WinMark Pro is not installed rst, the Windows
®
operating system
will arbitrarily assign a USB driver that is not compatible with Flyer’s USB port
protocols.
Important Note: After project development is complete, we highly recommend the use of Ethernet
communications instead of USB in situations where you are operating in WinMark
control mode during around-the-clock production because the Ethernet protocol is
better designed to handle continuous data transfer between devices.
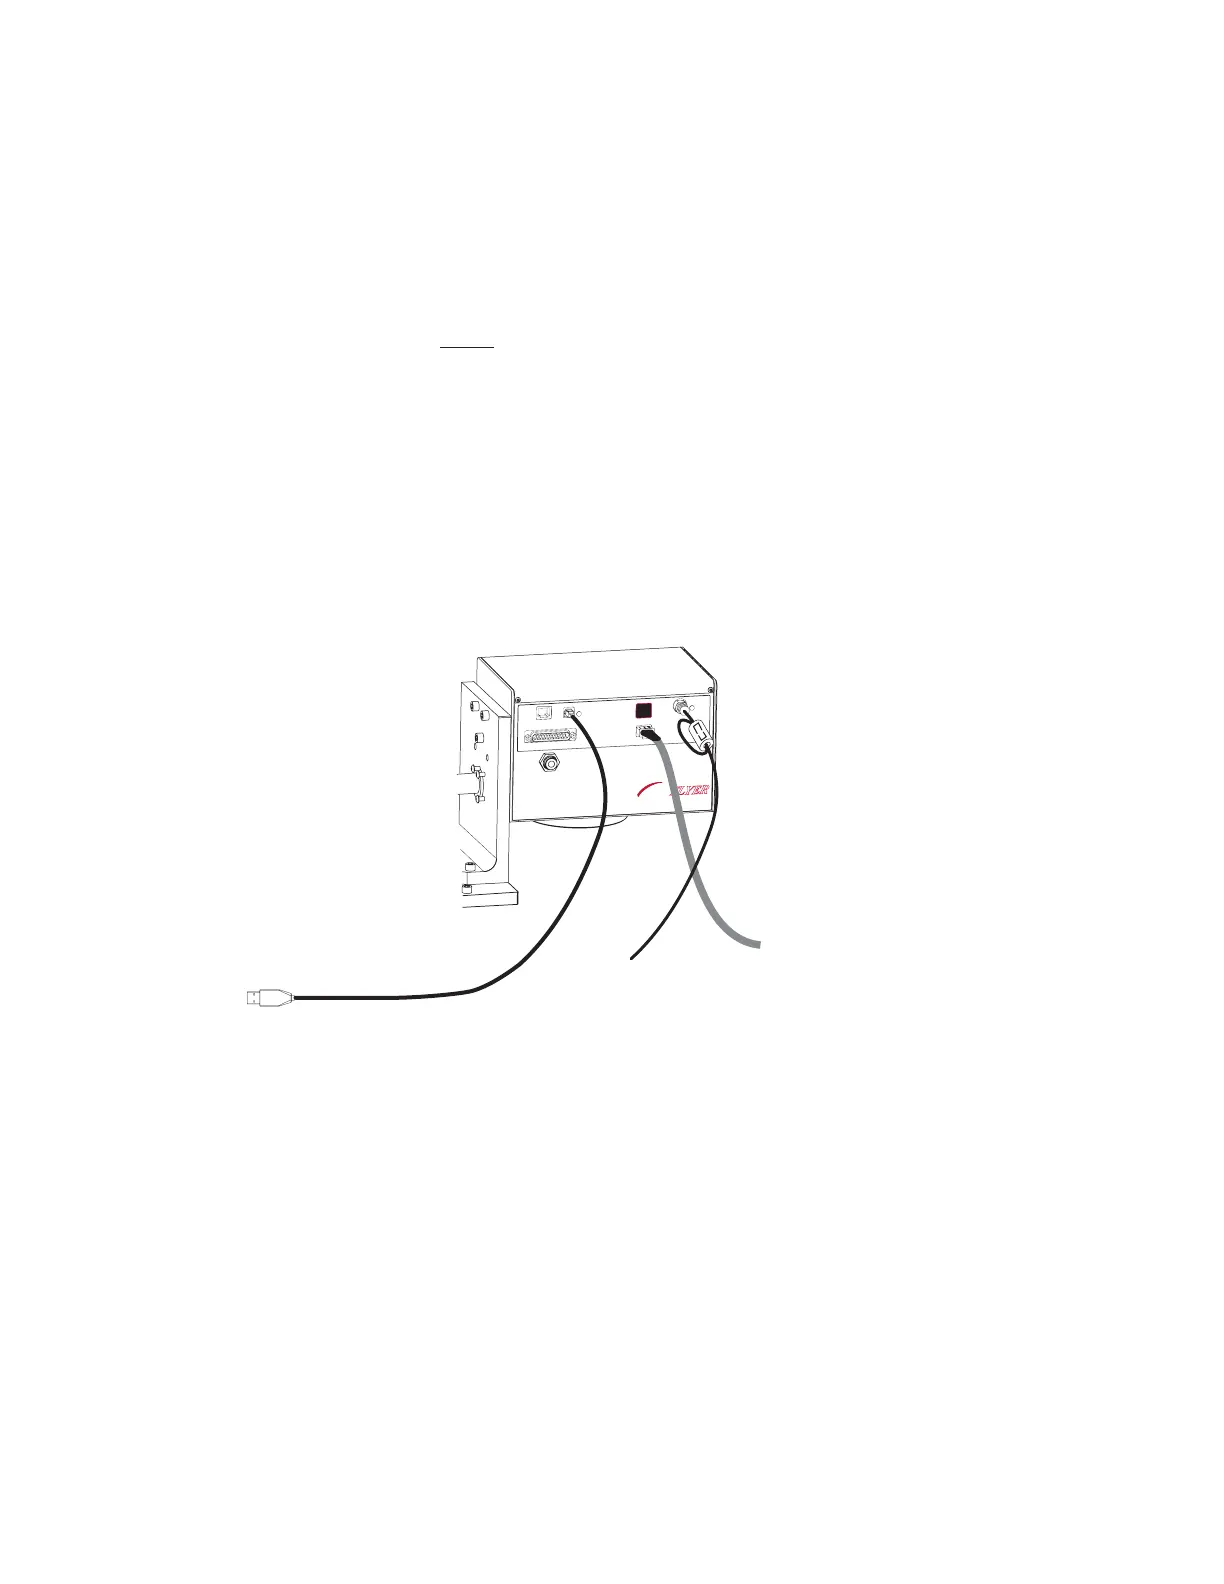
To connect the USB Communication cable, refer to Figure 1-11 and perform the following steps:
FH
MARKING HEAD
FLYER
ETHERNET
USB
LASER
CONTROL
POWER
USER INTERFACE
TEST
MARK
STATUS
Figure 1-11 Connecting the USB Communication cable
1
Locate the USB Communication cable in the ship kit. This double-shielded cable is approximately
six-feet (1.8 m) long with a USB “A” plug on one end and a USB “B” plug on the other.
Important Note: If you choose to provide your own USB cable, you must ensure that it is double-
shielded. Do not use unshielded or single-shielded cables in industrial environments.
2
Plug the USB “A” connector (the at rectangular end) into one of the USB “A” ports on your com-
puter.
3
Plug the USB “B” connector (the square end) into the USB port on the side of the Flyer head as
shown in Figure 1-11.
Note: When both USB and Ethernet cables are connected, the USB port takes precedence over the Eth-
ernet port for control purposes.