Triggering
3-68
TDS5000 Series User Manual
Use this procedure to detect and trigger on a glitch or to ignore a glitch.
Overview To trigger on a glitch Control elements and resources
Select glitch
triggering
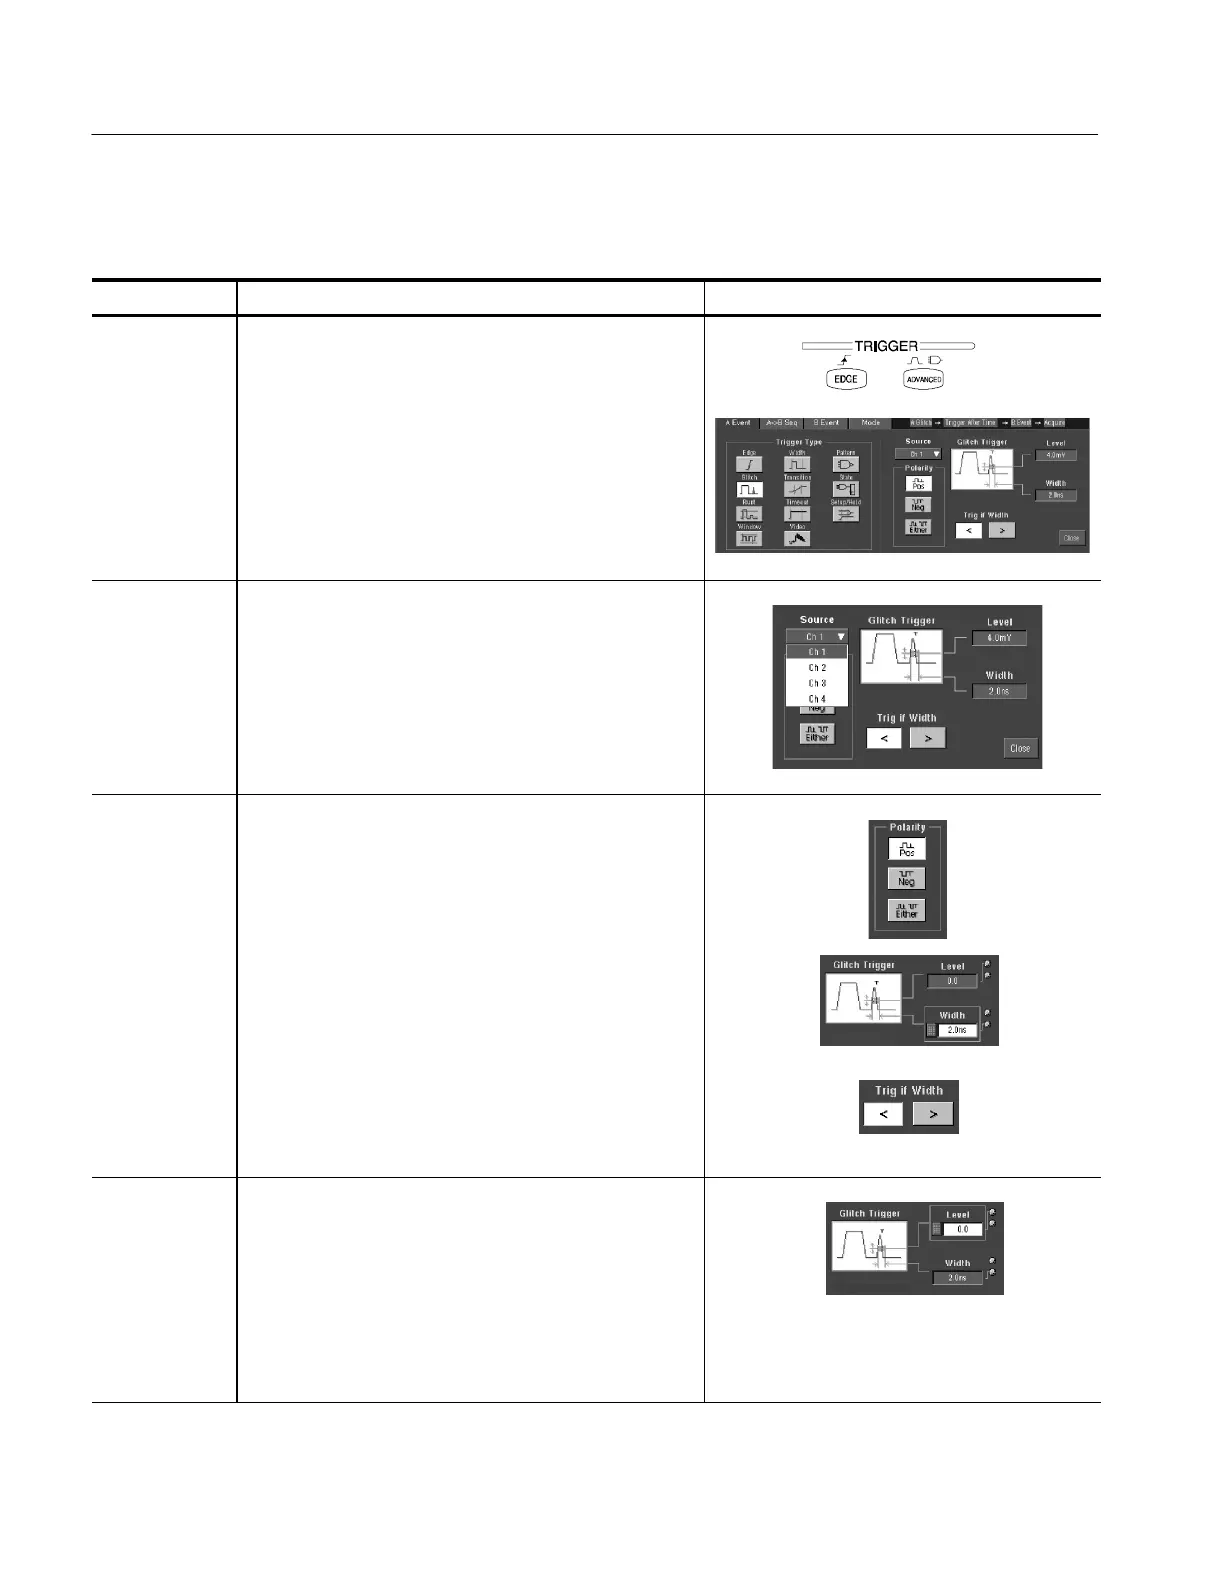
1. Push the front-panel ADVANCED button.
2. On the Trigger Setup control window, select the A Event
tab.
3. Click Glitch.
Select the
source
4. To specify which channel becomes the trigger source,
click Source, and select the source from the list.
Select the
polarity and
width
5. Click a Polarity button to specify the glitch polarity:
H Pos looks at positive-going pulses.
H Neg looks at negative-going pulses.
H Either looks at both positive and negative pulses.
6. To specify the width of t he glitch, click Width and set the
glitch width using the multipurpose knob or keypad.
7. To specify whether to trigger on gl itches narrower or
greater than the width you specify, click:
H Trig if Width < to trigger only on narrower pulses.
H Trig if Width > to trigger only on wider pulses.
Set the level 8. Click Glitch Trigger Level and use the multipurpose
knobs, keypad, or front-panel LEVEL knob to set the
level that the glitch must cross to be recognized by the
oscilloscope.
You can set the level to a value appropriate to either the
TTL or ECL logic families by clicking TTL or ECL on the
Level pop-up keypad.
Triggering on a Glitch
 Loading...


