98
BRAKES
Read all of SAFETY and this section before attempting any procedure. Pay particular attention to Notices, Cautions, Warnings and Dangers.
when released. If the pedal does not return fully or is
sluggish, the brake pedal bushings and pivot bolt
should be inspected (Figure 3).
3. Check the brake pedal free travel.
Brake pedal free travel is the distance the pedal
moves from rest to the point at which the brake
shoes first contact the brake drums. This should not
be confused with the light resistance that is felt as
the brake pedal is depressed enough to remove
slack from the compensator and cables. Too much
pedal free travel may indicate wheel brakes not
adjusting, wear in the cables and linkages or initial
break-in of components. Not enough pedal free
travel may indicate improper adjustment of the wheel
brake or the brake linkage. Either condition can
decrease the risk of the brakes from adjusting prop-
erly.
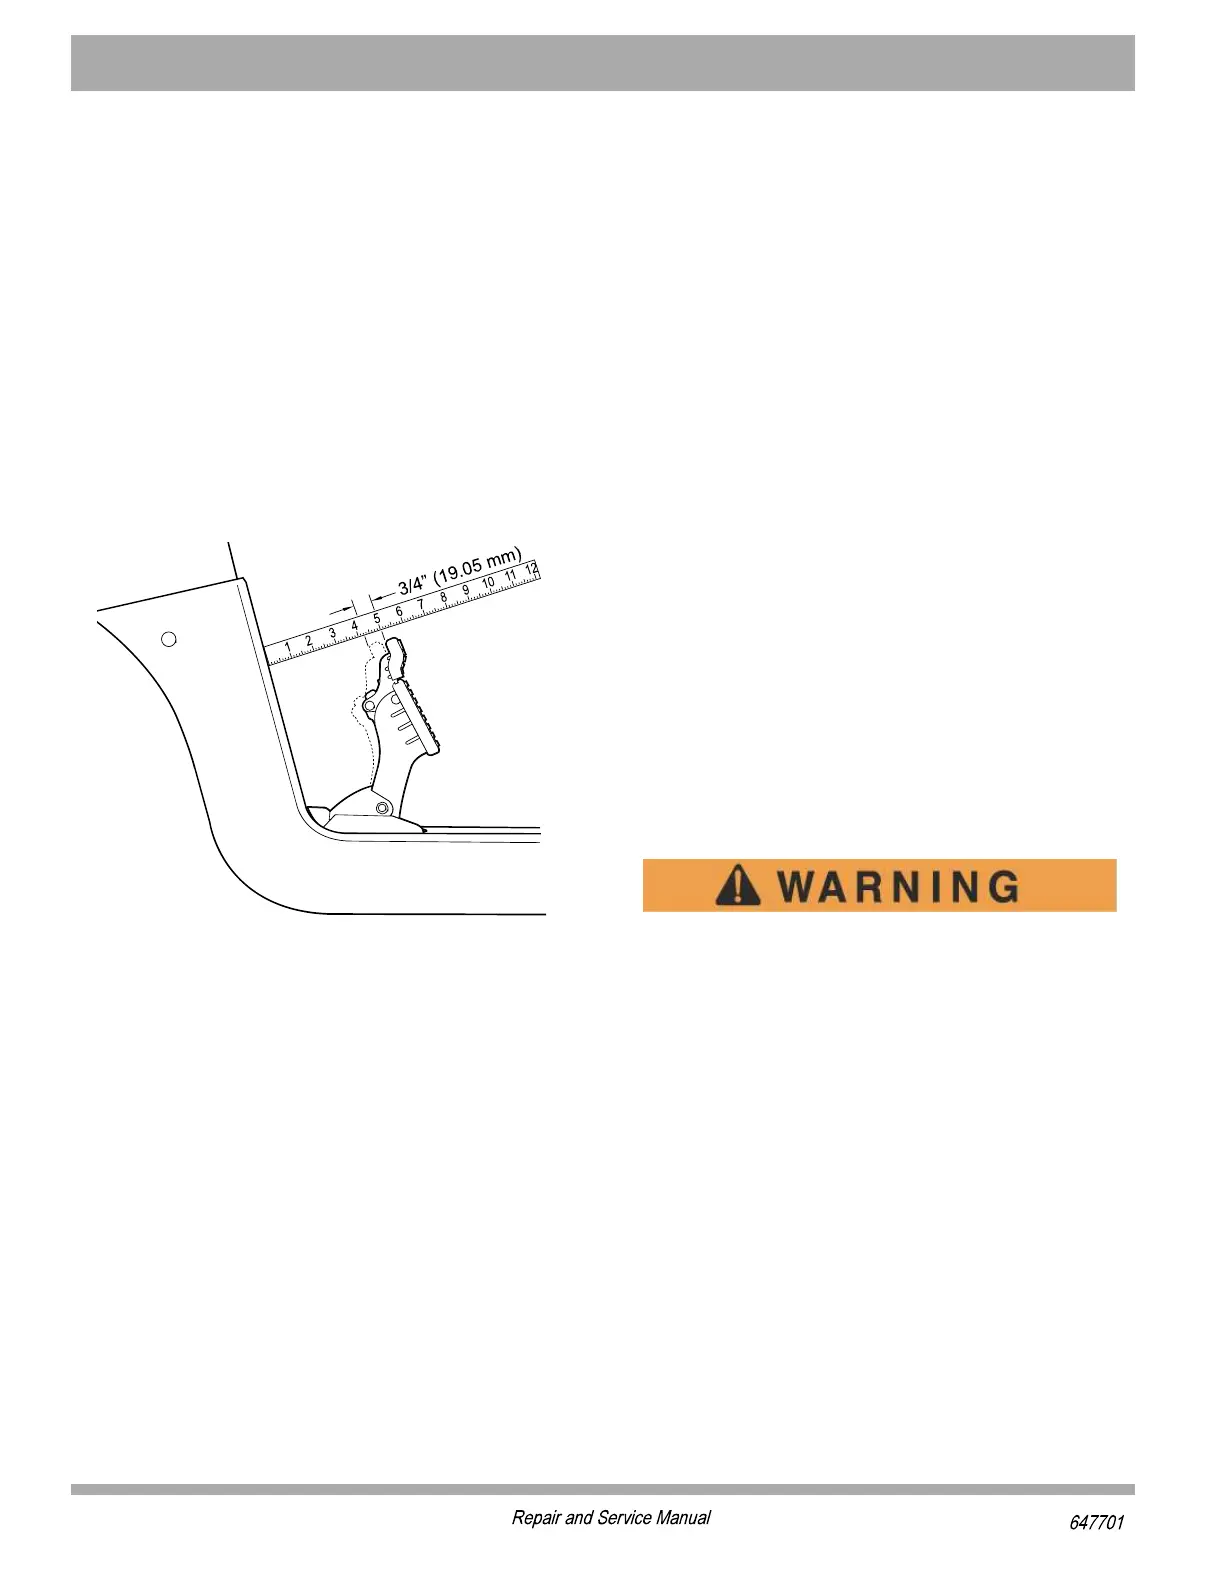
Figure 4 Checking for Excessive Free Travel
The correct brake pedal free travel setting should be set
to 3/4" (1.9 cm) (Figure 4).
Adjust brake pedal free travel as described in MAINTE-
NANCE AND REPAIRS if required.
4. Inspect the brake cables.
Inspect for damage to the outer cable, fraying of the
inner cable or lack of free motion when the pedal is
applied and released. Inspect the brake cable sup-
ports to be sure the cables are properly secured. If
any of these conditions are found, replace both
cables and equalizer as a set.
5. Check the clevis pins.
Check clevis pin and snap ring attaching the brake
cables to the brake levers. They must be loose when
the brake pedal has been released . If the clevis pins
are not loose, but brake pedal free travel is correctly
adjusted and the brake cables move freely, the prob-
lem is likely in the wheel brake.
6. Inspect the brake cable equalizer linkage.
Inspect for signs of corrosion, damage, wear or
excessive misalignment. Replace if corrosion, dam-
age, or wear is found.
7. Inspect parking brake pedal hinge.
Check for broken or rusted springs. and correct
retention of the hinge pin. Operate parking brake
pedal to confirm smooth operation of the hinge
mechanism.
8. Check the condition and operation of the parking
brake latching mechanism.
The parking brake should latch firmly and release as
soon as the accelerator pedal is depressed.
9. Inspect the parking brake kick-off cam.
Look for wear and for correct adjustment. With the
parking brake engaged and fully latched.
10. Inspect kick-off cam linkage and bushings.
Check for wear and damage. The kick-off cam pivot
and bushings should move freely and be free of cor-
rosion. The kick-off cam should rotate when the
accelerator pedal is depressed.
Periodic Brake Performance Test (PBPT)
To decrease the risk of severe injury or death
caused from driving a vehicle with poorly oper-
ating brake system, the braking system must
be correctly maintained. All driving brake tests
must be done in a safe location for the safety
of all personnel.
The Periodic Brake Performance Test (PBPT) must be
done according to specifications (see Periodic Service
Schedule in the GENERAL INFORMATION AND ROU-
TINE MAINTENANCE section) for inspection of braking
system performance. The PBPT is a good method for
identifying subtle loss of brake performance over time. It
is also useful as part of the fault diagnosis.
Before you do this test, inspect the brake pedal and link-
age. Correct any problems found including adjusting the
brake pedal free travel if needed.
The purpose of this test is to compare the braking perfor-
mance of the vehicle to the braking performance of new
or “known to be good” vehicles or verify acceptable stop-
ping distance (see below). Actual stop distances will be
8S1IEWYVIERH'SVVIGX&VEOI4IHEP*VII8VEZIP
6IPIEWI4EVOMRK&VEOI
,SPHErVYPIVTIVTIRHMGYPEV[MXLXLIJPSSVQEX
ERHGPSWIIRSYKLXSXLITIHEPXSXEOIEVIEHMRK
*VIIXVEZIPHMWXERGIWLSYPHFIEVSYRHMRGL
%HNYWX&VEOI'EFPI&VEGOIXLEVH[EVIXSEPPS[JSV
GSVVIGX*VII8VEZIP(MWXERGI