102
BRAKES
Read all of SAFETY and this section before attempting any procedure. Pay particular attention to Notices, Cautions, Warnings and Dangers.
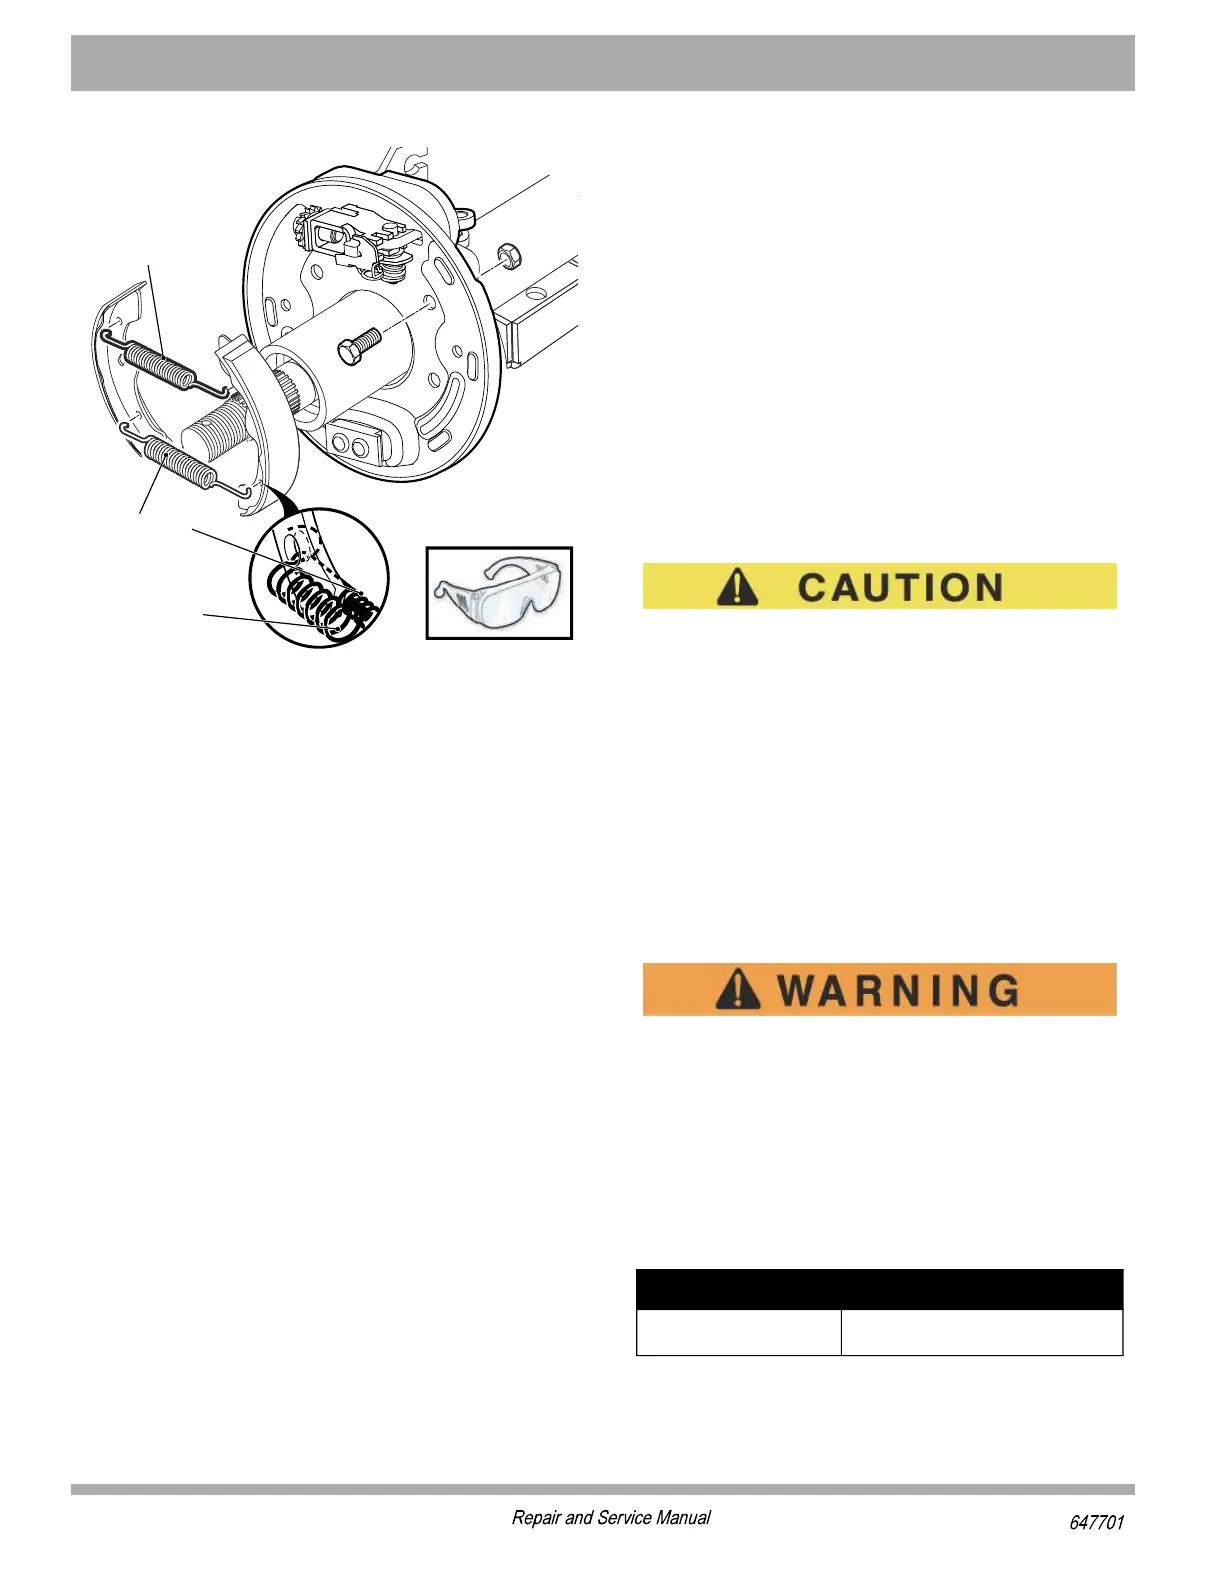
Figure 9 Orientation of Brake Shoe Springs
11. Repeat procedure at the opposite wheel brake.
12. Check/adjust brake pedal free travel.
When the brake system is serviced or needs parts
replaced, the brake pedal free travel must be
checked and adjusted. See ’Adjusting Brake Pedal Free
Travel’. This includes all linkage and wheel brake
components.
MAINTENANCE AND REPAIRS
Tool List Qty.
Hydraulic Floor Jack .................................................... 1
Scale............................................................................ 1
Jack Stands .................................................................4
Wheel Chocks .............................................................4
Socket, 1/2” .................................................................1
Socket, 3/4” .................................................................1
Socket, 11/16”..............................................................1
Socket, 15/16” .............................................................1
Socket, 1 1/8” ..............................................................1
Socket, 1/4” .................................................................1
Torque Wrench, ft. lbs.................................................. 1
Torque Wrench, in. lbs.................................................1
Extension, 6" ............................................................... 1
Ratchet ........................................................................ 1
Open End Wrench, 1/4”...............................................1
Open End Wrench, 1/2”...............................................1
Open End Wrench, 5/8”...............................................1
Straight Blade Screwdriver .......................................... 1
Straight Blade Screwdriver, Narrow............................. 1
Pliers............................................................................1
Vernier/Dial Calipers ....................................................1
Plastic Tipped Hammer................................................1
Puller (P/N 15947G1) ..................................................1
Pry Bar.........................................................................1
Dust Mask....................................................................1
Emery Cloth .................................................................1
Parts Replacement vs. Repair
Some maintenance or repair tasks require a lot of labor to
do correctly. Assessment of the condition of worn compo-
nents is critical to the operation of the brake system. In
some cases, component replacement can be more cost
effective than the removal, cleaning, inspection and reas-
sembly of the component.
Adjusting Brake Pedal Free Travel
Brake pedal free travel MUST be checked and
adjusted any time that the brake system is serviced
or when parts are replaced.
Brake pedal free travel is the distance the pedal travels
from rest to the point at which the brake cables start to
move the brake levers. This should not be confused with
the light resistance that is felt as the brake pedal is
pressed enough to remove slack from the compensator
and cables. Correct adjustment of free travel is essential
to proper brake function. Too much pedal free travel will
limit braking capability. Too little pedal free travel may
cause the brakes to drag (not fully released). Either con-
dition can decrease the risk of the brakes from adjusting
properly.
This procedure will adjust the brakes and seat
brake system components. The brake system
can not be effective for the first few applica-
tions of the brake pedal.
Pre-adjust service brake pedal free travel to the correct
setting by loosening the jam nut and adjust the spherical
nut (Figure 10). Tighten the jam nut to the torque value
specified below.
,IEZ]7LSI
7TVMRK
0MKLX7LSI
7TVMRK
%HNYWXIV
7TVMRK
Item Torque Specification
Jam Nut
10 - 11 ft. lbs. (14 - 15 Nm)