104
BRAKES
Read all of SAFETY and this section before attempting any procedure. Pay particular attention to Notices, Cautions, Warnings and Dangers.
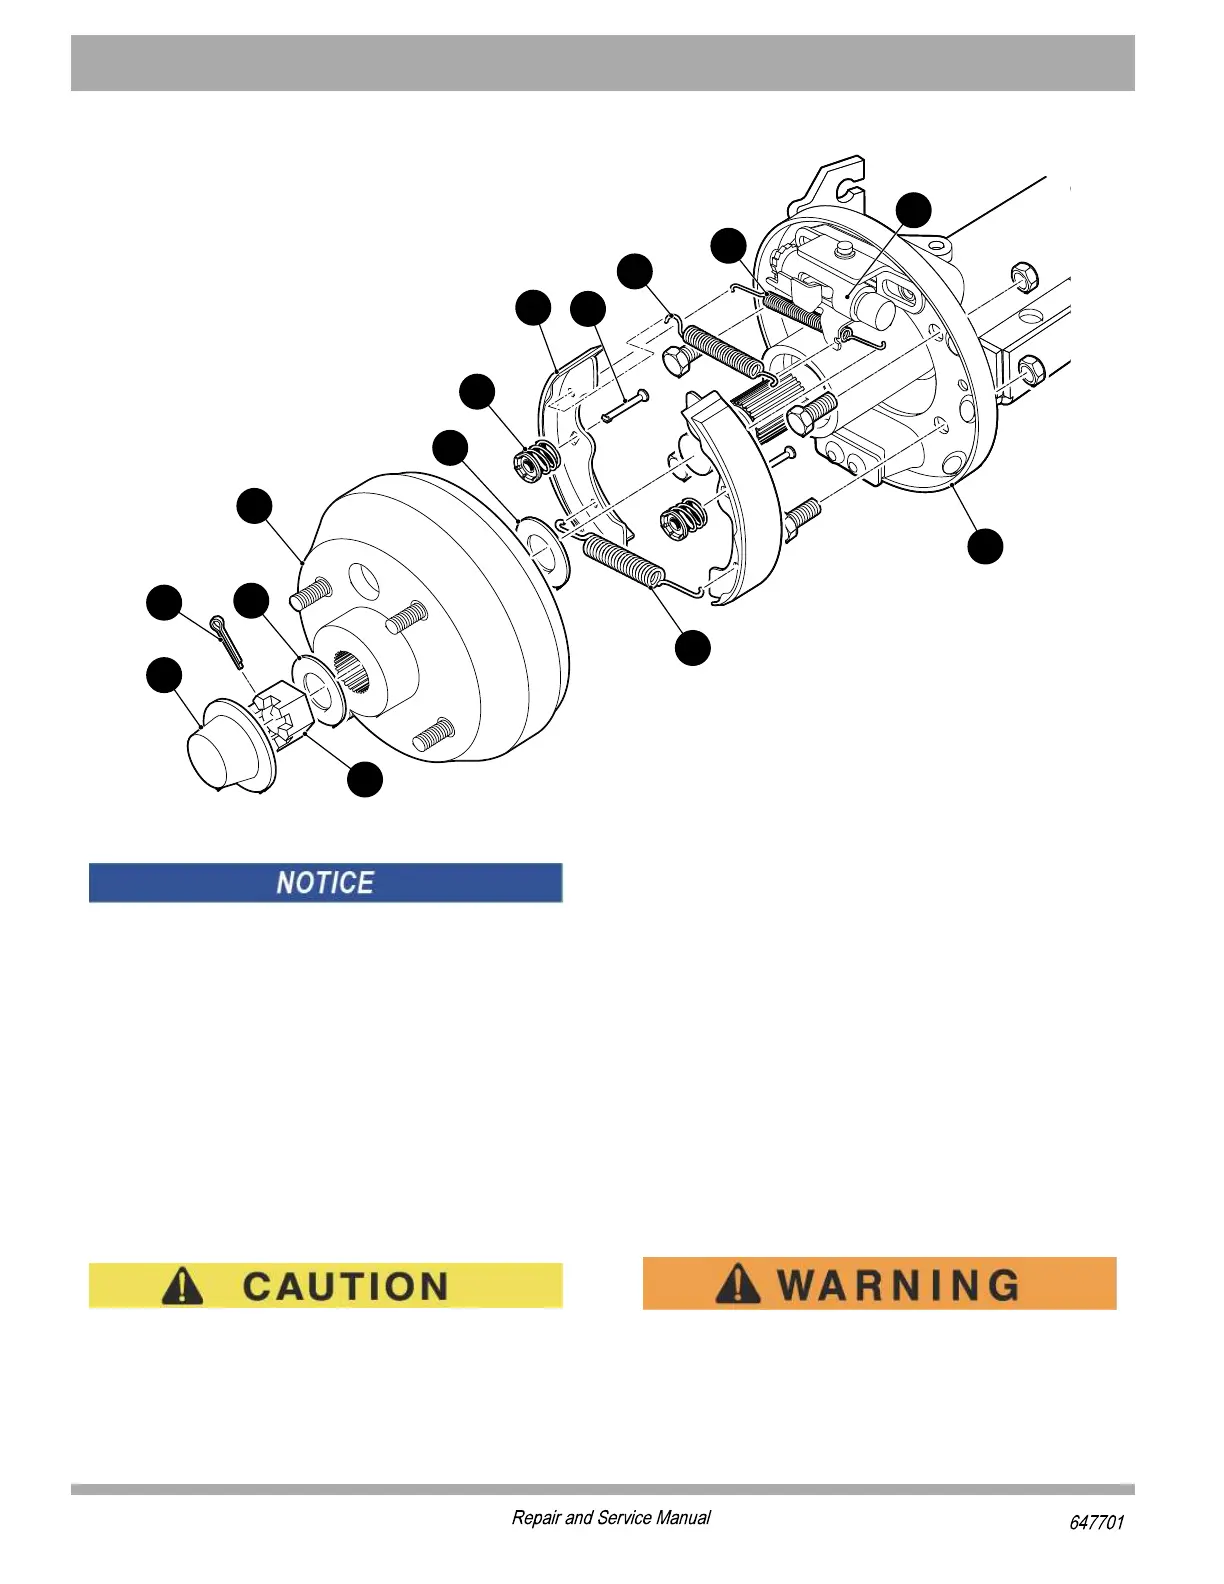
Figure 11 Brake Assembly
Pay particular attention to the location of the inner brake
drum washer (6) inside the brake drum, which can be on
the axle shaft or attached to the rear of the drum hub.
This washer must be installed again when the brake is
assembled again.
To install the brake drum, clean the axle shaft and the
splines on the brake drum to remove dirt, grease and for-
eign matter. Apply a small amount of anti-seize com-
pound to the axle spline. Install the inner brake drum
washer (6) and slide the brake drum (5) into position.
Make sure the nose of drum hub extends past the end of
the axle splines. If not, remove drum and install one addi-
tional inner brake drum washer (total of 2) to get neces-
sary clearance.
Do not back off nut to install cotter pin.
Install the remaining hardware and tighten the nut to 80-
90 ft. lbs. (108 - 122 Nm) torque. Continue to tighten until
a new cotter pin can be installed through the castellated
nut and the hole in the axle. Maximum torque is 140 ft.
lbs. (190 Nm).
Wheel Brake Service
Wheel brake service consists of disassembly, cleaning,
inspection, lubrication and re-assembly of the wheel
brake. Worn or damaged components must be replaced.
Wheel brake service is required periodically as a preven-
tive maintenance measure (see Periodic Service Sched-
ule). The wear rate of brake shoes and required service
intervals will vary based on usage, terrain and other con-
ditions. It is recommended that wheel brake service be
performed periodically on a sample of vehicles within the
service fleet to establish the most efficient and effective
service interval.
Remove the brake drum as described in ‘Brake Drum
Removal and Installation.
Wear eye protection and a mask when clean-
ing brake components. Do not use com-
pressed air to remove brake dust from brake
assembly.

 Loading...

