FUEL SYSTEM
Read all of SAFETY and this section before attempting any procedure. Pay particular attention to Notices, Cautions, Warnings and Dangers.
65
to wear or clogging of internal passages with foreign
material. DO NOT bend the float pin during removal.
Refer to “Carburetor fault diagnosis’ on page 134.”.
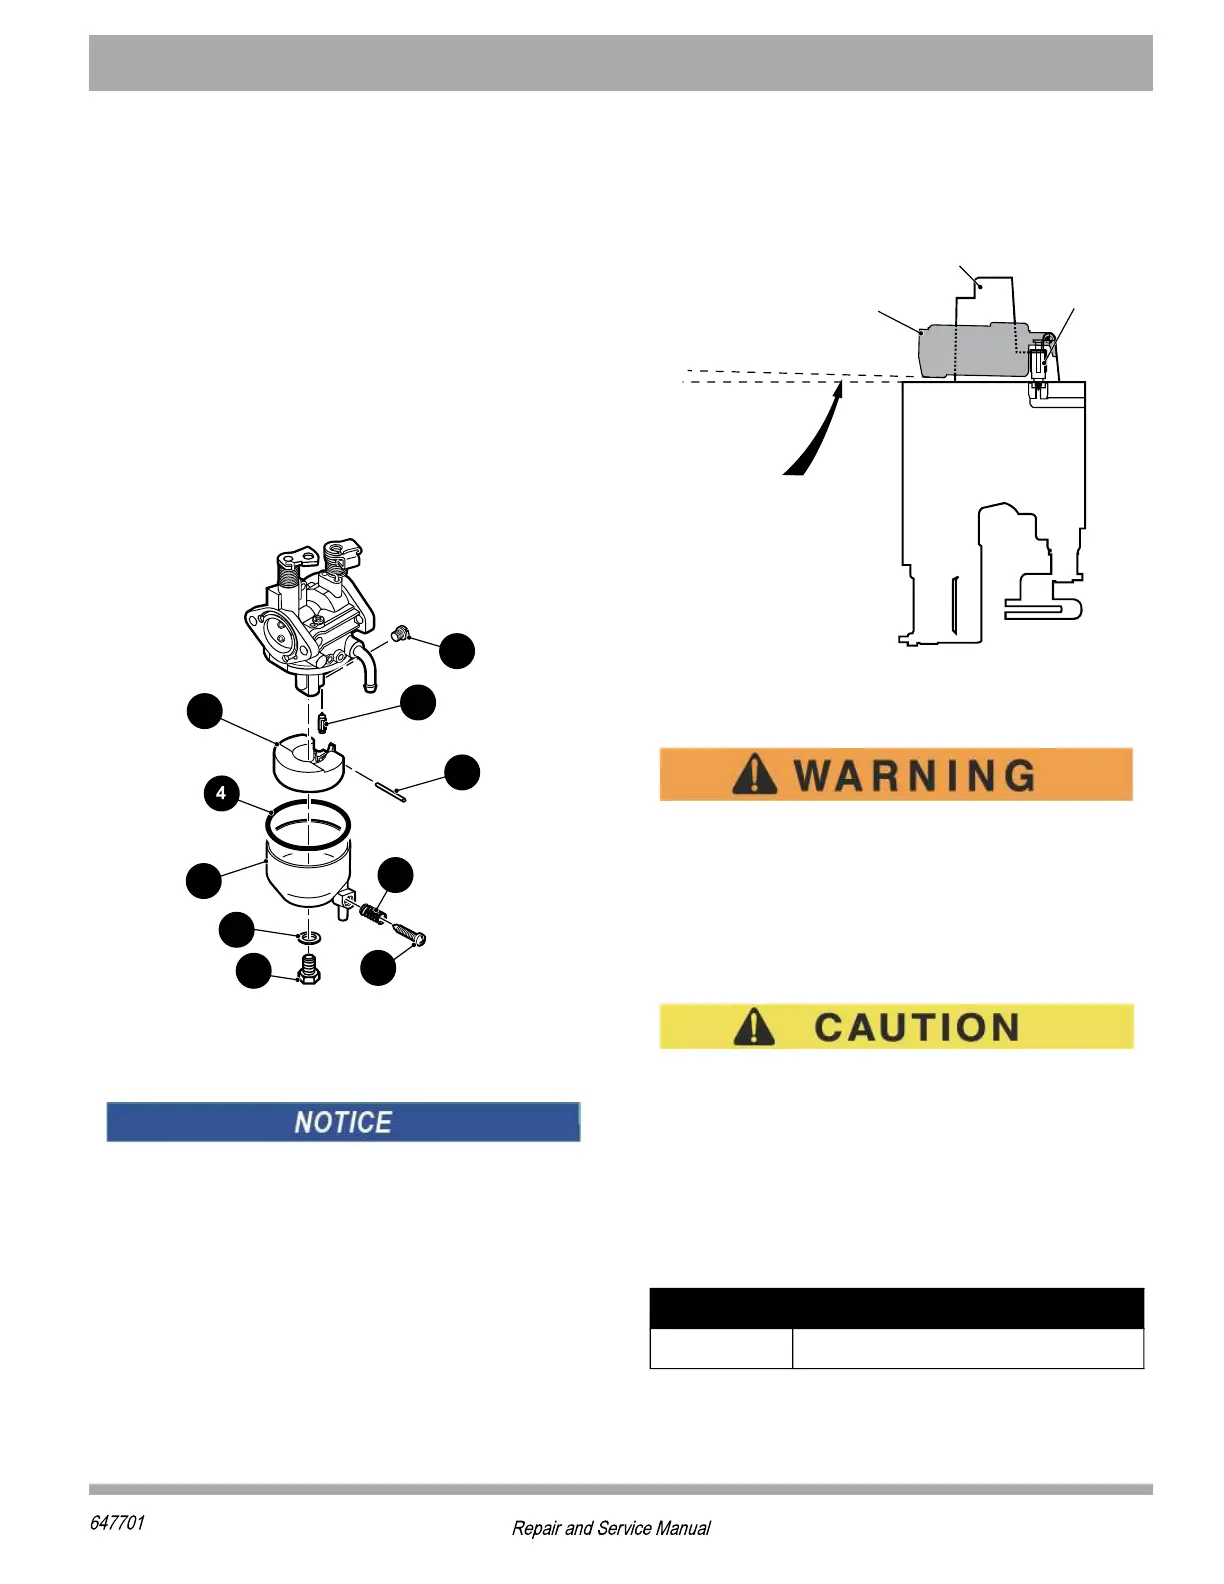
Remove the float bowl (1) by removing the retaining
screw (2) and washer (3) (Figure 9).
Inspect the bowl gasket (4) for nicks or cuts. Carefully
press out the float pin (5), remove the float (6) and the
inlet valve (7). Inspect the inlet valve for wear at its tip.
Remove the main jet (8).
Use solvent to wash all parts and blow through all pas-
sages with compressed air. Replace all gaskets and any
parts which show significant wear or damage. The drain
screw (9) and spring (10) can be used to drain the fuel
from the bowl without removing the bowl.
Figure 9 Carburetor Disassembly
Float Level Alignment
The float level cannot be adjusted but should be
inspected for proper alignment.
Turn the carburetor upside down. Remove the bowl. With
the carburetor inverted, the B side top edge of a properly
adjusted float will be slightly above parallel to the bowl
gasket surface and both sides of the float will be level with
each other (Figure 10). If the sides of the float are not par-
allel or if the B side of the float is not slightly above paral-
lel with the bowl gasket surface then the float should be
replaced. Reinstall the bowl, washer and the screw.
Check for fuel leaks.
Check for free movement of the choke shaft before
installing the carburetor. Lubricate the bushings with WD-
40
®
oil or equivalent.
Figure 10 Float Adjustment
Carburetor Installation
To decrease the risk of possible injury from
explosion or fire, check for clogged or kinked
hoses. Clogged or kinked carburetor hoses are
not only detrimental to the proper operation
and performance of the vehicle, but can also
be a safety hazard in the case of fuel leaking
on a hot engine.
Do not let the carburetor vent hose become clogged
or kinked. Engine heat will cause the fuel in the car-
buretor bowl to expand and may result in fuel being
expelled from the carburetor if unable to vent
through the vent tube.
Replace the carburetor in reverse order of removal. Use a
new gasket to ensure sealing of carburetor. Tighten hard-
ware to torque value specified below (Figure 9).
Item Torque Specification
Hardware
50 - 70 in. lbs. (6 - 8 Nm)
*PSEXWLSYPHFIEPMKRIHWS
XLEXXSTMWTEVEPPIPSV
qWPMKLXP]EFSZIrTEVEPPIP
[MXLKEWOIXWYVJEGI
*PSEX
*PSEX
:EPZI
'EVFYVIXSV
&SH]
*PSEX'LEQFIV7XIQ