REAR SUSPENSION
Read all of SAFETY and this section before attempting any procedure. Pay particular attention to Notices, Cautions, Warnings and Dangers.
111
REAR SUSPENSION
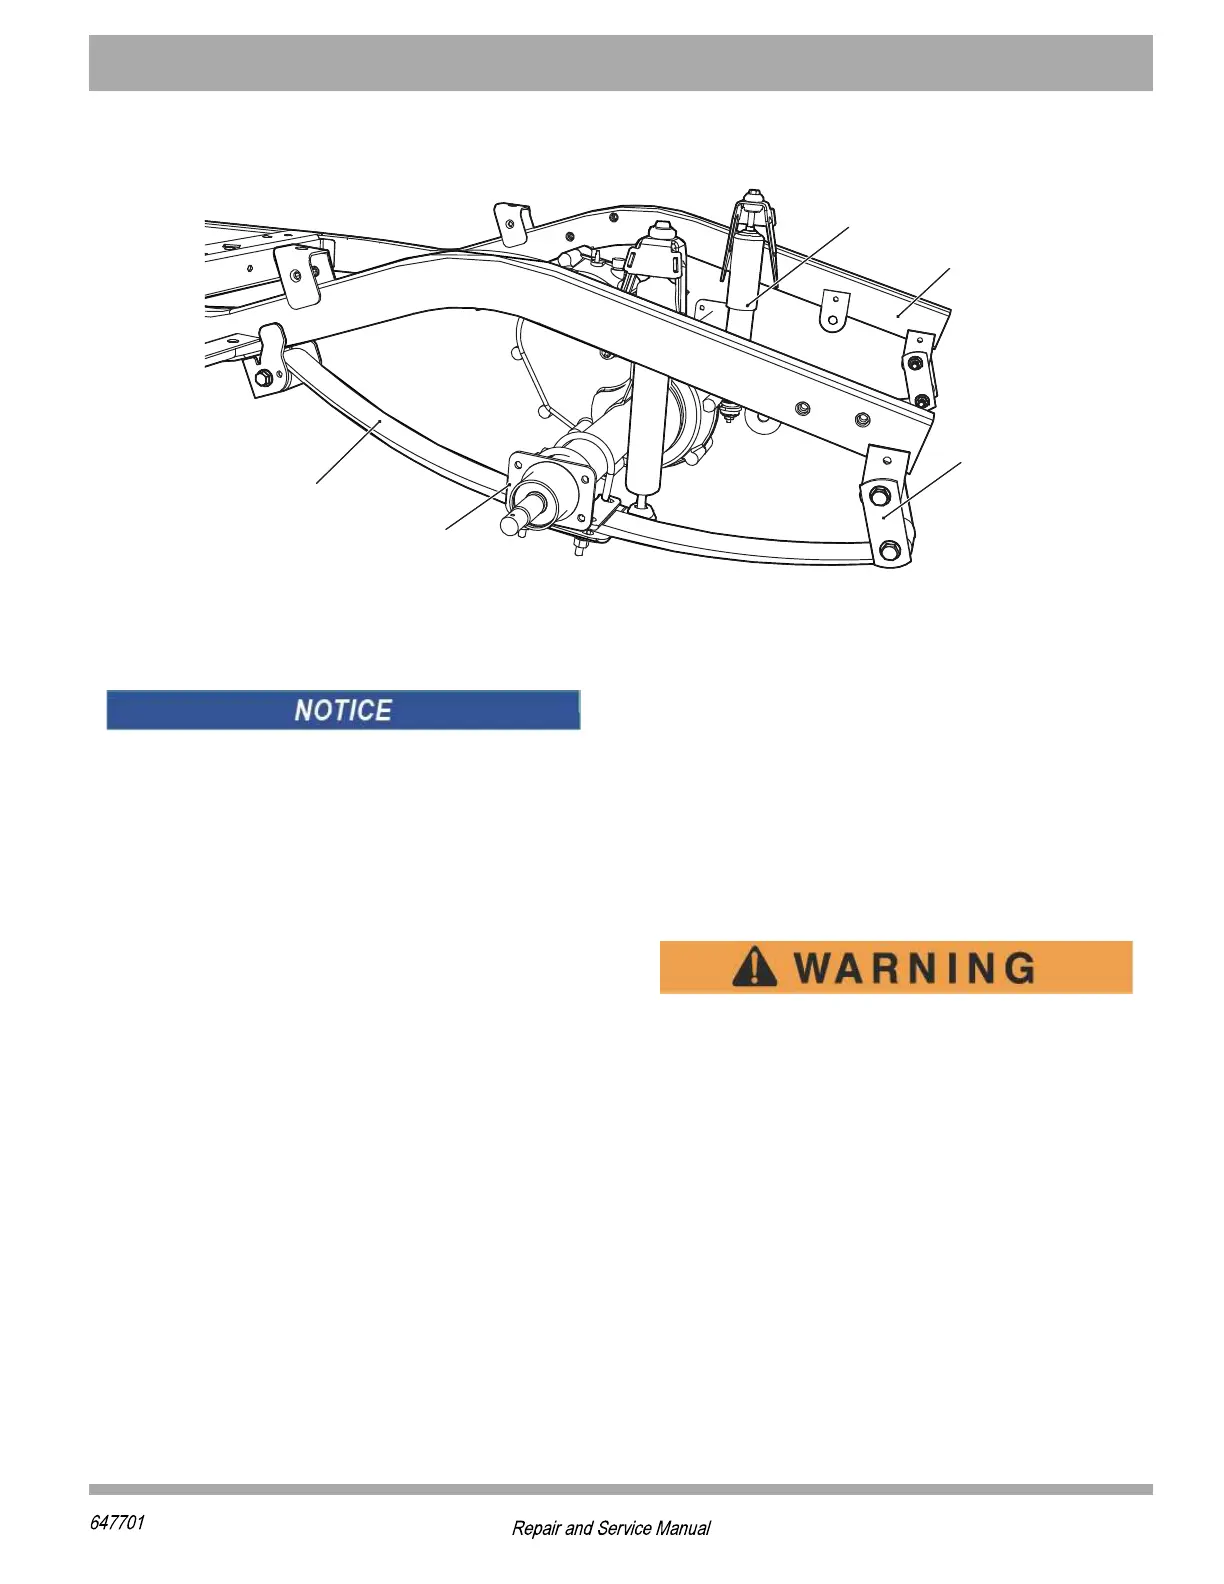
Figure 1 Rear Suspension
REAR SUSPENSION
Hardware that is removed must be installed in its origi-
nal position unless otherwise specified. If the torque val-
ues are not specified, refer to the Torque Specifications
table in the GENRAL INFORMATION AND ROUTINE
MAINTENANCE section.
General
Tool List Qty.
Wheel Chocks ............................................................. 4
Jack Stands................................................................. 4
Floor Jack.................................................................... 1
Wrench, 1/2”................................................................ 1
Wrench, 9/16”.............................................................. 1
Wrench, 3/4”................................................................ 1
Socket, 1/2” ................................................................. 1
Socket, 9/16” ............................................................... 1
Socket, 9/16”, Deep-well ............................................. 1
Extension, 3" ............................................................... 1
Ratchet........................................................................ 1
Torque Wrench, ft. lbs. ................................................ 1
Torque Wrench, in. lbs................................................. 1
The rear suspension includes the rear axle and the
attachments that secure it to springs and shock absorbers
(Figure 1). This section includes removal and replace-
ment of the springs, shock absorbers and the rear axle
assembly.
Disassembly and maintenance of the rear axle assembly
is shown in the REAR AXLE section.
Shock Absorber
Tool List Qty.
Wheel Chocks..............................................................4
Jack Stands .................................................................4
Floor Jack ....................................................................1
Insulated Wrench, 1/2”.................................................1
Torx Bit, T-27................................................................1
Wrench,15 mm ............................................................1
Socket, 15 mm.............................................................1
Ratchet ........................................................................1
Torque Wrench, ft lbs. .................................................1
To decrease the risk of personal injury, follow
the lifting procedure in the SAFETY section.
Position the wheel chocks in front and behind
front wheels and check stability of vehicle on
jack stands before starting any repair proce-
dure. Never work on a vehicle that is sup-
ported by a jack alone.
1. Remove the two Torx head screws that secure the
rear access panel.
2. Remove the rear access panel.
3. Raise the rear of the vehicle in accordance with the
instructions provided in SAFTEY section and support
the rear of the vehicles on the outer ends of the rear
bumper.
4. Access the lower end of the shock absorber (5) and
remove the hex nut (4), shock absorber washer (3)
*VEQI
7LSGO%FWSVFIV
0IEJ7TVMRK
6IEV%\PI
7LEGOPI

 Loading...

