BODY
Read all of SAFETY and this section before attempting any procedure. Pay particular attention to Notices, Cautions, Warnings and Dangers.
17
Repair and Service Manual
647701
Installation is reverse order of removal. Replace any worn
or damaged hardware as required.
Figure 6 Floormat
Cowl and Instrument Panel
Tool List Qty.
Torx Bit, T-45 ............................................................... 1
Torx Bit, T-30 ............................................................... 1
Torx Bit, T-27IP............................................................ 1
Torx Bit, T-50IP............................................................ 1
Insulated Wrench, 1/2” ................................................ 1
Ratchet........................................................................ 1
Torque Wrench, in. lbs. ............................................... 1
Torque Wrench, ft. lbs. ................................................ 1
Long Needle Nose Pliers............................................. 1
Using an insulated wrench, disconnect the
battery cable at the negative (BL-) battery
terminal.
If the vehicle is equipped with a canopy and windshield,
remove these items before proceeding. Instructions for
removal of the canopy and windshield are located in the
WEATHER PROTECTION section. Remove the upper
and lower rocker panels and the floormat as described.
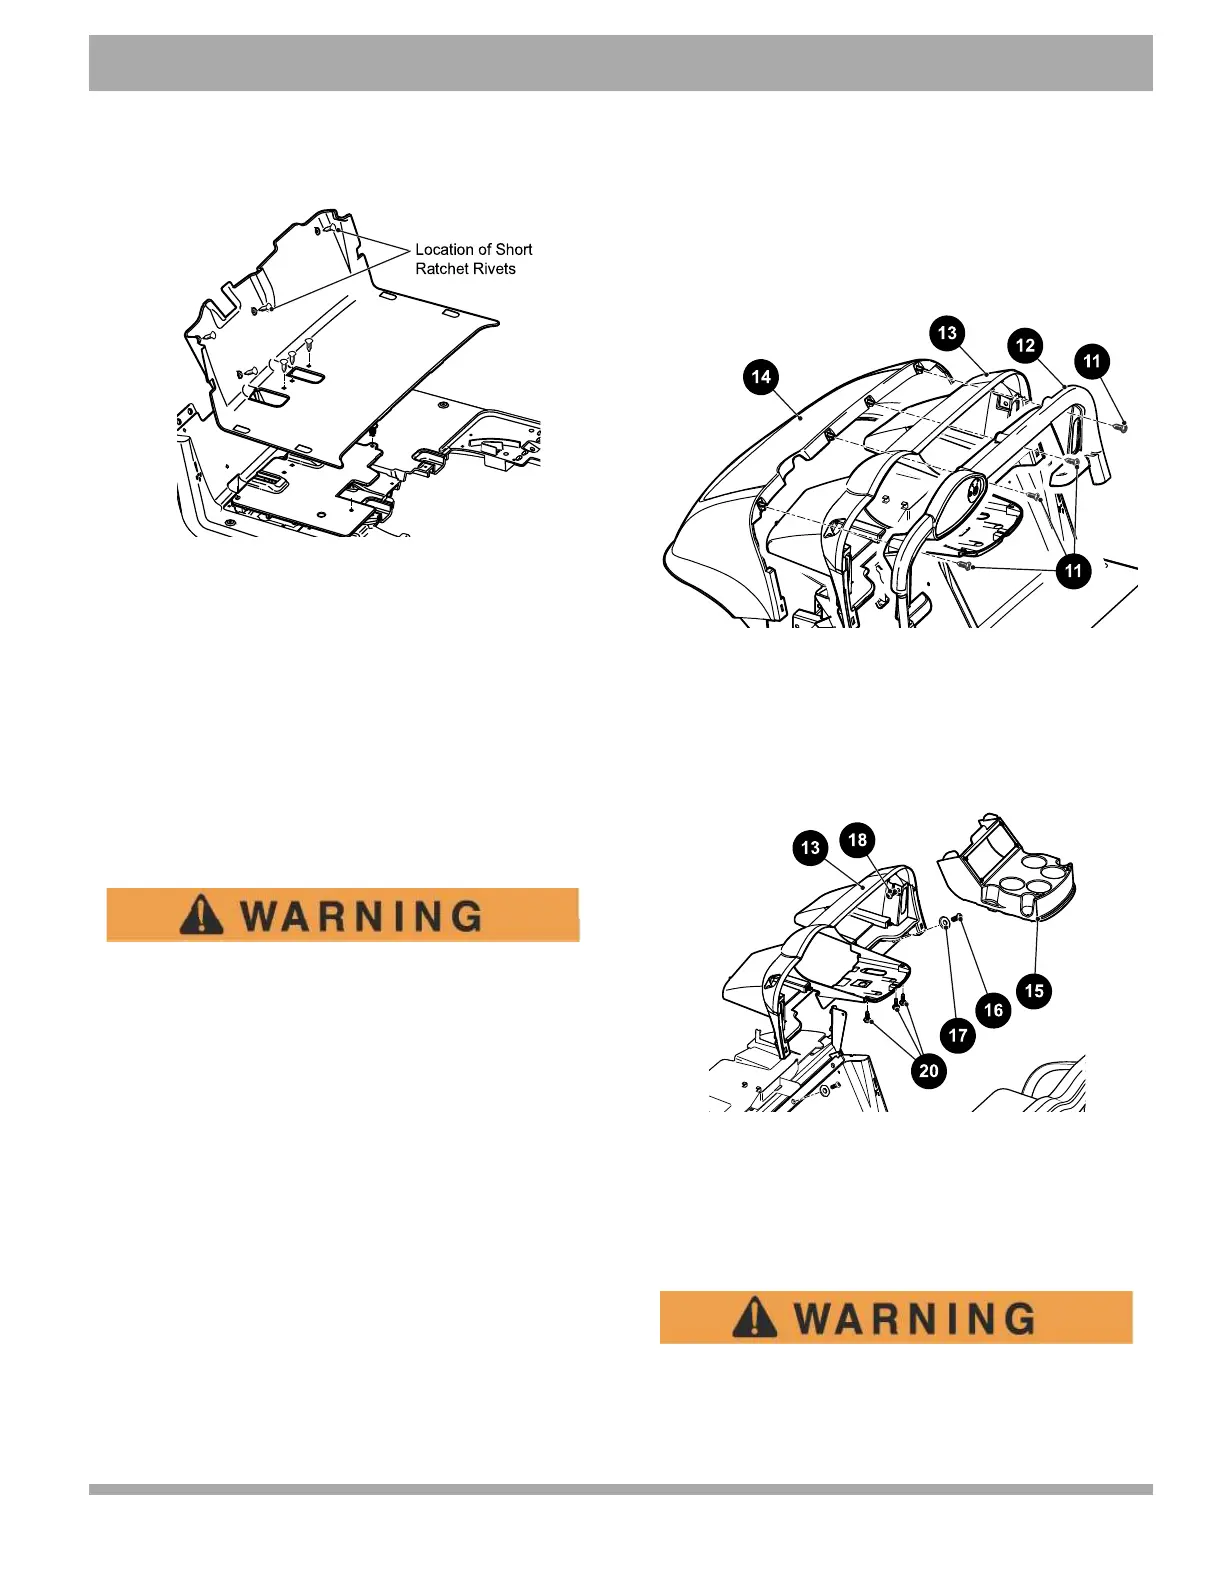
1. Remove four torx screws (11) securing the trim panel
(12) to the instrument panel (13) and cowl (14) (Fig-
ure 7).
2. Locate the tab in the fender well area, under the
cowl. The tab extends from the instrument panel (13)
through a slot in the cowl. Squeeze the tabs together
and push to the back of the vehicle while pulling for-
ward on the cowl. Repeat for the other side. Remove
the cowl.
3. Loosen the trim panel (12) by pulling it away from the
instrument panel along the upper edge. Grip the ball
holder with both hands and pull away from the instru-
ment panel (13). Move to the other side of the vehi-
cle and grip the ball holder on that side with both
hands and pull it away from the instrument panel
(13).
4. Disconnect the wires to the instruments located in
the trim panel. Remove the trim panel.
Figure 7 Cowl and Instrument Panel Trim
5. Remove three self-threading screws (20) securing
the cup holder assembly (15) to the instrument panel
(13). Remove the cup holder. Disconnect the turn
signal flasher unit and the brake switch relay if the
vehicle is equipped with turn signals and brake lights
(Figure 8).
Figure 8 Instrument Panel and Cup Holder
6. Remove four torx screws (16) and flat washers (17)
securing the instrument panel (13) along its lower
edge and the two torx screws (18) located near the
top of the instrument panel; one on each side. The
instrument panel (13) can now be removed.
To decrease the risk of the possibility of injury
or death, the correct safety label must be on
the instrument panel cup holder at all times.