54
ENGINE
Read all of SAFETY and this section before attempting any procedure. Pay particular attention to Notices, Cautions, Warnings and Dangers.
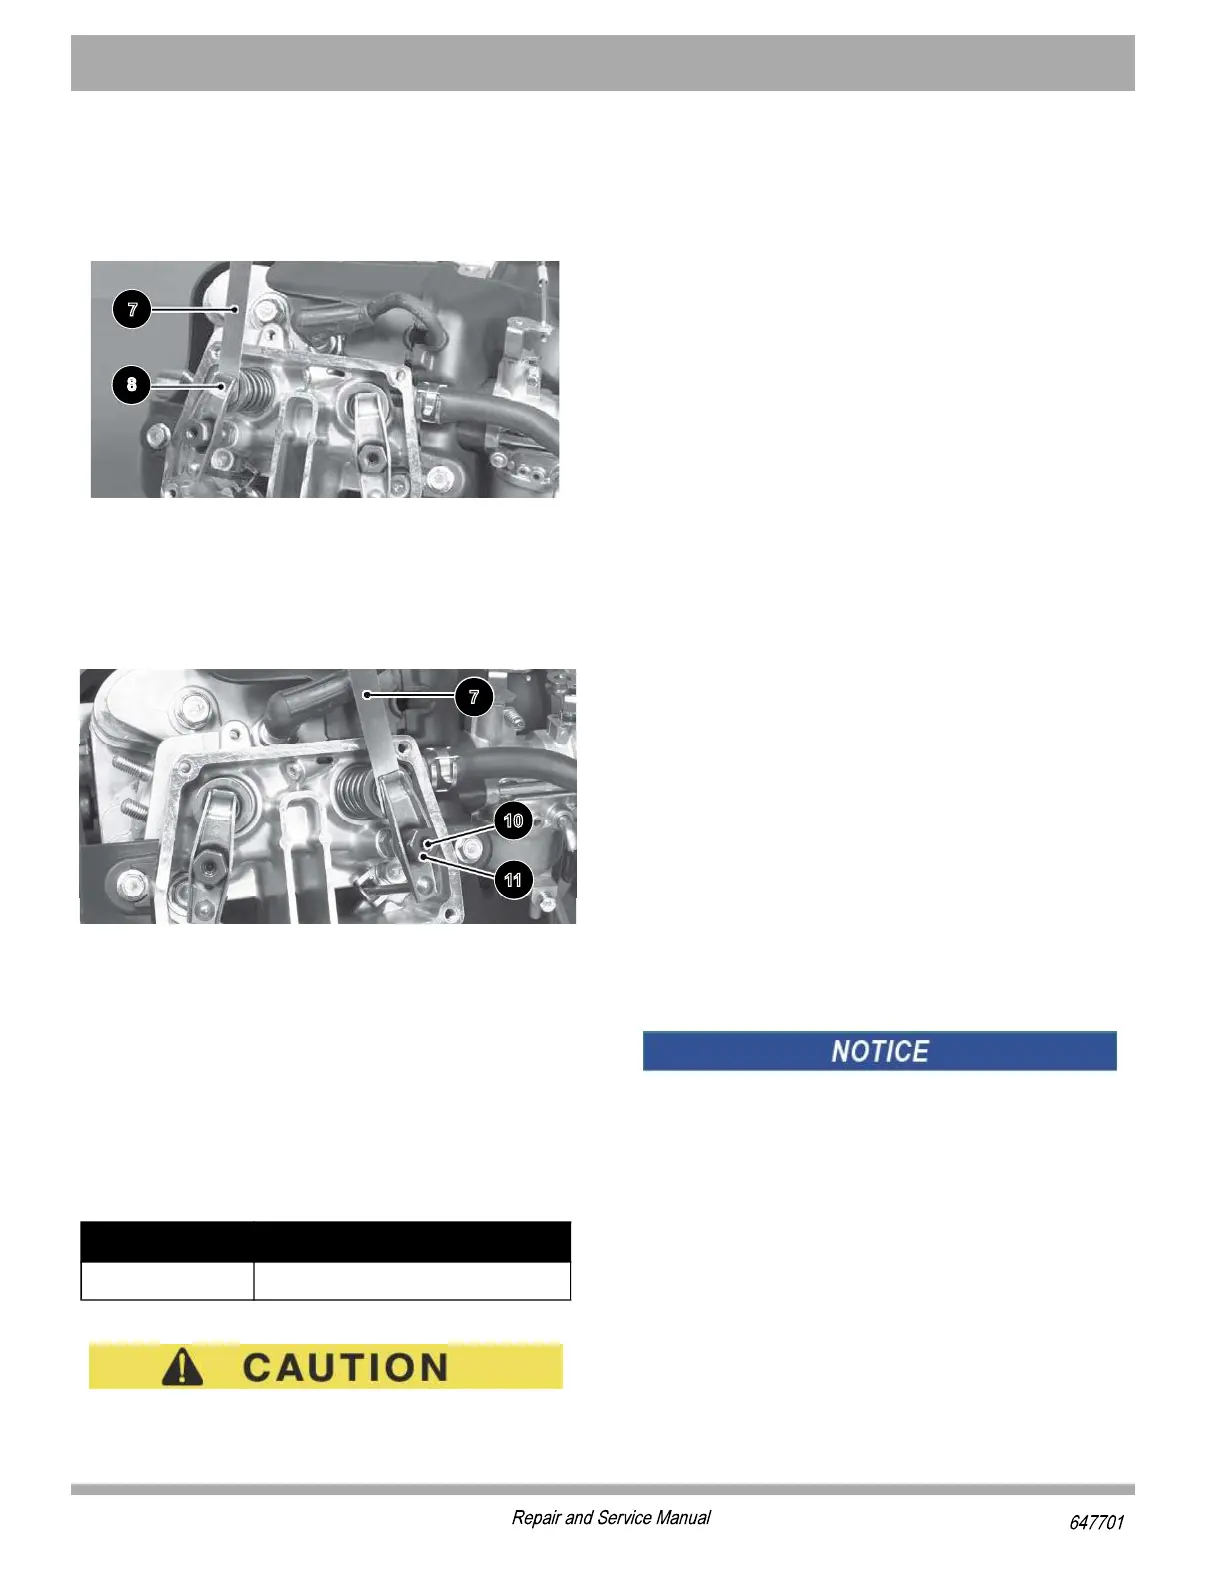
Check the valve clearance with a feeler gauge (7). Mea-
sure the valve clearance between the rocker arm (8) and
the valve stem end.
Valve clearance (when cold): Inlet, Exhaust 0.10 - 0.15
mm (0.004 - 0.006 in.).
Figure 18 Measure Valve Clearance
If the valve clearance is incorrect, adjust it.
Valve Clearance Adjustment
Turn the crankshaft in the proper direction until the piston
is at TDC of the compression stroke.
Figure 19 Valve Clearance Adjustment
Valve clearance (when cold): Inlet, Exhaust 0.10 - 0.15
mm (0.004 - 0.006 in.).
Loosen the lock screw (10) using the 3 mm Allen bit and
the adjusting nut (11). Insert the feeler gauge (7) between
the rocker arm and the valve stem end and move the
adjusting nut (11) until the feeler gauge begins to bind
between the rocker arm and the valve stem end.
Hold the adjusting nut (11) in place using a wrench and
tighten the lock screw (10) to the torque value specified
below.
Do NOT over-tighten.
Remeasure any clearance that was adjusted. Readjust if
necessary.
Replace the rocker cover (6), gasket and the four bolts
(5). Tighten the bolts to secure the cover in place.
ENGINE REMOVAL
Tool List Qty.
Torque Wrench, ft. lbs. ................................................1
Socket, 10 mm.............................................................1
Socket, 12 mm.............................................................1
Socket, 14 mm.............................................................1
Socket, 1/2”..................................................................1
Socket, 5/8”..................................................................1
Impact Socket, 19 mm .................................................1
Insulated Wrench, 1/2”.................................................1
Wrench, 8 mm..............................................................1
Wrench, 10 mm............................................................1
Wrench, 12 mm............................................................1
Wrench, 13 mm............................................................1
Wrench, 14 mm............................................................2
Wrench, 15 mm............................................................1
Wrench, 19 mm............................................................1
Combination Wrench, 19 mm ......................................1
Pliers............................................................................1
Extension, 6”................................................................1
Ratchet ........................................................................1
Flat Ratchet .................................................................1
Impact Tool...................................................................1
Straight Blade Screwdriver ..........................................1
Drip Pan.......................................................................1
This section covers the removal and installation of the
engine.
For information on rebuilding the engine, see the Engine
Shop Rebuild Manual for this vehicle.
Hardware that is removed must be installed in its origi-
nal position unless otherwise specified. If the torque val-
ues are not specified, refer to the Torque Specifications
table in the GENRAL INFORMATION AND ROUTINE
MAINTENANCE section.
This operation will remove the engine through the top of
the engine compartment. The weight of the engine
exceeds normal OSHA limits for one person; therefore,
a second person or an engine hoist will be needed to
remove the engine. If a hoist is employed, it will be nec-
essary to remove the canopy.
1. Disconnect the negative (-) battery cable.
2. Disconnect air hose at the carburetor.
Item Torque Specification
10 61 in. lbs (6.9 Nm)