BRAKES
Read all of SAFETY and this section before attempting any procedure. Pay particular attention to Notices, Cautions, Warnings and Dangers.
105
Do NOT use a commercial brake cleaner unless the
entire brake has been disassembled.
Remove any accumulated brake dust with a brush.
Remove the brake shoes. See ’Brake Shoe and Adjuster
Replacement’.
Clean backing plate with a commercial brake cleaner.
Allow to dry completely.
It is important that the friction areas between the
backing plate and the brake shoes be lubricated. Be
careful not to allow lubricant to contact the braking
portion of the brake shoes or the friction surface of
the brake drum. Use only recommended lubricants.
Lubricate the backing plate friction points of the shoes
and moving anchor with Multi Purpose Grease (MPG)
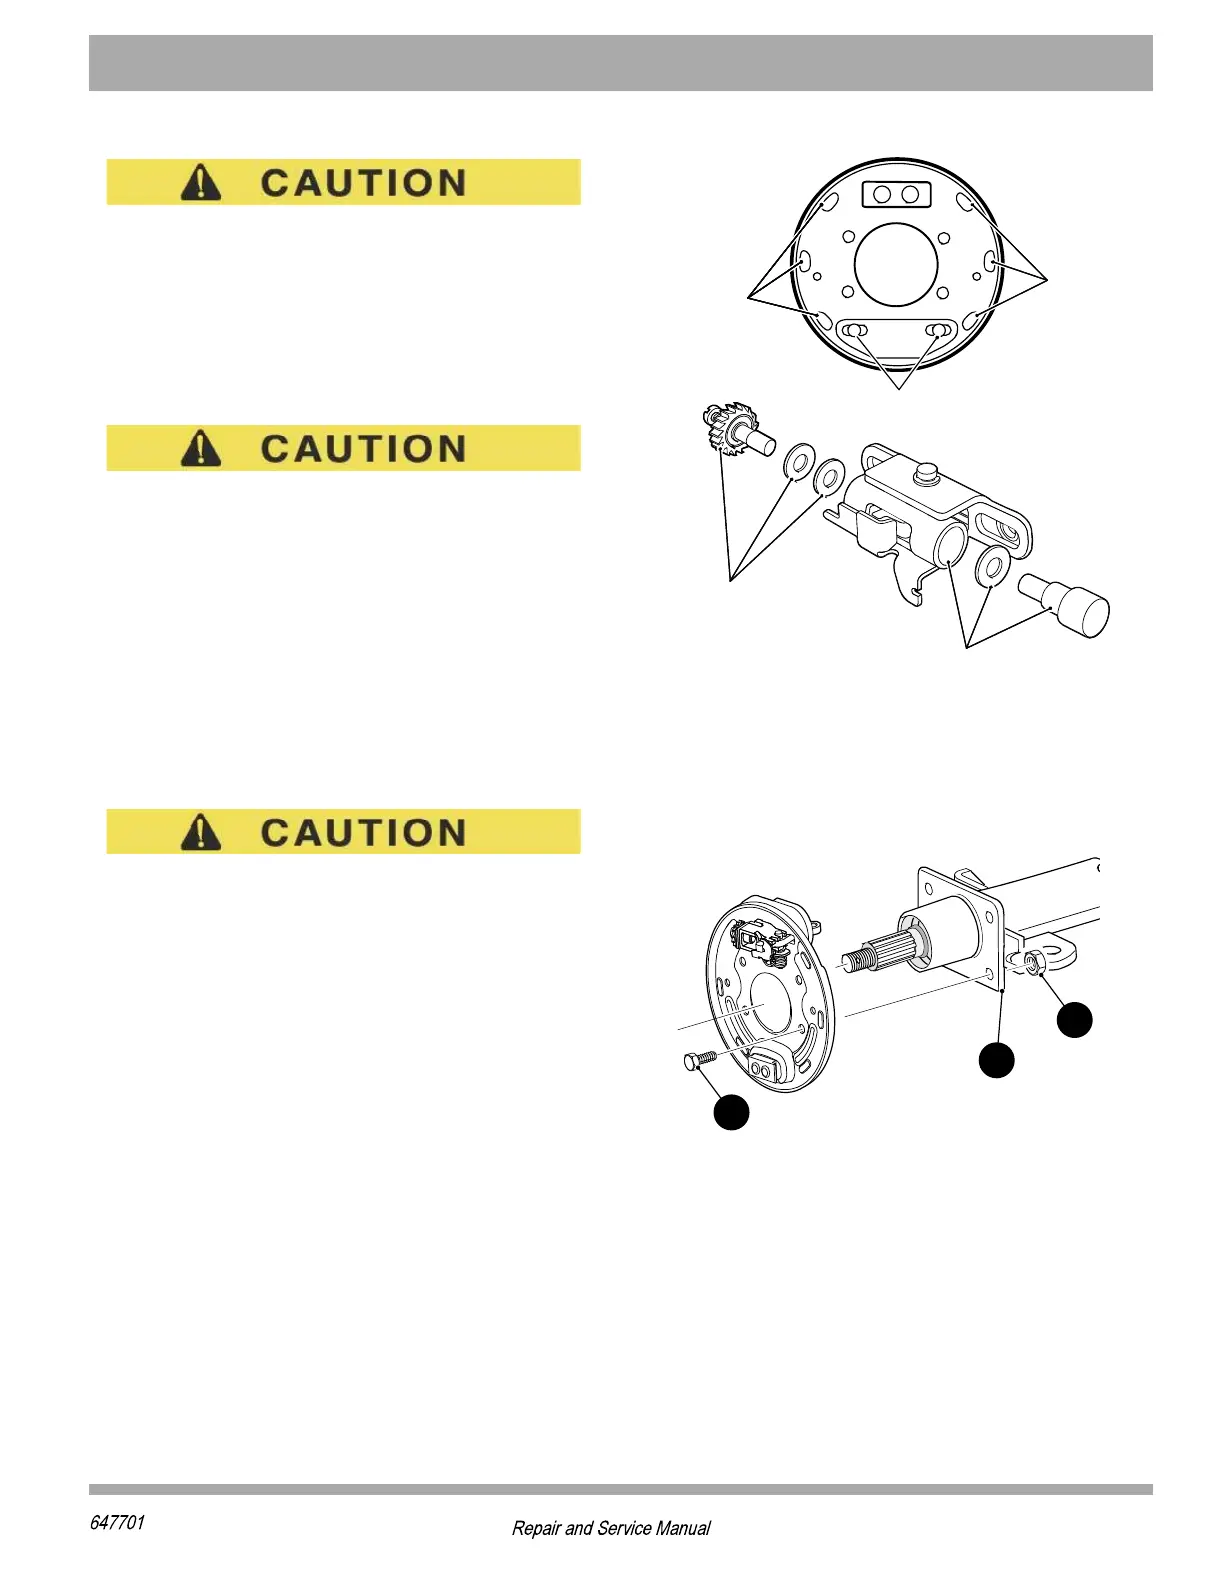
lubricant (Figure 12).
Install the actuator components, adjuster components
and brake shoes. See ’Brake Shoe and Adjuster
Replacement’ If the brake shoes and drum are not to be
replaced, sand the friction surfaces lightly with emery
cloth to remove any foreign material.
Be sure that the adjusting screw is turned into the
star wheel nut until only 1 - 2 threads are exposed
(Figure 15). If the brake shoes are replaced, replace
the three brake springs and the adjuster
components.
Replace the springs one side at a time, using the other
side as a guide.
Install brake drum as described in Brake Drum Removal
and Installation.
Repeat on other side of vehicle.
Adjust the brake pedal free travel.
Figure 12 Wheel Brake Lubrication Points
Backing Plate/Entire Wheel Brake Assembly
Removal and Installation
Remove the four bolts (1) and lock nuts (2) securing the
wheel brake backing plate to the flange (3) on the axle
tube (Figure 13).
Figure 13 Backing Plate Removal and Installation
Remove the clevis pin securing the brake cable to the
brake lever.
Installation is the reverse of removal. Connect the brake
cable to the wheel brake with the clevis pin installed from
the top down and a new cotter pin. Install the brake
assembly or backing plate to the axle tube flange. Install
new hardware.
0YFVMGEX
(S238
0YFVMGEXI
0YFVMGEXI
&SWWIW
SRIEGL
WMHI
0YFVMGEXI
&SWWIW
SRIEGL
WMHI
0YFVMGEXIWYVJEGIWMRERHEVSYRH
WPSXWERHTPEWXMGWPMHITPEXI