WEATHER PROTECTION
Read all of SAFETY and this section before attempting any procedure. Pay particular attention to Notices, Cautions, Warnings and Dangers.
121
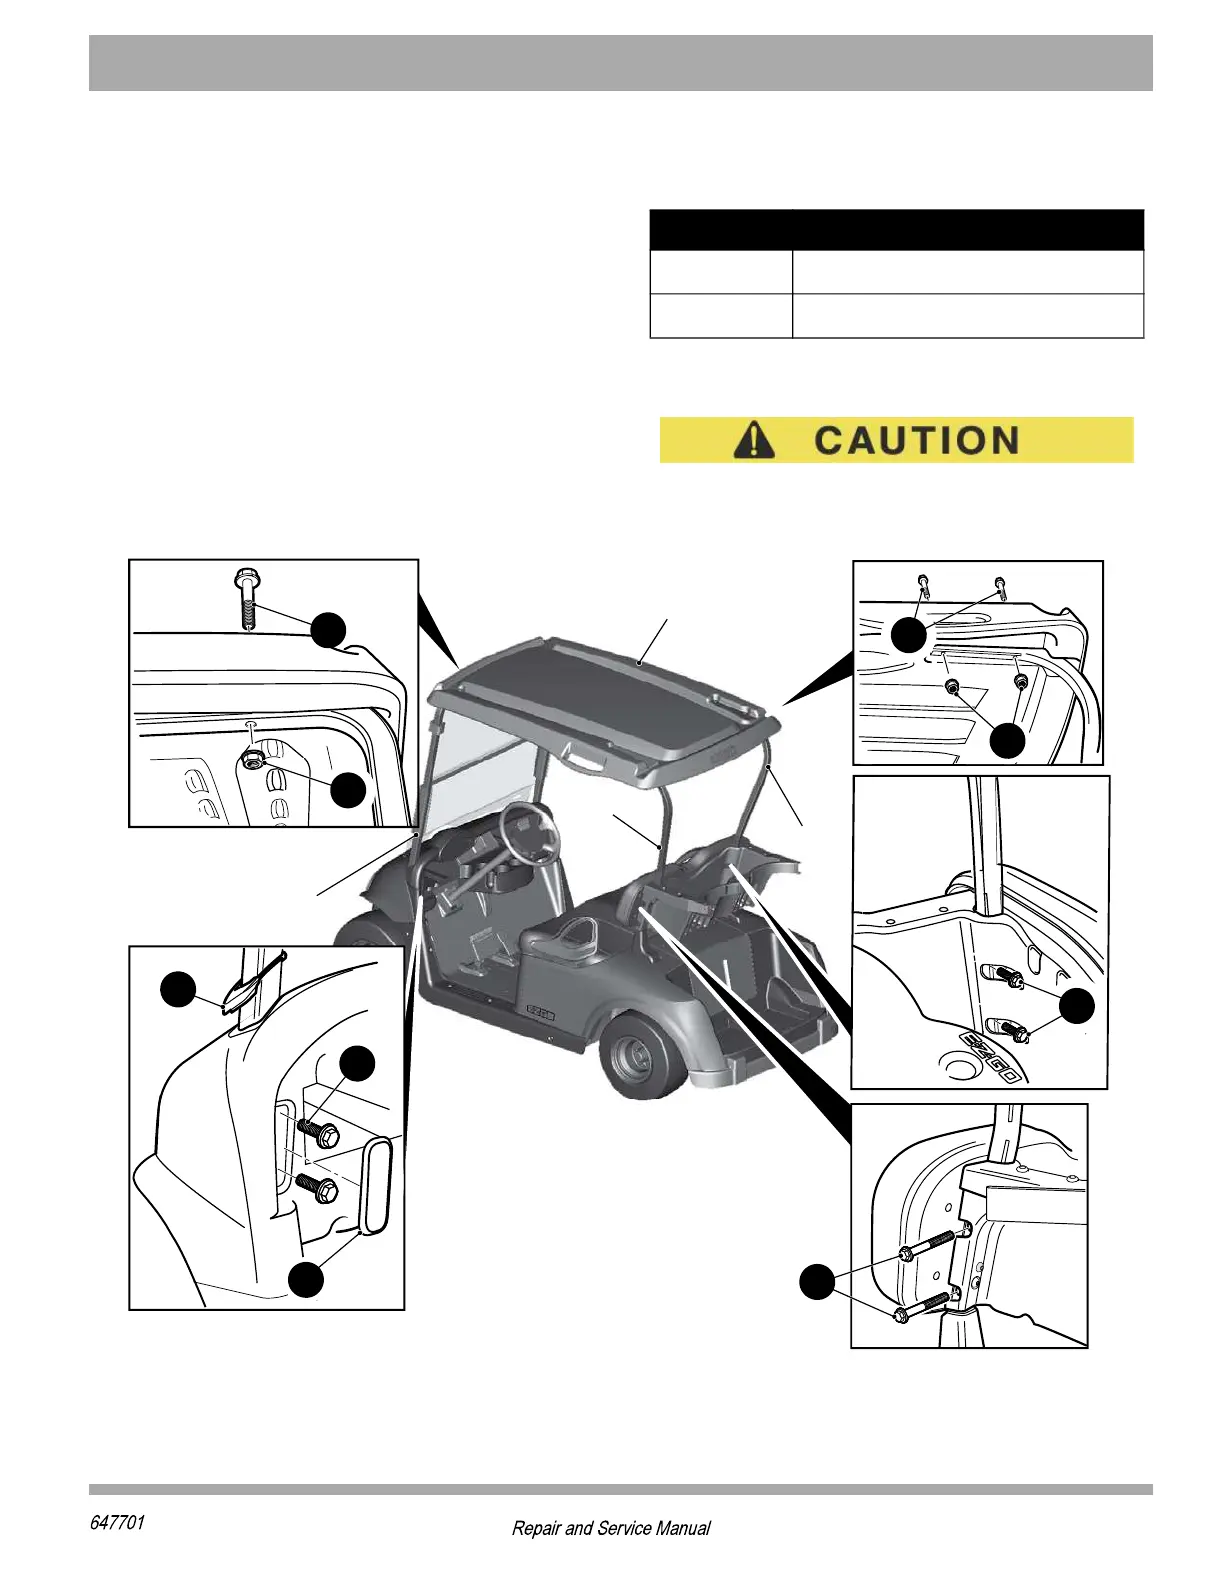
holes, align the holes in the strut with the holes in the
frame and insert the hex bolts (6).
3. Position the rear struts so that they are bent to the
outside of the vehicle and the top legs point to the
front of the vehicle. Align the mounting holes in each
strut with the matching holes in the sweater basket
and seat back support, install the hex bolts (5) and
nuts (4) finger tight only.
4. Place the top onto the struts and install six hex bolts
(2) down through the top and struts, place the nuts
(1) on finger tight.
5. Make sure that the grommets (7) on the front strut
are in place.
6. Tighten the hex bolts (2, 6) and hex nuts (4) to the
torque values specified below.
7. Replace the access covers (5) in the instrument
panel.
DO NOT over tighten fasteners. Exceeding the spec-
ified torque value will crush the strut tubes.
Figure 3 Golf Car Canopy
Item Torque Specification
2, 4 71 - 98 in. lbs (8 - 11 Nm)
6 177 - 203 in. lbs (20 - 23 Nm)
*VSRX7XVYX
6IEV7XVYX
6IEV7XVYX
'ERST]8ST

 Loading...

