Installation - Mechanical
42 CLCH-SVX07K-EN
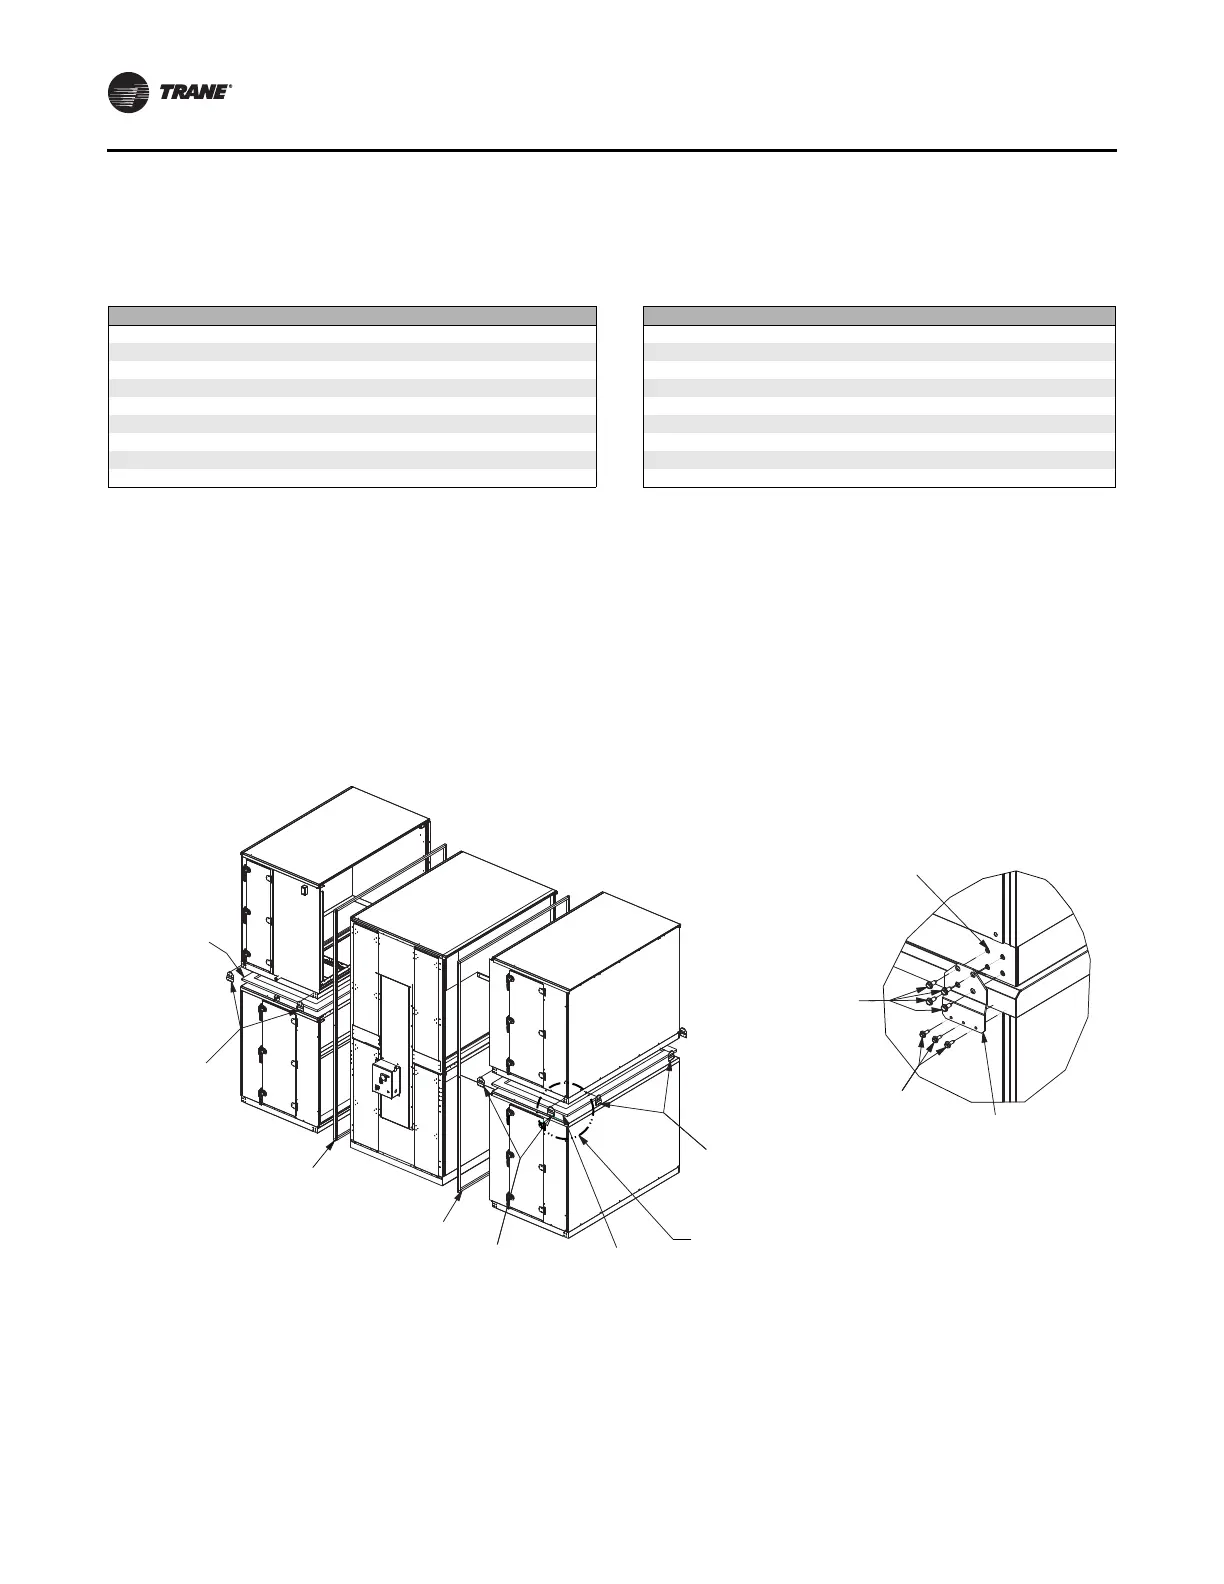
Stacked Outdoor Unit Assembly
Assembly Hardware
Unit Assembly
1. See Figure 49. Apply gasket (Item 1) on top of lower
unit. Compress gasketing to ensure a good air seal
between upper and lower sections.
2. Place upper unit on lower unit.
3. Remove lifting lugs from top unit and attach stacking
brackets (Item 2) to top and bottom units using screws
(Item 3 and Item 4). See Detail A in Figure 49. Stacking
brackets (Item 2) are to be used on the right and left
sides at each shipping split section end and also on
front and back of the unit.
4. Apply Butyl tape (Item 5) to one side of the shipping
split section.
5. Slide shipping split sections together, pulling tight
using lifting lugs and threaded rod on bottom and
straps or pipe clamps on top.
Table 10. Parts list for outdoor stacked units
Item Description Item Description
1 Gasket: 1.00T x 4.00W
2 Bracket: Stacked unit 10 Guard: Energy recovery end cover
3 Screw: 0.313-18 x 0.875 sheet metal 11 Guard: Energy recovery end cover
4 Screw: 10-16 x 0.750 self driller 12 Guard: Direction of airflow flashing
5 Tape: Butyl 0.38T 13 Guard: Flashing seam cover
6 Tape: Ribbed Butyl 14 Adhesive/sealant: Flex polyurethane
7 Plate: Vertical seam cap 15 Bracket: Hood support
8 Tape: 0.12T x 1.00W, gray Butyl 16 Angle: Hood support
9 Guard: perpendicular to airflow flashing 17 Screw: 0.250-14 x 0.750 self driller
Figure 49. Stacked unit assembly
(1) Gasket:
1.00T x 4.00W
(2) Bracket:
stacked unit
(5) Tape:
Butyl 0.38T
(5) Tape:
Butyl 0.38T
(3) Screw:
0.313-18 x 0.875
sheetmetal
Part# X25240049010
(4) Screw:
10-16 x 0.750
self-driller
Part# X25020634020
(1) Gasket:
1.00T x 4.00W
See Detail A
Detail A
Remove lugs from upper
baserail prior to installing
stacked unit bracket
(2) Bracket:
stacked unit
(2) Bracket:
stacked unit
(2)Bracket:
stacked unit
Part# 4953-0203