Installation - Mechanical
52 CLCH-SVX07K-EN
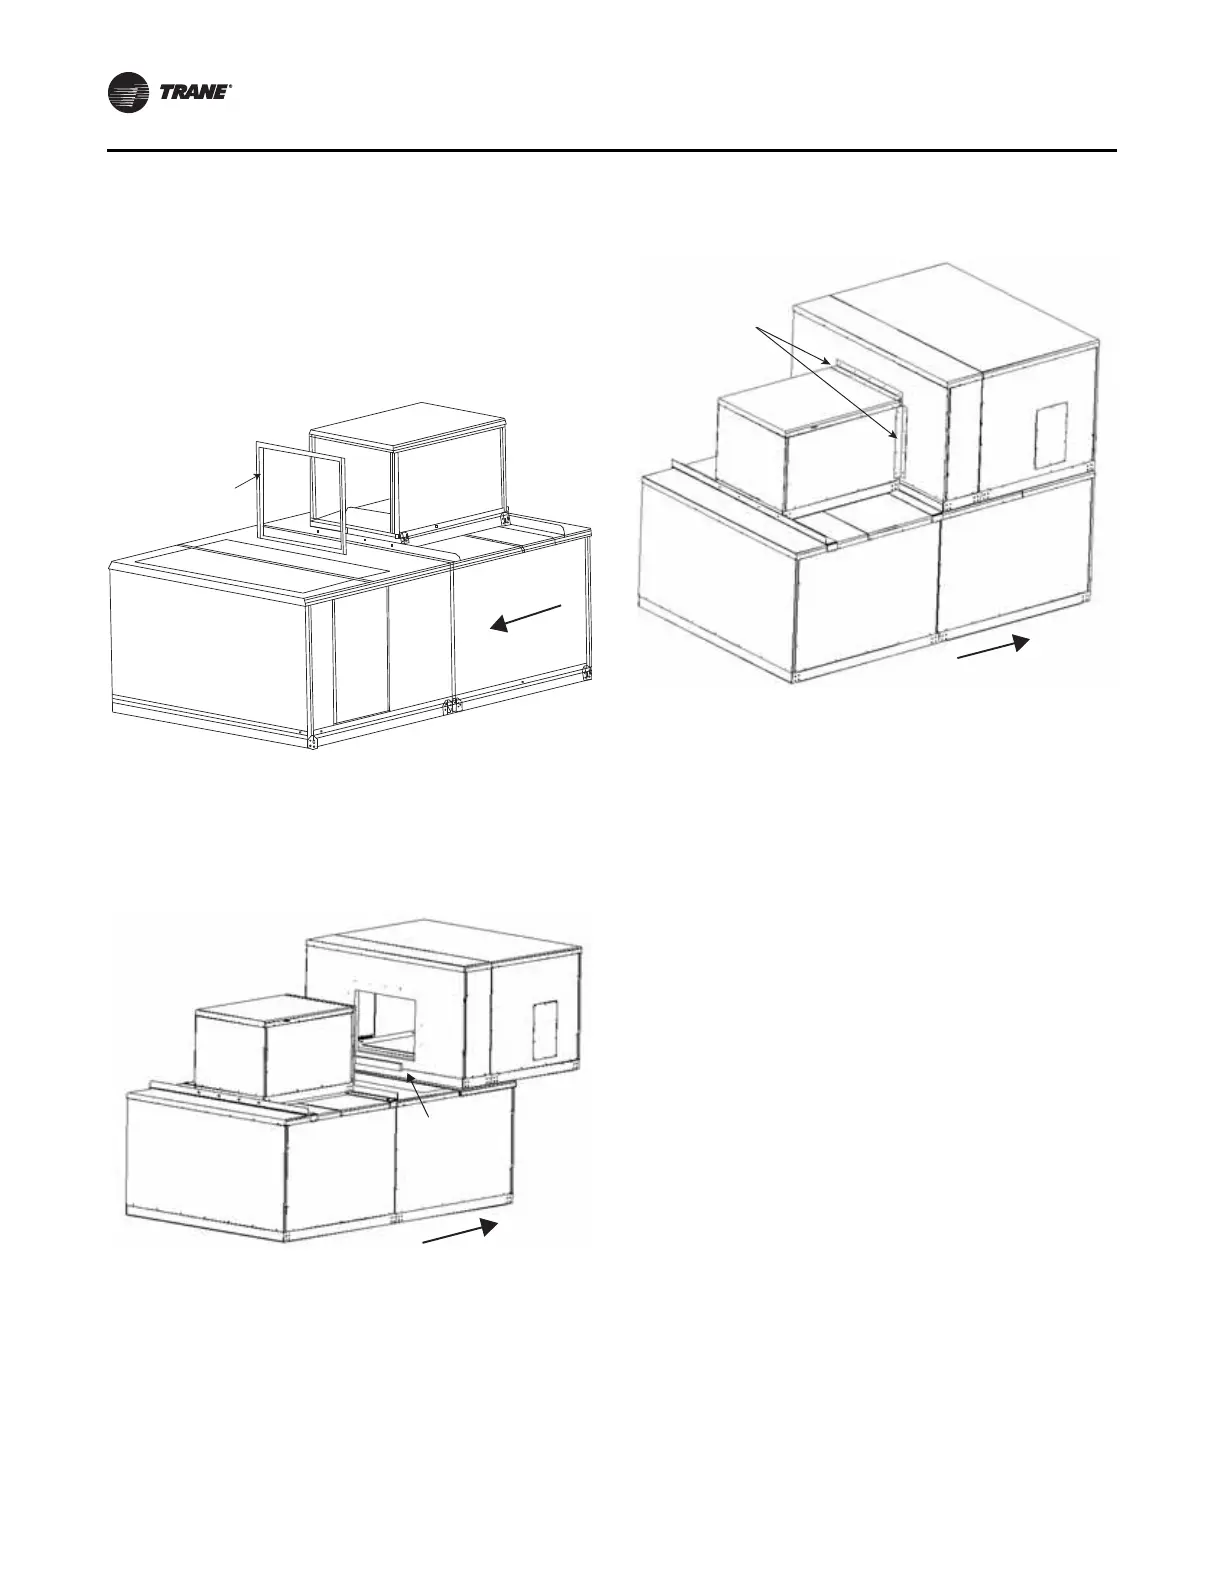
Vertical SDU/Winterizer Assembly
To assemble dissimilar unit sizes for an indoor vertical
SDU/winterizer configuration:
1. Apply gasketing to the mating surface of the secondary
unit (see Figure 67).
2. Apply gasketing to the mating surface of the primary
unit at the bottom of the opening (see Figure 68.
3. Lift the secondary unit, follow instructions in “General
Lifting Considerations,” p. 25 (see Figure 18), and place
on the black unit support brackets (see Figure 65, p. 51.
The secondary unit must be centered on the primary
unit between the black unit support brackets.
4. Install trim angles as shown in Figure 69 inserting the
10-16 x 3/4-inch self-drilling screws using a powered
impact gun and taking care not to strip the screws.
External Raceway Assembly
For air handling units with factory-installed power wiring
extending from the first level to the second level, wiring
must be connected and assembled in a raceway. See
Figure 70.
1. Cut zip ties. Remove protective foam cover from
connectors.
2. Attach stacked raceway harness connectors, matching
connector colors on the high voltage side and
connector numbers on the low voltage side.
3. Verify conduit size.
4. Attach covers.
5. Secure conduit. Space tie-downs no greater than 10
inches. Locate cut-screw behind conduit.
Part numbers:
• Indoor
– External Raceway Kit: KIT09713
• Outdoor
– External Raceway Kit - Top: KIT16191
– External Raceway Kit - Bottom: KIT16192
Figure 67. Apply gasketing to mating surface of
secondary unit
Figure 68. Apply gasketing to the mating surface of the
primary unit.
Gasket
1.0 inches T x
1.0 inches W
Airflow
Gasket
1-inch T x
2 1/2 inch W
Airflow
Figure 69. Install trim angles
Vertical and horizontal
trim angles
Airflow