Installation - Mechanical
CLCH-SVX07K-EN 49
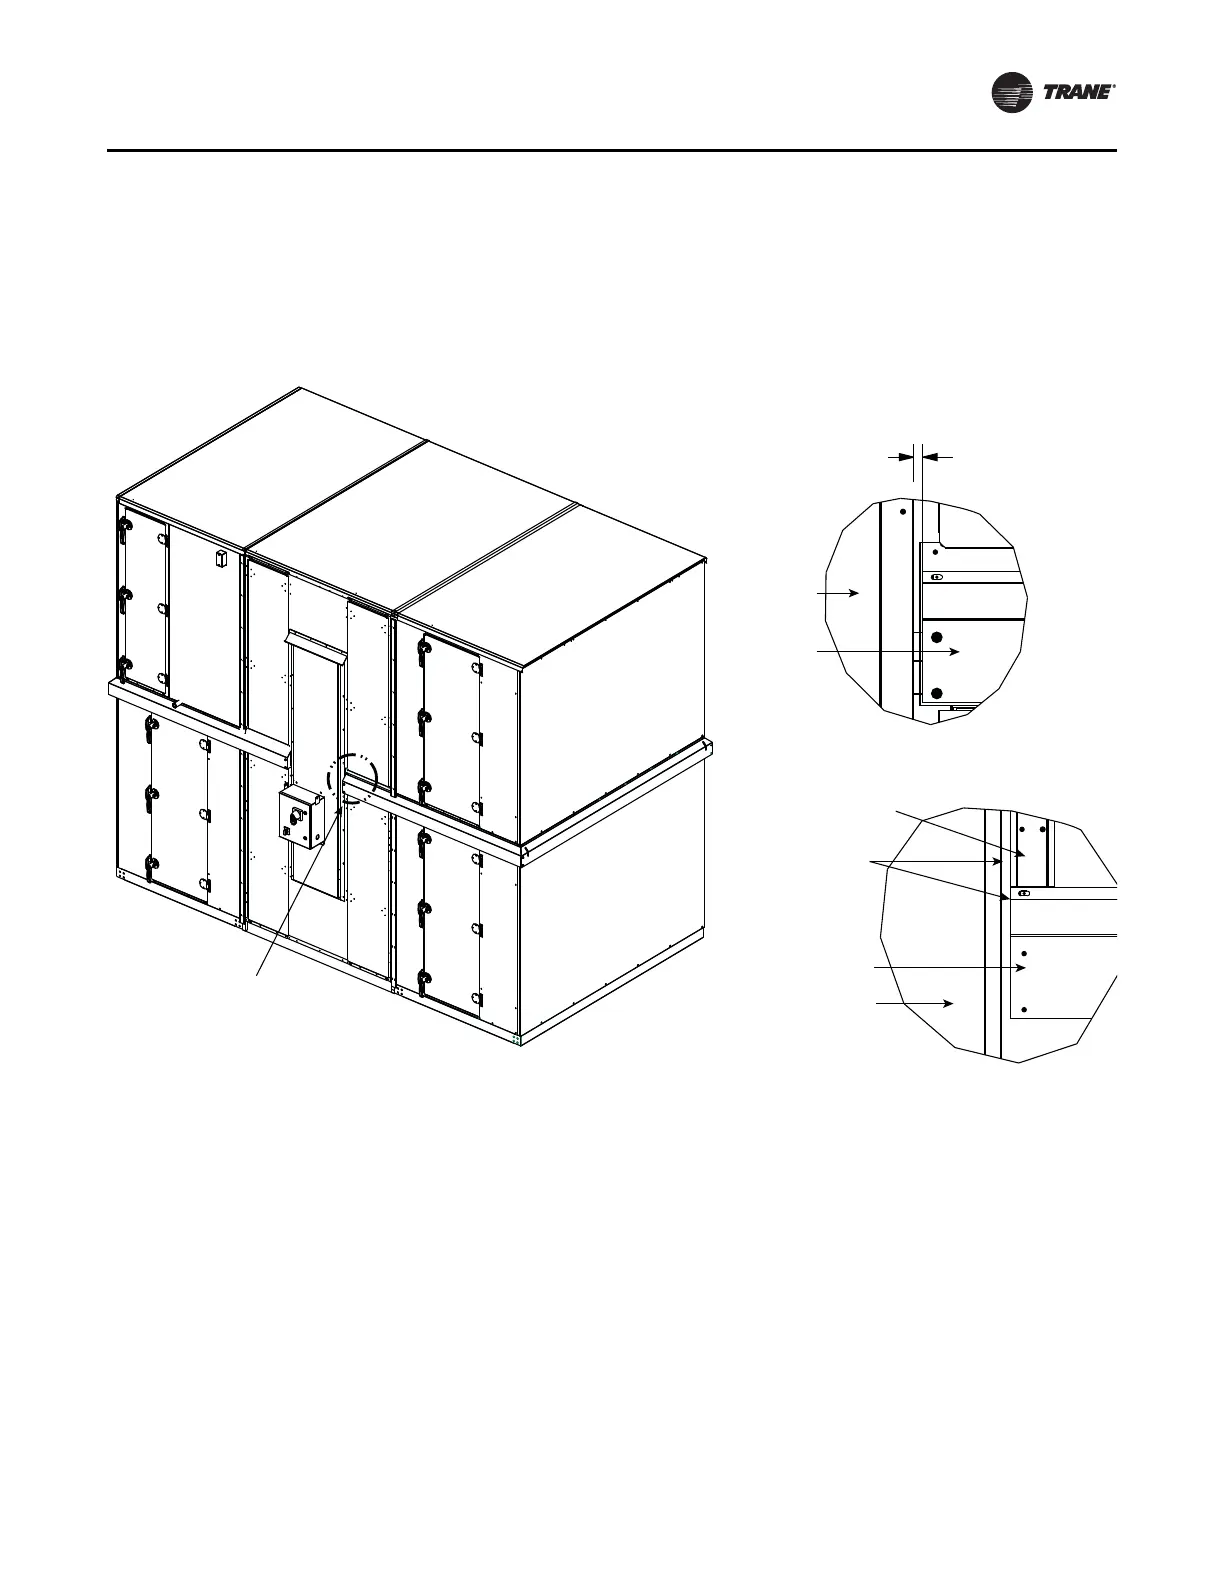
• Flashing runs full length on right/left sides of unit
except on access side when an energy recovery
section is present. For energy recovery section without
full height doors, flashing will extend to removable
plug panel. For energy recovery section with full height
doors, flashing will be flush with edge of vertical seam
caps (see Detail A in Figure 62).
• Flashing runs full length on front/back of unit. Front/
back flashing will not have any locating features and
will always have mitre (one piece will have two mitres,
two pieces will have one mitre).
Install Flashing and Hood
1. See Figure 63. Secure two hood support brackets (Item
15) to base rail with screws (Item 17).
2. Apply Butyl tape (Item 8) to flashing (Item 9) and place
over hood support brackets (Item 15) using cut in
flashing and secure to base rails with screws (Item 4).
3. See “Hood Installation,” p. 41 for hood installation
instructions.
4. Secure hood support angles (Item 16) to hood support
brackets (Item 15) and to the hood side panels with
screws (Item 17).
5. Apply caulk (Item 14) around hood support bracket
(Item 15), hood support angle (Item 16), and cutout in
perpendicular-to-airflow flashing (Item 9) to ensure
water-tight seal.
Figure 62. Side flashing installation
Flashing
Plug panel
Without full height doors
.406 from plug
panel flange
Vertical seam cap
Flashing
Door
Flashing flush
with vertical
seam cap
With full height doors
Assembled view
See Detail A
Detail A
Detail A