2AV/X
1-6-41
1-6
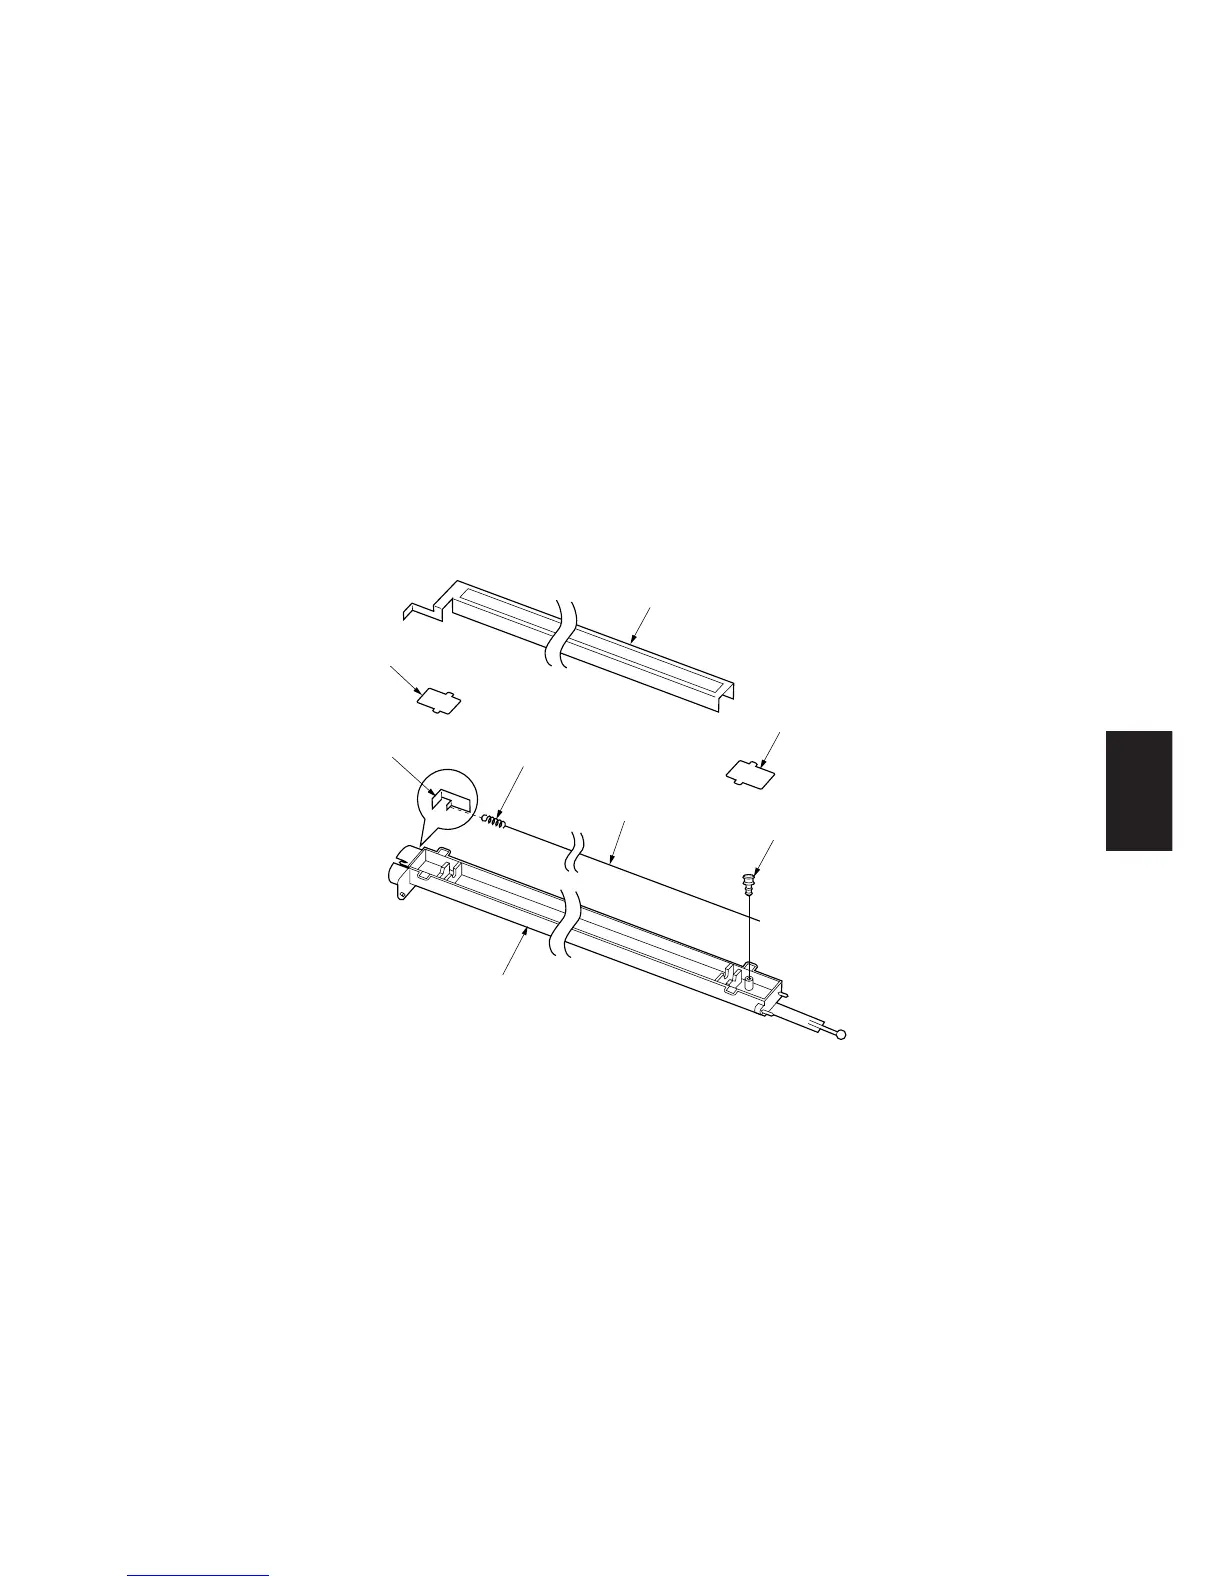
(2) Replacing the tungsten wire (reference)
Take the following procedure when the tungsten wire is broken or to be replaced.
Precautions
• Use the specified tungsten wire (P/N: 2AR1016).
• The part of the wire wrapped around the charger spring must not protrude over the L-shaped hook in the main charger
rear housing.
• Use clean, undamaged tungsten wire.
• Keep the tungsten wire taut by stretching it.
• Clean the shield grid with a wet cloth followed by a dry cloth when replacing the tungsten wire.
• Do not use organic solvents such as alcohol or thinner to clean the shield grid.
• Do not leave dust or dirt after cleaning the shield grid.
Procedure
1. Remove the image formation unit (see page 1-6-40).
2. Remove the charger assembly (see page 1-6-40).
3. Remove the main charger front and rear lids.
4. Remove the shield grid from the front of the charger assembly.
5. Remove the tungsten wire retainer pin and the charger spring from the charger terminal, and then the tungsten wire.
Tungsten wire
Tungsten wire retainer pin
Main charger rear lid
Main charger front lid
Main charger housing
Charger terminal
Charger spring
Shield grid
Figure 1-6-55