2AV/X
1-6-48
1-6
1-6-9 Fixing section
(1) Detaching and refitting the fixing unit
Follow the procedure below to check or replace the fixing unit.
Procedure
1. Open the bypass tray, paper conveying unit
and front cover, and then remove the rear
cover, left front cover and left rear cover.
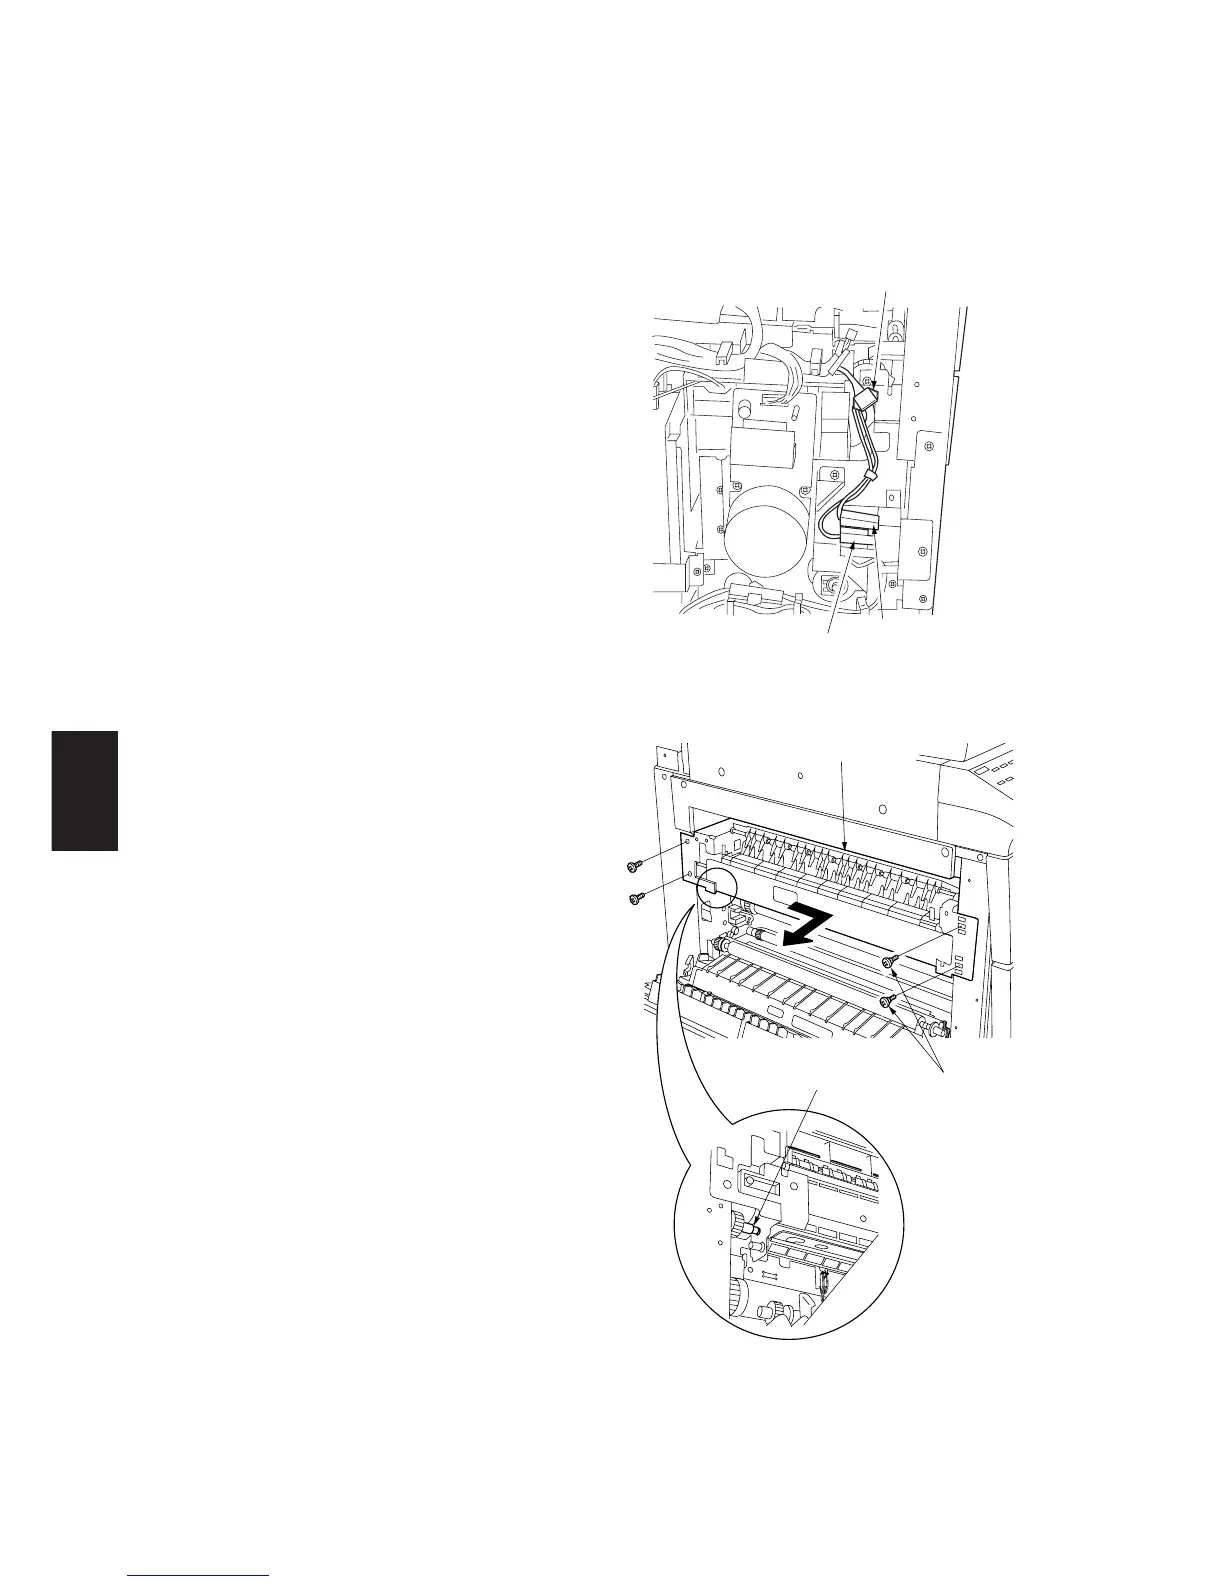
2. Detach the three fixing unit connectors (blue,
green and yellow) at the machine rear.
Figure 1-6-68
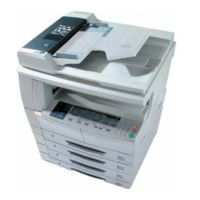
3. Remove the two screws from the rear and the
two pins from the front of the fixing unit and
shift the unit toward the machine front.
Remove the drive pin on the copier and then
remove the fixing unit.
• When refitting the fixing unit, be sure to
return the two pins at the front of the unit to
their original positions.
Figure 1-6-69
Connector (yellow)
Connector (green)
Connector (blue)
Pins
Pin
Fixing unit