ROBOT HP7E / HP10E / HP12E / HP15E / HP20E 4. Setting up
4-5© VEMAG 2010
4.5 Locking the linking gear (optional)
Danger!
There is a risk of crushing when swivelling the linking gear in and out. To
prevent injury, proceed extremely carefully when tting and dismantling
the part.
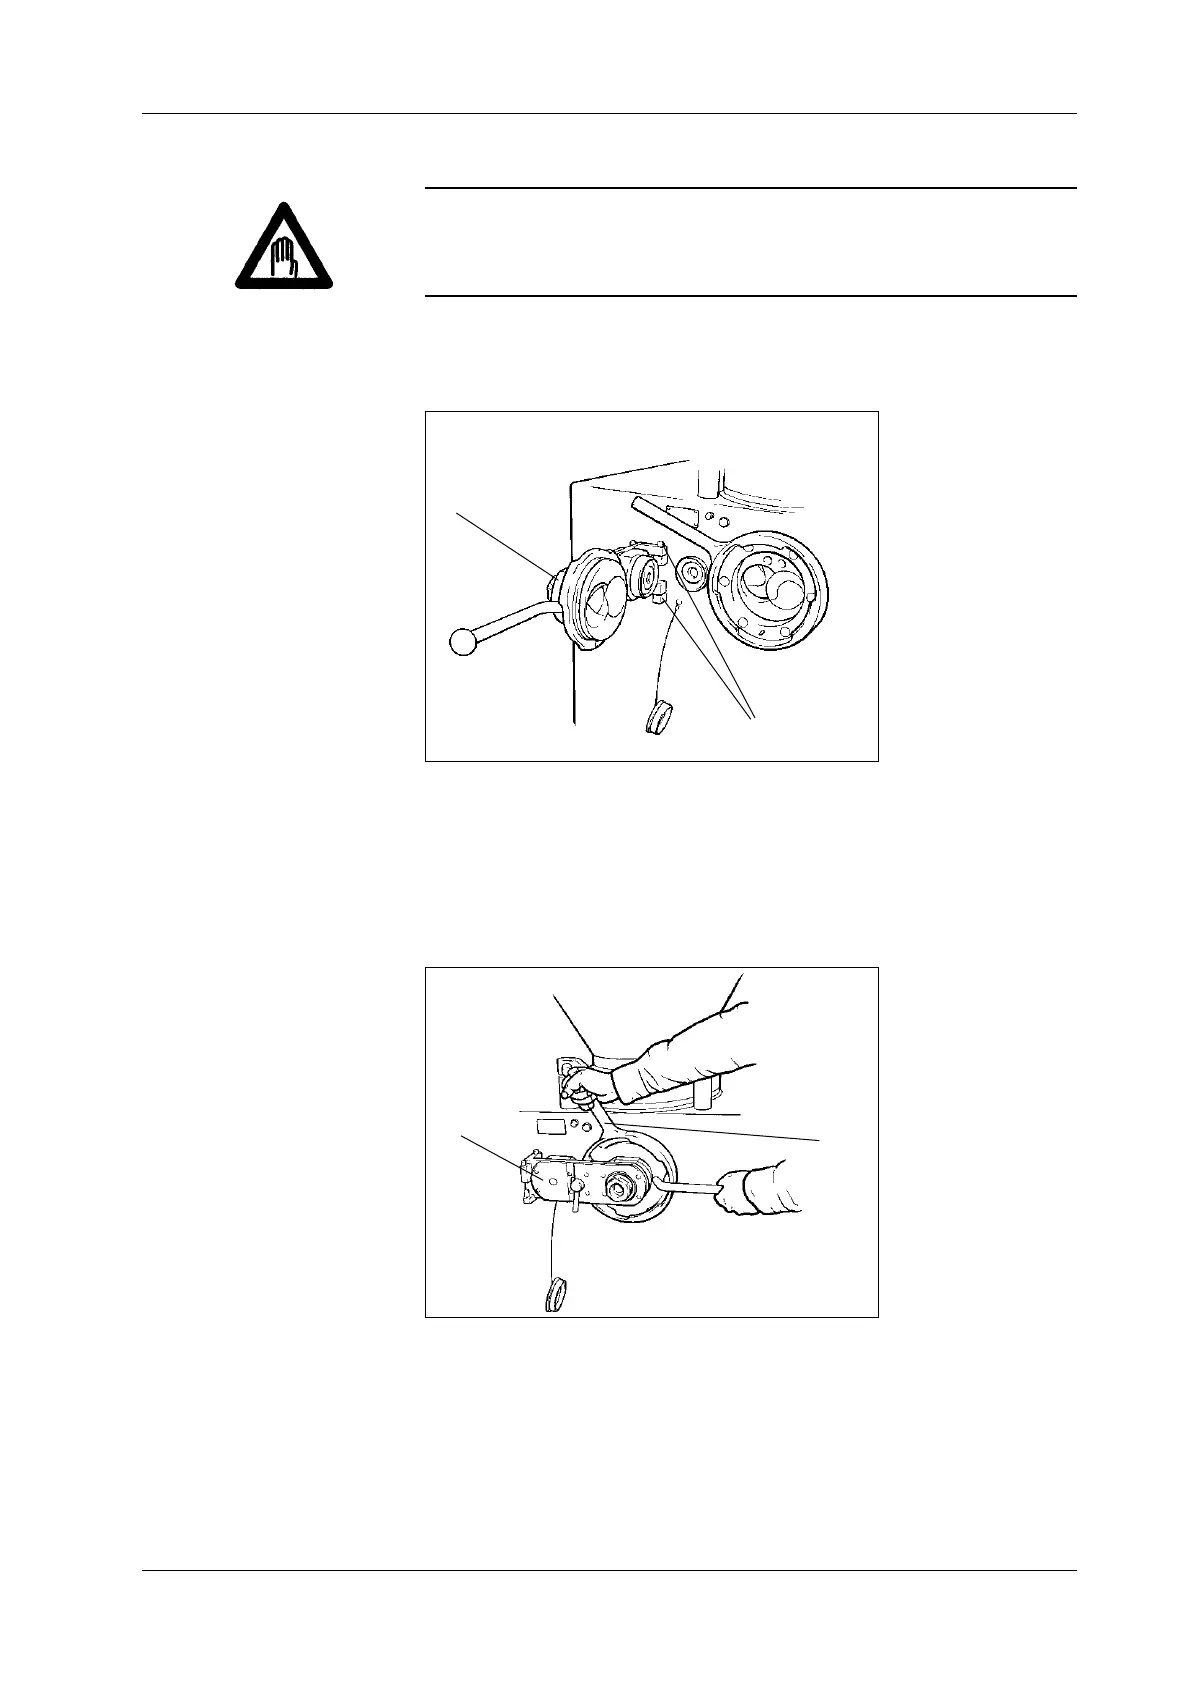
• Attach linking gear (1) to the outlet side of the machine with the aid of
the two bearing journals (2).
1 Linking gear
2 Bearing journals
Fig. 4-8
Fitting the linking gear
(optional)
1
2
• Adjust locking nut (1) so that the handle is between the 10 and 11
o’clock position and swing linking gear (2) in front of the outlet.
• Turn the locking nut clockwise to lock the linking gear. The handle
should now be approximately vertical.
1 Locking nut
2 Linking gear
Fig. 4-9
Locking the linking gear
(optional)
1
2