VideoIQ User Guide83
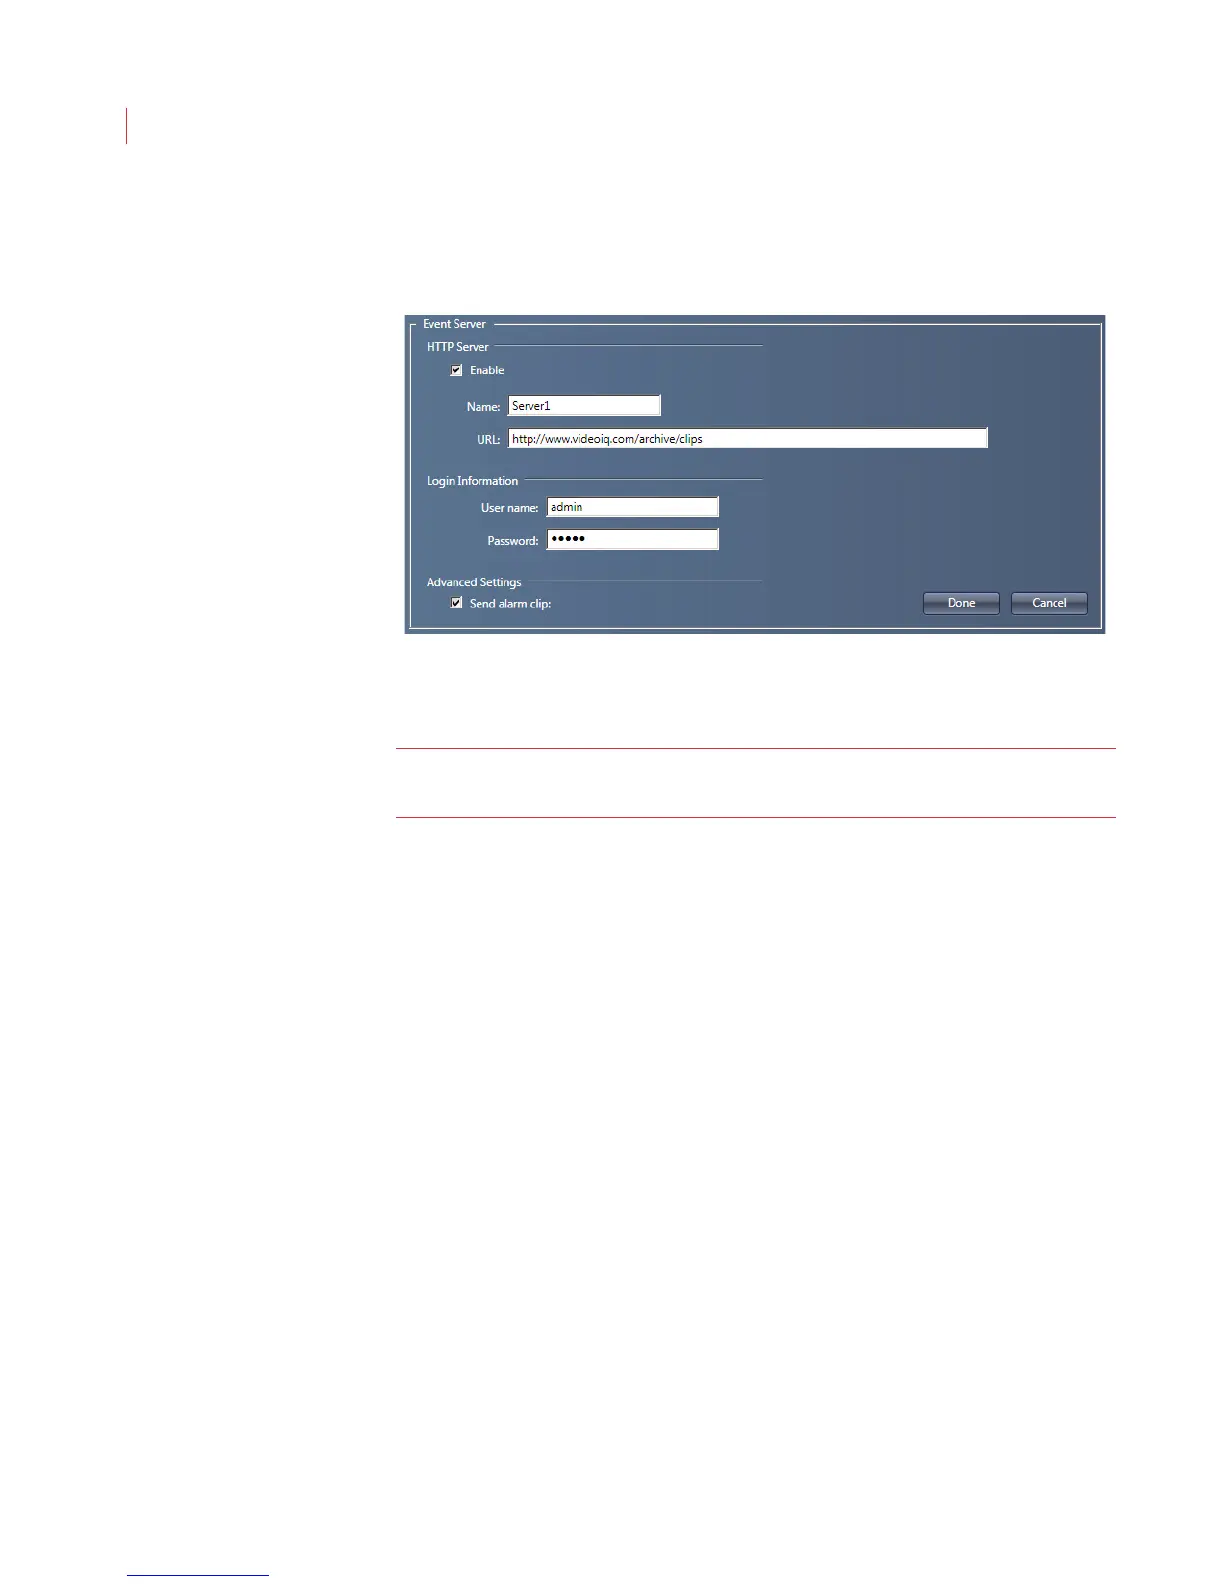
Configuring HTTP
1. Click Add HTTP.
2. Check the Enable box to activate this entry in View.
Note: If you have multiple HTTP servers set up in View, each with the Enable
box is checked, alarms clips will be sent to each server.
3. To organize servers in the Event Servers field, enter a Name.
4. Enter the address of the server in the URL field. You can enter a directory
path to direct all post requests to this full URL.
5. Enter the User name and Password used to login into the server.
6. Click the Test button. If the fields are configured correctly a file will be posted
to your server.
7. To receive alarm clips in addition to alarm data, check Send alarm clips.
8. Click Done, then click Apply.
To view an alarm clip double-click on the file. The clip will display in Windows
Media Player.
 Loading...