Chapter 4 Deployment of the CPU 21x-2BT10 with TCP/IP Manual VIPA CPU 21x
4-38 HB103E - Rev. 05/45
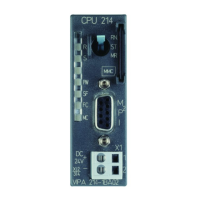
The MMC (Memory Card) serves as external storage medium and has the
FAT16 file system.
Your project engineering must be stored in the root directory and requires
the file name: S7PROG.WLD.
With an OVERALL_RESET the MMC is automatically read (if plugged).
The access via Ethernet requires a hardware project engineering (Minimum
project) in the CPU where IP address and subnet mask are defined via a
virtual CP.
This project is transferred per MMC or MPI into the CPU. After an overall
reset you may access the CP via the PLC functions.
• Configure a CPU 315-2 with the order no. 6ES7 315-2AF03-0AB0 V1.2
in the hardware configurator.
• Include the CP 343-1 (343-1EX11) at slot 4.
• Set the wanted IP address and subnet mask in the according dialog
window and connect the CP with "Ethernet".
• Transfer your project to your CPU via MPI or MMC.
The following approach requires that the CP is available online, i.e. you
assigned an IP address and subnet mask via a hardware configuration and
the project engineering PC is in the same IP number circle.
Establish a connection between project PC and CPU via Ethernet using the
twisted-pair slot. Adjust the following setting in the SIMATIC Manager at
Options > PG/PC interface...:
TCP/IP -> Network card...Protocol RFC 1006
Now you may access the CP using e.g. the PLC functions.
• Change to your project in the hardware configurator and start the
transfer with PLC > Download to module
• Select the wanted module and type as "address" the IP address of the
CP. Before the transfer takes place you receive an error message that
the "Online module" is different from the "Offline module". Ignore this
message and start the transfer with [OK].
Now you may access the PG/OP channel via your project and configure
the wanted connections for the CP 343 with NetPro.
Provided that no new hardware configuration is transferred to the CPU, the
given CP is permanently stored in the project as transfer channel.
Transfer via
MMC
Transfer via
Ethernet
Approach
(Minimal project)
Access to CP
CPU access via CP

 Loading...