Fuel tank settings
1. Activate helm station by pushing the ACTIVE
STATION BUTTON.
2. Enter OEM-mode
3. Select and enter SETTINGS from MAIN MENU.
Select and enter OEM MODE from SETTINGS.
OEM-mode
Enter OEM-mode
NOTE! Always exit OEM-mode before changing helm
station.
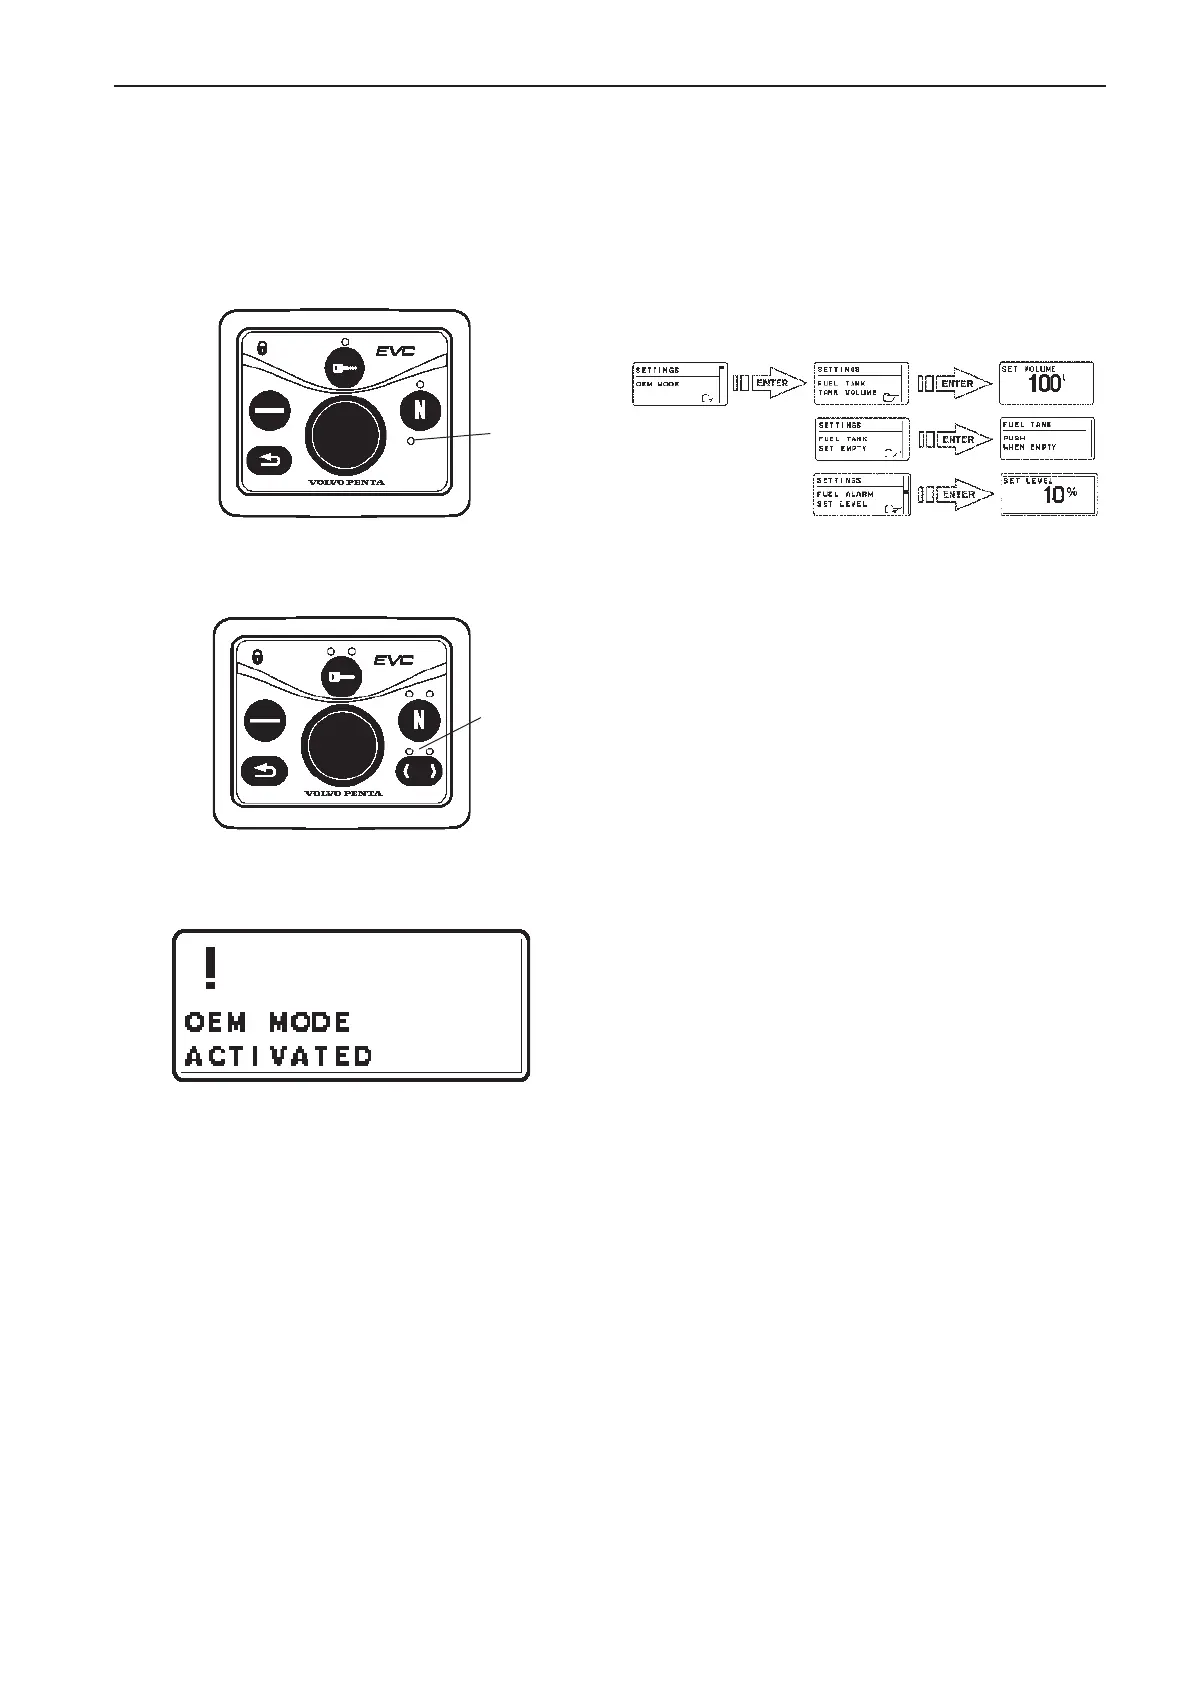
1. Enter OEM-mode by pushing the MULTIFUNC-
TION BUTTON for at least 5 seconds.
2 The red (red/green) LED(s) is flashing and pop-
up screen OEM MODE ACTIVATED is shown for
approx. 5 seconds.
In twin installations one of the tachometer dis-
play is activated. To change tachometer, push
TACHOMETER SELECTION BUTTON.
Exit OEM-mode
3. Exit OEM-mode by pushing the MULTIFUNC-
TION BUTTON for at least 5 seconds. The red
(red/green) LED(s) stops flashing. Pop up screen
is shown in display for approx. 5 seconds.
Single installation
LED
Twin installation
LEDs
Fuel tank volume setting
4. Select and enter FUEL TANK TANK VOLUME.
5. Set the fuel tank volume by turning the NAVIGA-
TION WHEEL to an appropriate value and con-
firm by pushing.
Empty fuel tank setting
NOTE! The fuel tank must be empty.
6. Select and enter FUEL TANK SET EMPTY.
7. Confirm empty tank in the PUSH WHEN EMPTY
window.
Fuel alarm (if needed)
NOTE! The default level of the fuel alarm is set to 0%
of the tank volume, which means that the alarm is
off. For the alarm to function, the desired alarm level
must be set.
8. Select FUEL ALARM SET LEVEL. Push NAVI-
GATION WHEEL.
9. Set the level (in %) by turning the NAVIGATION
WHEEL clockwise or counter-clockwise to an
appropriate value and confirm by pushing the
NAVIGATION WHEEL.
97
EVC-C Calibration and settings