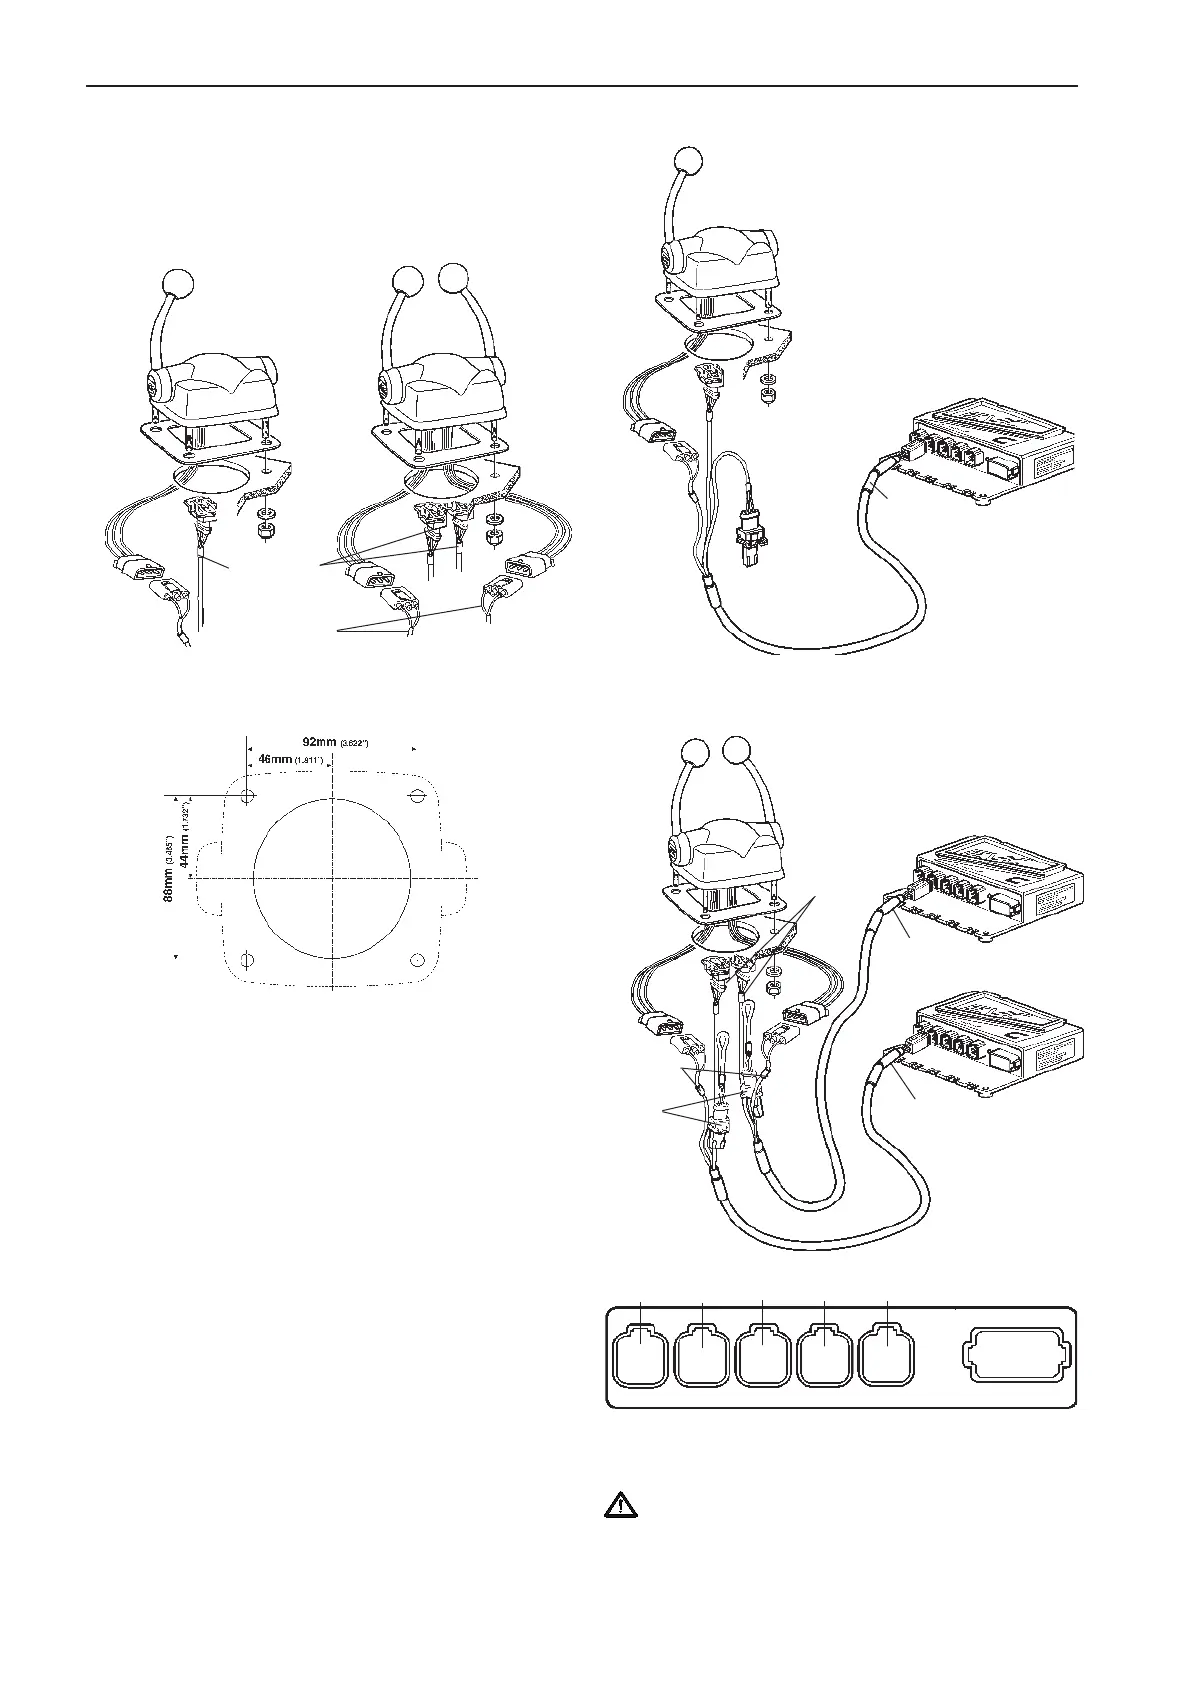
Controls, electronic
Top mounted
Please refer to the Mechanical controls chapter for
installation of mechanical controls.
Drill holes according to template. Please refer to the
Templates for controls and panels chapter.
Remove protective film from the gasket and glue the
gasket to the dashboard.
Install the conector/connectors marked “THROTTLE
POT.” to the control.
Install the connector/connectors marked “NEUTRAL
SWITCH” to the control.
NOTE! The connectrors marked GEAR POT are not
used in this type of controls.
Fit the control to the dashboard.
Twin engine controls
The control cables should be connected to the X7:
CONTROLS (blue) connector in the HCU.
IMPORTANT! No extension cables are allowed
to the control lever cable.
THROTTLE
POT.
NEUTRAL
SWITCH
CONN X7
Blue
CONN X7
Blue
Port
engine
Starboard
engine
THROTTLE
POT
NEUTRAL
SWITCH
GEAR
POT
(not used)
Single engine control
CONN X7
Blue
THROTTLE POT
NEUTRAL
SWITCH
GEAR POT
(not used)
X5:MULTILINKX2:DATALINK X3:AUX
X4:KEY
Green YellowPink
Gray
Blue
X7:CONTROLS
X8:NOT USED
72
Installation procedure, helm EVC-C